
How to Safely Insulate Your Water Heater

A spike in heating costs from an older tank is nothing to panic over. The most effective fix is to wrap the tank in a fiberglass blanket and slip foam sleeves over the first six feet of connecting pipes. Doing this stops heat from escaping into cold air while ensuring that sensitive switches and safety valves remain completely open.
A few details change how you handle the job. Modern tanks often have heavy factory insulation built in, but an older cylinder that feels warm to your hand in a chilly basement gains an immediate boost. Fuel type also dictates the setup, as gas burners and exhaust vents demand open clearance to stop fire hazards, whereas electric units allow broader coverage. Here is how to check your setup and wrap the tank safely.
The Touch Check: How to Tell If Your Water Heater Needs Insulation
Water heaters keep dozens of gallons of hot water ready at all times in basements, utility closets, and garages. When that water sits idle, heat slowly escapes through the steel tank walls. This heat drain is known as standby heat loss (heat escaping through the tank walls while water sits idle). Because of this loss, the heater cycles on repeatedly throughout the day and night just to maintain water temperature, driving up utility bills even when nobody is using hot water.
Not every water heater requires an external wrap. Newer models typically feature thick polyurethane foam injected between the steel tank and outer jacket during manufacturing. This factory foam provides strong heat retention on its own. Older units, especially those past ten years of service, often contain thinner fiberglass insulation that settles over time. As that internal insulation degrades, standby heat loss climbs.
You can determine whether your water heater loses heat with a simple physical check. Place your bare palm flat against the side of the tank. If the metal shell feels noticeably warm, heat is escaping into the room instead of staying in your water. If the metal feels completely cool or matches the ambient room temperature, the internal insulation is already doing its job, meaning an extra blanket will provide minimal benefit.
Tank location also matters. A water heater inside a heated hallway closet loses very little heat to the surrounding air. In contrast, a water heater placed in an unheated basement or cold outbuilding faces a steep temperature drop. If your water heater sits in a frigid garage where you run a best electric heater for garage with thermostat during working hours, the freezing overnight air pulls heat directly through the metal tank.
Quick Tank Check:
- Touch the middle of the outer shell with your bare palm to verify if it feels distinctly warm.
- Check the manufacturer label on the side to confirm whether the unit is more than ten years old.
- Look at the label to verify the factory heat-blocking rating (an R-value of 16 or higher means extra insulation is unnecessary).
- Notice if the air in the immediate utility space stays unusually warm even when the surrounding garage or basement is cold.
If your palm confirms warmth on an older tank in an unheated space, an insulation blanket is an effective way to lower monthly bills.
Gas vs. Electric Tanks: Safety Rules on What You Can and Cannot Cover
Gas and electric water heaters look similar, but their heating mechanisms are entirely different. Treating a gas unit like an electric model is a serious mistake that can cause fire, melted insulation, or carbon monoxide poisoning. Knowing what can and cannot be covered on your specific tank is critical before you install any wrap.
Electric water heaters use two internal heating elements mounted behind metal side panels. Because electric heaters produce no open flames and require no exhaust venting, they are much simpler to insulate. You can wrap nearly the entire cylindrical body. However, you must never cover the electrical access panels. These two metal plates protect the upper and lower thermostats and heating elements. Covering them makes adjusting water temperature or resetting a tripped switch impossible without cutting away the blanket. Trapping extra heat over these electrical junctions can also cause internal wiring to overheat. Always cut clear, open windows around these panels.
Gas water heaters burn natural gas or propane, introducing strict combustion clearances:
First, never cover the flue or draft hood (the metal exhaust pipe on top that vents gas fumes outside). The draft hood allows exhaust fumes from the burner to mix with room air and rise safely through your home chimney. Placing insulation on top of a gas tank or near the draft hood creates a severe fire hazard from hot exhaust metal. Obstructing the opening around the flue also prevents toxic combustion fumes from venting, forcing dangerous, odorless carbon monoxide back into your home.
Second, never cover the burner access door or the combustion air intake vents at the base of the tank. Gas burners require a continuous stream of fresh air to burn cleanly. Wrapping an insulation blanket down to the floor or letting it sag over the bottom chamber chokes the flame. This causes incomplete combustion, heavy soot accumulation, pilot light failure, and dangerous gas buildup. Keep the bottom four to six inches of the tank completely bare.
Third, leave the gas control valve fully uncovered. This is the metal box mounted low on the tank with the temperature knob and pilot light controls. It must remain easily visible and accessible so you can adjust settings or shut off the gas supply instantly in an emergency.
Finally, both gas and electric water heaters include a safety relief valve (the brass valve with a lever that releases excess pressure). This valve is mounted on the top or upper side of the tank, with a discharge pipe pointing down toward the floor. If internal pressure or temperature reaches unsafe levels, this valve pops open to vent steam, preventing the tank from rupturing. Never cover this valve, wrap tape around the lever, or insulate the discharge pipe.
Step-by-Step Guide: How to Wrap the Tank and Insulate Connecting Pipes
Wrapping a water heater takes about an hour or two with a clear plan. Gather your supplies before starting: a tape measure, a utility knife, a marker, work gloves, a dust mask, and a roll of heat-resistant aluminum foil tape. Never use standard cloth duct tape, because tank warmth dries out the adhesive, causing it to fail within months.
Follow these installation steps:
- Shut off the power or gas supply: Safety comes first. For an electric tank, switch off the dedicated circuit breaker at your electrical panel. For a gas unit, turn the gas control knob on the front of the tank to the "Pilot" position so the burner does not ignite while you work.
- Clean the tank surface: Wipe down the outer steel shell with a damp cloth to remove built-up dust, cobwebs, and grease. Foil tape will not stick to a dirty surface. Let the metal dry completely before continuing.
- Measure your tank dimensions: Measure the height and circumference of the tank cylinder. For an electric heater, measure from the top rim down to the base. For a gas heater, measure from six inches below the top rim down to six inches above the bottom burner chamber. Note the exact positions of access panels, the gas valve, and the safety relief valve.
- Mark and cut access openings on the floor: Lay the blanket flat on a clean floor. Transfer your measurements onto the insulation using a marker. Cut rectangular openings for access panels, control boxes, and the safety relief valve using your utility knife. Cutting flat on the floor produces cleaner, safer cuts than slicing against the tank.
- Position and wrap the blanket: With a helper, wrap the blanket around the cylinder, aligning your cut openings with the panels and valves. Wrap the blanket snugly, but avoid pulling it tight. Compressing the material flattens the tiny air pockets that block heat, lowering its heat-blocking rating (R-value).
- Seal seams and cutout edges with foil tape: Tape the vertical seam down the side where the blanket ends meet. Apply firm pressure to seal the bond. Tape around the perimeter of every cutout opening to keep raw insulation fibers from shedding over time.
Once the tank is wrapped, insulate the connecting water pipes. Heat naturally rises into overhead plumbing through thermal siphoning, losing heat even when faucets are off. Cold water inlet pipes also absorb warmth and sweat with condensation.
Slip pre-slit foam pipe insulation sleeves over the first six feet of both the hot and cold water pipes leading into the tank. Peel the adhesive backing and press the seams together, securing the joints with foil tape. If you have a gas heater, keep all foam pipe sleeves at least six inches away from the metal flue or draft hood pipe so the plastic foam does not melt. If your tank sits in a tight utility compartment in a manufactured home, review the guidelines for a heater for mobile home enclosures to confirm that pipe insulation does not block necessary combustion air routes.
What to Look for in a Water Heater Blanket Kit
Choosing the right insulation blanket kit depends on your tank capacity and fuel source. Most kits are designed to fit standard water heaters holding 40, 50, 60, or 80 gallons. Always measure your tank height and circumference before ordering to ensure full coverage. A blanket that is too short leaves metal exposed, while one lacking circumference leaves an open seam gap.
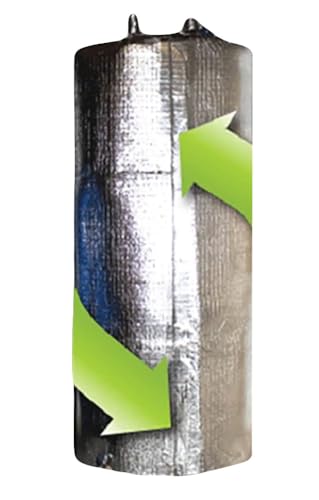
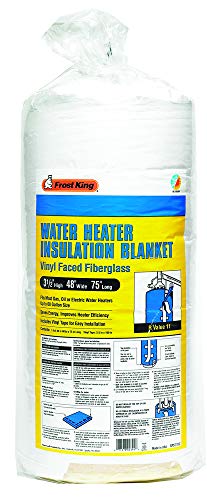
Consider the insulation material carefully. Traditional kits use vinyl-backed fiberglass, which provides dependable thermal resistance but requires gloves, long sleeves, and a dust mask during handling to avoid skin irritation. For an itch-free project, look for non-fiberglass kits made from reflective foam or pre-oxidized fibers. These modern materials are clean to handle, easy to trim with standard household scissors, and feature reflective outer surfaces that bounce radiant heat back toward the tank.
Check the heat-blocking rating (R-value) listed by the manufacturer. For water heater blankets, ratings between R-8 and R-12 offer strong heat retention without making the tank bulky or difficult to service. Make sure the kit carries recognized flame-resistance ratings, which is especially important around gas tanks where pilot flames and burner chambers are present. Check whether the package includes high-temperature aluminum foil tape, saving you a separate purchase and ensuring the seams remain securely bonded for years.

- BWP Score9.6
BWP Score is a ranking system developed by Bestwinterproducts.com. BWP score has no relationship or impact from any manufacturers or sales agent websites. Learn more
- BrandAES
- BWP Score9.1
BWP Score is a ranking system developed by Bestwinterproducts.com. BWP score has no relationship or impact from any manufacturers or sales agent websites. Learn more
- BrandTrade Winds

- BWP Score8.4
BWP Score is a ranking system developed by Bestwinterproducts.com. BWP score has no relationship or impact from any manufacturers or sales agent websites. Learn more
- BrandFrost King
- BWP Score8.3
BWP Score is a ranking system developed by Bestwinterproducts.com. BWP score has no relationship or impact from any manufacturers or sales agent websites. Learn more
- BrandFrost King
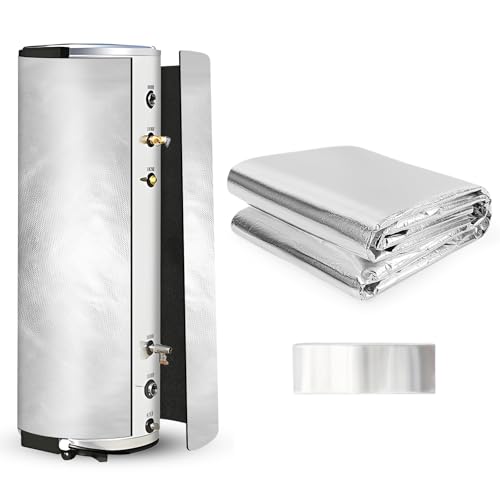
YIBOBO Upgraded Water Heater Insulation Blanket, 76"x48" Pre-Oxidized Fiber Technology
View on Amazon- BWP Score8.1
BWP Score is a ranking system developed by Bestwinterproducts.com. BWP score has no relationship or impact from any manufacturers or sales agent websites. Learn more
- BrandYIBOBO

- BWP Score8.1
BWP Score is a ranking system developed by Bestwinterproducts.com. BWP score has no relationship or impact from any manufacturers or sales agent websites. Learn more
- BrandSmartJacket

- BWP Score7.5
BWP Score is a ranking system developed by Bestwinterproducts.com. BWP score has no relationship or impact from any manufacturers or sales agent websites. Learn more
- BrandYIBOBO
Last update on 2026-11-03 / Affiliate links / Images, Product Titles, and Product Highlights from Amazon Product Advertising API
FAQs
Can I put an insulation blanket on top of my water heater?
On an electric water heater, you can insulate the top as long as you cut clean openings for the hot and cold water pipes. On a gas water heater, you must never insulate the top. Gas tanks vent hot exhaust fumes through the metal draft hood at the top, and placing insulation nearby creates a severe fire hazard and blocks toxic combustion gases from venting safely out of your home. Keep the top of every gas tank bare.
Will adding an insulation blanket void my water heater warranty?
Most manufacturers permit blankets if installed correctly without covering safety labels, access panels, or the safety relief valve. However, some newer high-efficiency models explicitly state in their documentation that external wraps are unnecessary and could void parts coverage. Check your owner manual or call the customer service number on your tank label before installing a blanket to verify your warranty terms.
When should I call a professional plumber instead of wrapping the tank myself?
If you see water pooling around the base, rust streaks along seams, or scorch marks near burners, stop immediately and call a licensed plumber. Wrapping an insulation blanket over a leaking or corroded tank traps moisture, accelerates rust, and hides structural failure until the tank ruptures. A qualified professional can inspect the tank, check gas venting safety, and tell you if a replacement is required.


Top 12 best white electric fireplace 2026

Best Clear Ski Goggles Men 2026 For Sharp Vision On Slopes

Top Best Cordless Electric Snowblower 2026 - (Latest)

Best Warm Winter Scarves 2026 For Cozy Comfort

Best Green Ski Goggles 2026 For Clear Vision On Slopes

12 Best Corner Electric Fireplace 2026: My Ultimate Guide To Pick One

Best Battery Powered Snow Blower 2026 For Effortless Snow Clearing

Best Ski Goggles Under 30 Inches For Crisp Vision And Comfort





