
How Do Solar Heaters Connect to Swimming Pools?

Most pool owners assume heating water with the sun requires ripping out plumbing or hiring an electrician. In reality, the plumbing loop is straightforward. A solar heater connects directly into the return line right after your pool filter. Clean, filtered water simply takes a quick detour through the panels to absorb heat from the sun before flowing back into the pool.
How you make the physical connection depends on your setup. Above-ground pools usually connect with flexible ribbed hoses clamped over plastic fittings, while in-ground pools use rigid PVC pipes. Placing panels on a high roof also asks much more of your pump than setting them on the lawn. Adding a bypass valve lets you send water past the heater on cloudy days so the pool stays warm. Here is how the loop works and how to hook it up safely without leaks.
The Plumbing Route: How Water Moves from Pump to Solar Collector
Every swimming pool circulation system follows a single closed loop. Water leaves the pool through the skimmer and main drain, travels through underground or above-ground pipes into the pump, passes through the filter to remove debris, and returns to the pool clean. A solar heater does not replace any of these pieces. Instead, it acts as an optional detour inserted into the return line, which is the pipe sending clean water back into the pool.
Connecting a solar heater into the wrong part of this loop is the most common mistake pool owners make. A solar collector must always sit after the pool filter and before any sanitation equipment. The reason comes down to the microscopic channels inside solar panels. Solar collectors use hundreds of tiny plastic or rubber tubes to spread water out into thin sheets under the sun. If you hook the heater up before the filter, pine needles, hair, and sand will enter those narrow channels and create permanent clogs. Once clogged, solar mats are nearly impossible to flush clean, and water circulation drops to a trickle.
Water must also pass through the solar heater before reaching any chemical feeders or chlorinators. If you run a saltwater system or are considering choosing the best pool heater for a saltwater pool, the electrolytic salt cell must sit downstream from the solar panels. Salt cells and erosion tablet feeders release concentrated chlorine into the water. Pushing highly concentrated chlorine directly into solar rubber or polypropylene panels will degrade the seals, cause premature cracking, and shorten the lifespan of your collector array.
The ideal route is straightforward: pool skimmer to pump, pump to filter, filter to solar heating array, solar array to chemical feeder, and chemical feeder straight out through the return jets. Following this order protects your equipment, keeps the water crystal clear, and ensures your pool absorbs maximum heat during bright sunny hours.
Steps to Connect a Solar Pool Heater to Your Return Line
Whether you have an in-ground pool with rigid PVC pipes or an above-ground pool connected with flexible ribbed hoses, the connection process follows the same logic. Here is the step-by-step procedure to plumb a solar heater into your pool pad without causing leaks or straining your equipment.
-
Turn off electrical power to your pool pump at the breaker panel.
Reason: Cutting power prevents the pump motor from kicking on automatically via a timer while you are cutting pipes, eliminating electrical hazards and sudden water surges. -
Open the manual air relief valve on top of your filter tank until the pressure gauge drops to zero.
Reason: Relieving the internal pressure keeps water from spraying violently across your equipment pad when you cut into the plumbing. -
Measure and cut the return line pipe directly downstream from the filter outlet.
Reason: Removing a small section of the clean return pipe creates the physical gap needed to glue in your new diverter fittings and pipe branches. -
Install a check valve between the filter tank outlet and your new junction point.
Reason: A check valve lets water move in only one direction, which stops gallons of heavy water resting in elevated solar panels from draining backward into your filter tank when the pump shuts down. -
Glue in a three-way diverter valve onto the return pipe right after the check valve.
Reason: A diverter valve is a lever that redirects water down a different pipe, giving you total control over whether water heads to the solar panels or bypasses them completely. -
Run a feed pipe from the diverter valve outlet to the bottom inlet corner of your solar panels.
Reason: Pushing water into the lowest corner forces trapped air upward and out of the collector, ensuring every internal channel fills completely with water instead of air pockets. -
Install a vacuum relief valve at the highest point of your solar panel array.
Reason: This valve lets air into the panel tubes when the pump turns off, which prevents a powerful siphoning vacuum from collapsing your solar panels like an empty soda can. -
Connect the return pipe from the top opposite corner of the panels back to the pool return line.
Reason: Plumbing across the panels diagonally from bottom to top creates balanced water resistance, so water spends equal time absorbing heat across every square foot of the mat. -
Secure every joint with PVC cement or stainless steel hose clamps.
Reason: For rigid PVC, purple primer and medium-bodied cement create a leak-proof chemical weld, while flexible hose setups require double-banded stainless steel clamps to stop hoses from slipping off under pressure. -
Turn the pump back on, set the diverter valve halfway open, and check every fitting for drips.
Reason: Starting at half flow lets the solar panels fill slowly without hammering the plumbing with air, allowing you to spot and fix small leaks before running at full speed.
Why a Bypass Valve Is Mandatory for Every Solar Pool Setup
A bypass is a detour pipe that lets water skip the heater. Many pool owners wonder why they cannot simply pipe their filter line straight into the solar panels and leave it running all summer. Without a bypass valve, your solar heater will frequently work against you and make your pool colder instead of warmer.
Solar heating panels are black surfaces designed to transfer heat rapidly. During a sunny afternoon, they absorb solar radiation and transfer that heat into passing pool water. But at night or during cold, overcast rainstorms, the physics reverse. Heat naturally moves toward cold air. If your pool pump runs at night while water flows through roof panels, those black panels act as a massive cooling radiator. The night sky will pull heat right out of your pool water, dropping your pool temperature by five to ten degrees before morning.
A bypass setup uses a three-way diverter valve to change the water path based on weather conditions. When the sun is shining brightly, you turn the valve handle to send one hundred percent of the filtered water through the solar panels. When clouds roll in, the sun sets, or you need to vacuum the pool, you turn the handle to send water straight back to the pool, skipping the solar roof loop entirely.
You can manage this bypass manually with a simple hand lever, or you can automate it. An automatic solar controller uses two temperature sensors: one clipped to your roof near the panels and one drilled into the pool pipe. When the roof sensor senses that the panels are warmer than the pool water, a small electric motor turns the diverter valve to send water up to the sun. As soon as the sun dips behind clouds and the panels cool down, the motor rotates the valve back to bypass mode. This automation prevents accidental pool chilling while you are away at work or asleep.
Checking Pump Power and Head Pressure Before You Buy Parts
Before buying solar panels, mounting brackets, and stacks of pipe, you must confirm that your current pool pump can push water through the entire loop. Adding solar heat introduces head pressure, which is the extra effort a pump needs to push water uphill against gravity and through narrow friction-heavy channels.
The height of your solar panels determines how hard your pump has to work. If you plan to lay solar mats on a wooden rack or on the grass right next to your pool pad, head pressure is minimal. A standard 0.75-horsepower or 1-horsepower pump will circulate water through ground-level mats with ease. However, if you plan to mount panels on a single-story garage roof ten to twelve feet high, or a two-story home roof twenty feet up, lifting that column of water requires serious power.
Use this quick checklist to confirm your pool pad can handle the extra plumbing load:
- Check your pump motor label: Standard single-speed pumps on roof-mounted setups generally need to be at least 1.0 to 1.5 horsepower. If you have a variable-speed pump, verify that you can program a high-RPM schedule during peak sunny hours to overcome roof elevation.
- Read your clean filter pressure gauge: Look at the pressure gauge on top of your pool filter after a fresh backwash or cartridge cleaning. If your baseline pressure is already high (around 18 to 22 PSI), your plumbing system already has restricted flow, and adding roof panels may strain the motor.
- Inspect pipe diameter: Standard 1.5-inch PVC pipe creates significantly more friction over long distances than 2-inch pipe. If your panels sit more than thirty feet away from the equipment pad, plan to step up your feed and return pipes to 2-inch rigid PVC to reduce pump drag.
- Look for bubbles at the pool return jets: If your pump lacks the strength to lift water to your roof, a vacuum will form in the upper pipes, pulling air through the vacuum relief valve. If you see clouds of fine bubbles constantly blasting out of your pool jets after installing panels, your pump is struggling to push water over the roof peak.
No-Cut Return Fitting Adapters for Above-Ground Pools
If you own an above-ground pool or rent a home with a pool, cutting into factory PVC pipes or slicing flexible filter hoses can feel intimidating. Fortunately, you do not have to perform permanent plumbing surgery to enjoy solar heat. A specialized category of return-fitting adapters allows you to connect a solar heating loop directly to the inside wall of your pool.
These compact adapters screw straight into standard 1.5-inch threaded eyeball return fittings on the inside pool wall. Instead of interrupting the pipes back at the equipment pad, the adapter splits the water stream right as it enters the pool. One side of the adapter lets filtered water enter the pool normally, while the threaded branch directs a portion of the flow into a garden hose or small flexible heating mat laid out on the lawn or pool deck. The heated water then feeds back into the pool through a separate discharge line.
When shopping for a no-cut adapter, check the thread size of your existing pool wall fitting first to ensure compatibility. Look for models made from heavy-duty, UV-resistant ABS plastic that feature an adjustable internal diverter dial. An adjustable dial lets you fine-tune how much water passes through your solar heating line, preventing excessive backpressure on small above-ground pool pumps while still pulling steady warmth from the afternoon sun.
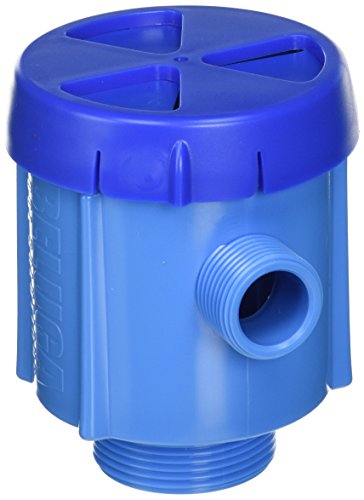
- BWP Score8.2
BWP Score is a ranking system developed by Bestwinterproducts.com. BWP score has no relationship or impact from any manufacturers or sales agent websites. Learn more
- BrandBeluga Pool Solutions
Last update on 2026-11-01 / Affiliate links / Images, Product Titles, and Product Highlights from Amazon Product Advertising API
FAQs
Can I connect a solar heater directly to my pool skimmer?
No, you should never connect a solar heater to the skimmer or the suction side of your pool pump. The suction line pulls cold water and floating debris into the pump basket, which would quickly choke narrow solar channels with leaves and dirt. Solar panels must always connect to the pressurized return line after water has passed through the filter.
How do I stop my solar pool heater from cooling the water down at night?
You stop nighttime cooling by turning your three-way diverter valve to bypass mode before the sun sets. This redirects water straight from the filter back to the pool, preventing it from radiating heat away through cold roof panels. Installing an automatic solar controller will handle this switch for you automatically whenever the roof temperature drops below pool water temperature.
What pipe material works best for connecting solar panels to an in-ground pool?
Schedule 40 rigid white PVC pipe is the standard choice for in-ground solar pool installations. It withstands continuous water pressure, resists degradation from pool chemicals, and handles outdoor sun exposure when properly supported. Flexible PVC hose can work for short underground turns, but rigid pipe provides the best long-term durability and prevents pipe sagging on hot roofs.
How do I prepare solar pool connections for freezing winter weather?
Before the first winter freeze, turn your bypass valve to isolate the solar array from your pool pad. Open the drain plugs at the lowest end of the solar panel piping so gravity can pull all standing water out of the panels and vertical lines. Trapped water inside collector mats will freeze, expand, and split the plastic seams, ruining the heater before spring arrives.
Related guides: best heaters for pools.


Top 12 best white electric fireplace 2026

Best Clear Ski Goggles Men 2026 For Sharp Vision On Slopes

Top Best Cordless Electric Snowblower 2026 - (Latest)

Best Warm Winter Scarves 2026 For Cozy Comfort

Best Green Ski Goggles 2026 For Clear Vision On Slopes

12 Best Corner Electric Fireplace 2026: My Ultimate Guide To Pick One

Best Battery Powered Snow Blower 2026 For Effortless Snow Clearing

Best Ski Goggles Under 30 Inches For Crisp Vision And Comfort





