How to Build a Fireplace Mantel Shelf

A bare wall above a glowing hearth often feels empty, leaving a homeowner wondering how to hang a heavy timber beam without it pulling loose. The simplest approach is to build a lightweight, three-sided hollow box and slide it over a hidden wood cleat screwed firmly into the wall framing. This box design delivers the rich look of solid wood without the dangerous weight.
Your exact layout depends on what type of fire you have and what sits behind the wall. Wood and gas units radiate intense heat that requires greater clearance height than electric inserts, and a deeper shelf needs extra distance so the front edge will not scorch. Solid brick or stone masonry also takes heavy masonry screws, while drywall needs long wood screws sunk into hidden studs. Here is how to measure safe clearances, assemble the box, and hang a shelf that stays rock solid.
Safe Mantel Height and Heat Clearances
Before cutting any lumber, you must determine where your shelf will hang. Heat rises straight up from the firebox (the opening where the fire burns or heat discharges). If you mount a combustible wood shelf too close to that opening, rising heat will bake the wood, dry out your finish, cause joints to crack, or create a serious fire hazard.
Clearance rules depend on the type of fireplace you own and how far the shelf sticks out from the wall. Deep shelves trap more rising hot air underneath them than shallow shelves, which means deeper shelves must sit higher on the wall. For a standard wood-burning masonry fireplace, common building codes require combustible materials to sit at least 12 inches above the firebox opening for a shelf that projects 6 inches. For every extra inch your shelf extends past 6 inches, you generally need to raise the shelf by an additional inch. That means an 8-inch deep mantel shelf typically requires at least 14 inches of clearance from the top of the firebox.
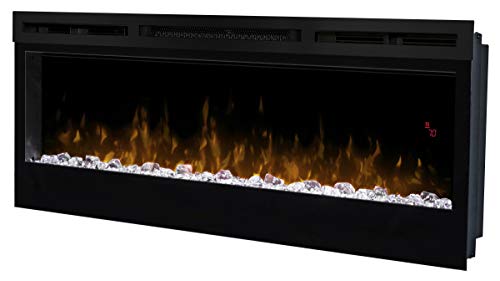
Gas fireplaces and electric units follow different requirements based on where their blowers push heat. For sleek, modern installations like the Dimplex Prism wall mount fireplace, heat vents forward, which allows for tighter clearances than traditional wood-burning setups. If you are updating an existing masonry fireplace with the best electric fireplace insert for large room heating, verify whether the blower pushes warm air out from the top or the bottom of the unit before fixing your shelf location.
Use this quick clearance checklist before marking your wall:
- Consult the manual: Check the appliance documentation for the exact minimum distance to combustible trim.
- Measure the firebox opening: Measure from the top edge of the metal or masonry opening, not from the decorative surround or glass screen.
- Factor in shelf depth: Plan to add extra height clearance if your mantel shelf sticks out more than 6 inches from the wall surface.
- Check above the shelf: If you plan to mount a television or mirror above the mantel, ensure you leave at least 8 to 12 inches of space between the top of the shelf and the bottom of your electronics.
- Confirm local building codes: Contact your local building department to verify regional fire safety rules before drilling into your wall.
Choosing Lumber and Sizing Your Mantel Box
Many homeowners assume a rustic mantel requires a solid timber beam. Solid wood beams look striking, but an 8-foot solid beam can weigh over 70 pounds. Hanging that much dead weight requires deep structural wall modifications, heavy steel brackets, and extensive drilling into wall framing. If you hang a solid beam incorrectly, the shelf will gradually sag or pull completely free from the wall.
A hollow box beam solves this problem completely. A hollow mantel shelf uses three or four flat lumber boards joined together to form an open-backed box. It looks identical to a solid timber beam once installed, but it weighs only 15 to 25 pounds. Because the box is hollow inside, it slides directly over a mounting strip attached to your wall studs, creating a seamless floating appearance without visible metal brackets.
For the lumber, standard 1-inch thick boards (which actually measure 3/4 inch thick) work best. Common pine boards from a local home center are affordable, lightweight, straight, and easy to cut with everyday tools. Pine also accepts wood stains and distressing techniques exceptionally well. If you prefer a richer grain or plan to hang the shelf on a covered porch, cedar offers natural decay resistance and a lightweight profile. Poplar is another great choice if you plan to paint your mantel white or black, because it has an ultra-smooth grain without knot holes.
For standard dimensions, a mantel shelf looks balanced when it extends 3 to 6 inches past the firebox opening on each side. A standard length of 60 inches fits most average living room setups, while smaller fireplaces look best with 48 to 54 inches, and large stone hearths can accommodate 72 inches. Aim for a shelf depth of 7 to 8 inches, which provides plenty of room for framed photos or candles without sticking awkwardly into your living space. A face height of 5 to 6 inches gives the shelf the bold, grounded look of a real hand-hewn beam.
Assembling the Hollow Box Beam Step by Step
Building the hollow box requires only basic cutting and assembly tools. You will need a miter saw or circular saw, a drill, wood glue, clamps, and 1-1/4-inch finish nails or trim screws. Work on a flat, clean surface like a workbench or a smooth garage floor to keep your boards square as you join them.
- Cut your main boards to length: Measure and cut your top board, bottom board, and front face board to your target length. Make sure all three boards are cut to the exact same length so the ends align evenly.
- Cut the end caps: Cut two small end cap pieces to close the left and right sides of your box. Measure the inner cavity height and width carefully so these blocks sit flush with the ends of your long boards.
- Select your edge joints: You can join the boards using miter cuts (an angled cut along board edges to hide the seams) or simple butt joints (overlapping flat boards). A 45-degree miter cut along the long edges hides the board seams completely, making the three boards look like a single solid log. If you do not have a table saw or router to cut clean 45-degree bevels, a simple butt joint works well. Just position the front face board so it covers the edges of the top and bottom boards, keeping the joint line hidden from front view.
- Dry fit the pieces: Lay your boards together without glue to confirm all edges meet tightly. Use strips of painter tape across the corners to hold the boards in place while you check the alignment.
- Glue and fasten the frame: Run a steady bead of wood glue along every joining edge. Press the boards together and fasten them every 8 to 10 inches using 1-1/4-inch finish nails or trim screws. Wipe away any wet glue that squeezes out of the seams with a damp rag immediately, because dried glue prevents wood stain from penetrating evenly.
- Install the end caps: Apply wood glue to the outer edges of your end caps, slide them into the left and right openings of the box, and secure them with finish nails through the outer face and top boards.
- Sand and finish: Sand all outer surfaces with 120-grit sandpaper, followed by 220-grit sandpaper for a smooth feel. If you want a rustic farmhouse look, you can distress the raw pine before finishing by tapping it lightly with a metal chain or scraping edges with a hand rasp. Wipe away all sawdust, apply your chosen wood stain, and protect the wood with two coats of clear polyurethane.
Anchoring the Wall Cleat and Hanging the Shelf
The secret to a floating shelf that never sags is the cleat (a sturdy wood strip screwed to the wall that holds the shelf). Because your mantel is hollow, it slips directly over this wooden cleat like a glove over a hand. The cleat bears all the downward weight of the shelf and anything you place on top of it.
- Size and cut the cleat: Measure the inside cavity of your hollow mantel box. Cut a standard 2x4 board so it is approximately 2 inches shorter than the inside length of your mantel. Rip the 2x4 down in thickness if necessary so it fits smoothly inside the hollow opening without binding. For extra stability, screw short 2x4 spacer blocks perpendicularly along the cleat every 12 inches to form a ladder shape that supports the front face of the mantel.
- Locate your wall studs: Hold a magnetic or electronic stud finder against the wall at your chosen clearance height. Mark the center of every wood stud in the area where your mantel will sit. You must anchor the cleat into at least two, and ideally three, structural wall studs. Never hang a fireplace mantel shelf using drywall anchors alone, because the weight of the shelf and decor will pull the drywall away from the wall framing.
- Mount the cleat to wood studs: Hold your cleat against the wall at your marked height. Place a 4-foot bubble level across the top of the cleat. Once it is level, drill pilot holes through the cleat and directly into the center of the wall studs. Secure the cleat firmly using 3-inch or 3-1/2-inch structural wood screws and flat washers. Pull on the cleat firmly to confirm there is zero wobble.
- Fasten to masonry, brick, or stone: If you are mounting the shelf onto a brick chimney or stone surround, wood studs will not be accessible. Drill into the brick or mortar joints using a hammer drill and a carbide masonry bit. Fasten the cleat using masonry anchors (heavy-duty screws that grip into brick, stone, or mortar) such as 5/16-inch concrete sleeve anchors or 3-inch concrete screws. Make sure the anchors bite securely into solid material rather than crumbling, weathered mortar.
- Mount and secure the mantel box: Slide your finished hollow mantel box over the wall cleat until the back edges sit tight against the wall surface. While pressing the shelf firmly against the wall, drive 2-inch trim-head screws through the top surface of the mantel directly into the wooden cleat underneath. Place one screw near each end and one every 12 inches along the length. Sink the screw heads slightly below the wood surface so they remain unobtrusive, or cover them with small matching wood plugs.
What to Look for in a Pre-Built Mantel Shelf Kit
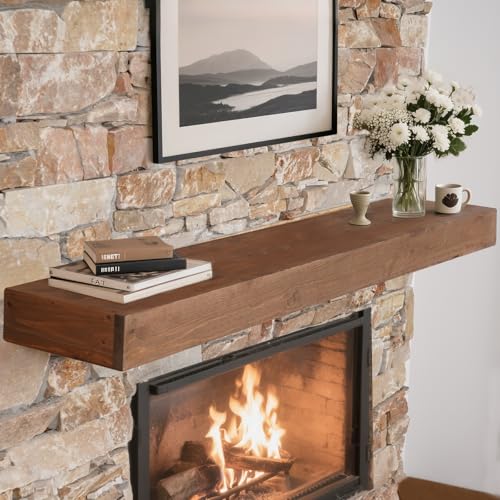
Building your own mantel shelf lets you choose exact custom dimensions, but it does require dedicated workspace, saws, clamps, and finishing supplies. If you do not have cutting tools or do not want to spend a weekend measuring and staining lumber, pre-built hollow mantel shelves offer the exact same floating appearance and sturdy cleat mounting system right out of the box.
When selecting a pre-built mantel kit, look closely at the materials and mounting hardware. Quality kits are handcrafted from natural pine or cedar boards, often measuring around 0.8 inches thick for solid durability without excess weight. Look for options that arrive already treated with protective wax-oil or polyurethane coats, which shield the wood from minor heat exposure and household dust.
Pay close attention to the included mounting bracket. A good kit includes a heavy-duty hidden bracket or wooden cleat designed to support between 50 and 75 pounds of weight when anchored into wall studs. Verify that the package provides hardware matched to your specific wall type, including long wood screws for standard drywall over studs and specialized expansion anchors if you plan to install the shelf over concrete or brick.
- BWP Score9.6
BWP Score is a ranking system developed by Bestwinterproducts.com. BWP score has no relationship or impact from any manufacturers or sales agent websites. Learn more
- BrandGoCampDirect

- BWP Score9.6
BWP Score is a ranking system developed by Bestwinterproducts.com. BWP score has no relationship or impact from any manufacturers or sales agent websites. Learn more
- BrandG GOOD GAIN

- BWP Score9.6
BWP Score is a ranking system developed by Bestwinterproducts.com. BWP score has no relationship or impact from any manufacturers or sales agent websites. Learn more
- BrandG GOOD GAIN

- BWP Score9.2
BWP Score is a ranking system developed by Bestwinterproducts.com. BWP score has no relationship or impact from any manufacturers or sales agent websites. Learn more
- BrandUrbandi

- BWP Score9.2
BWP Score is a ranking system developed by Bestwinterproducts.com. BWP score has no relationship or impact from any manufacturers or sales agent websites. Learn more
- BrandGeneric

- BWP Score9.2
BWP Score is a ranking system developed by Bestwinterproducts.com. BWP score has no relationship or impact from any manufacturers or sales agent websites. Learn more
- BrandUrbandi

- BWP Score9.0
BWP Score is a ranking system developed by Bestwinterproducts.com. BWP score has no relationship or impact from any manufacturers or sales agent websites. Learn more
- BrandEshoma

- BWP Score9.0
BWP Score is a ranking system developed by Bestwinterproducts.com. BWP score has no relationship or impact from any manufacturers or sales agent websites. Learn more
- BrandMederlo

- BWP Score8.6
BWP Score is a ranking system developed by Bestwinterproducts.com. BWP score has no relationship or impact from any manufacturers or sales agent websites. Learn more
- BrandAvana
Last update on 2026-10-02 / Affiliate links / Images, Product Titles, and Product Highlights from Amazon Product Advertising API
FAQs
How much weight can a hollow floating mantel shelf hold?
A hollow mantel shelf secured into two or three wall studs using a solid wood cleat can reliably support 50 to 75 pounds. The weight capacity depends entirely on the strength of your wall attachment rather than the mantel box itself. If the cleat is screwed into solid wood framing with heavy-duty structural screws, it will easily hold heavy decor, holiday stockings, and framed art without sagging.
Can I build a fireplace mantel shelf out of regular 2x4 lumber?
You can use 2x4 lumber to build your internal wall cleat and support frame, but 1-inch boards (such as 1x6 or 1x8 pine) work much better for the outer hollow box. Standard 2x4s are heavy, have rounded edges, and often carry higher moisture content that can warp as it dries near a heat source. Using 3/4-inch thick boards keeps the outer box lightweight, square, and easy to mount.
Do I need to seal or protect the wood mantel shelf from heat?
Yes, finishing your mantel shelf with a quality stain and a protective topcoat is essential for longevity. A clear polyurethane coating or penetrating wax-oil finish locks out moisture, prevents the wood grain from drying out, and shields the surface from soot and dust. However, no clear wood finish makes lumber fireproof, so maintaining proper clearance height above your firebox remains the most critical safety step.


12 Best Corner Electric Fireplace 2026: My Ultimate Guide To Pick One
Dimplex Prism Wall Mount Fireplace: Sleek Heat With Modern Flame Style
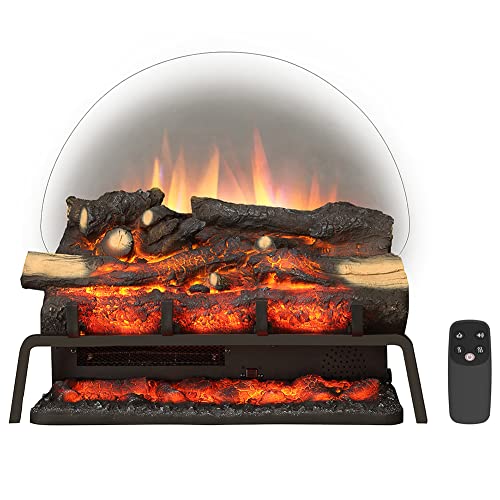
Best Electric Fireplace Insert for Large Room Heating and Style

Best 40 Inch Electric Fireplace Insert 2026 - Cozy Ambiance with Modern Power
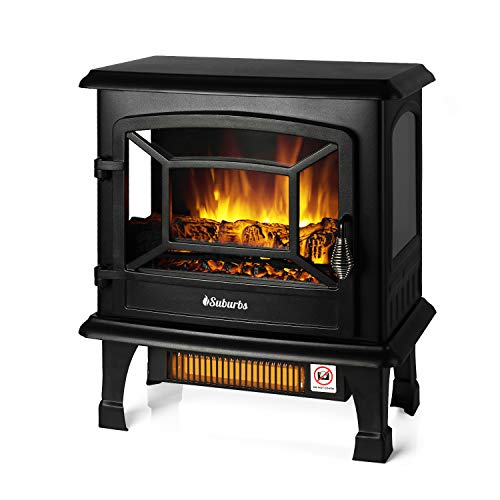
Top 12 Best Quality Electric Fireplace 2026 - Buying Guides

Best Wall Mount Electric Fireplace 2026 for Ultimate Comfort and Style

How to Start Monessen Fireplace: A Step-by-Step Guide

How to Whitewash Rock Fireplace: Simple Steps to Refresh Your Space