How to Build a Wood-Burning Fireplace Safely

Building one takes solid foundation work and firebrick. A traditional build means pouring concrete footings, laying heat-resistant bricks for the firebox (the inner chamber where wood burns), shaping a smoke chamber, and running a lined chimney through the roof. Done properly, this masonry system radiates warmth into your living space while pulling toxic smoke safely outdoors.
The right approach depends on your home layout, structural support, and local rules. Traditional brick masonry weighs thousands of pounds and needs a ground-level foundation, while a factory-built metal fireplace can fit safely into standard wood framing. Local building codes and clean-air regulations also set clear limits on clearances and permits. Learning the core construction stages helps you decide whether to hire a mason or tackle the job yourself.
Masonry Brick Builds Versus Factory-Built Prefab Kits
Before you lift a trowel or buy materials, you must decide which type of wood-burning fireplace fits your house structure. You have two main choices: a site-built masonry fireplace made entirely from brick, block, and stone, or a factory-built metal fireplace kit. Both burn real firewood, but their engineering, structural weight, and installation demands are completely different.
A traditional masonry fireplace is built brick by brick on your property. It uses solid concrete foundations, high-temperature firebrick, clay flue tiles, and exterior masonry. This design lasts for generations, adds substantial home value, and holds radiant heat long after the flames die down. But it also weighs between five and ten tons. You cannot place a masonry fireplace on an ordinary wooden subfloor. It requires a dedicated concrete ground footing poured below the frost line. Because of the sheer mass and exacting masonry skills required, building one requires serious physical labor, weeks of cure time, and precise bricklaying technique.
A factory-built fireplace, often called a zero-clearance prefab unit, uses an engineered steel or cast-iron firebox surrounded by insulated sheet metal cabinets. These units vent through lightweight, double-walled stainless steel chimney pipes. Because the cabinet stays cool on the outside, you can frame around it with standard two-by-four wood wall studs. A prefab unit weighs only a few hundred pounds, meaning an existing wood floor system can support it without extra ground footings. Installation takes days rather than weeks.
If your home already sits on a concrete slab or has an accessible crawl space where you can pour a new pier, full masonry is an option. If your home has a finished basement, multiple stories, or wooden floor joists that cannot support tons of stone, a factory-built unit is far safer and much cheaper. For rooms where venting a chimney through the roof is physically impossible, homeowners often pivot toward alternatives like the best electric fireplace insert for large room heating to avoid major structural changes entirely. But if your goal is an authentic, hand-laid brick hearth, you must plan for heavy masonry from the ground up.
The Crucial Parts of a Wood Fireplace and How Heat Moves
A wood-burning fireplace is an exhaust system driven by heat physics. When wood burns, it releases hot gases, water vapor, and unburned particles. Hot air expands and rises naturally because it is lighter than the cooler air outside your home. To pull smoke up and away without letting it spill into your room, several parts must work in harmony.
The foundation starts below ground level with a thick slab of steel-reinforced concrete. Directly above the foundation sits the hearth, which is the fire-safe floor extending in front of the fire to catch popping embers and rolling logs. The inner hearth sits directly beneath the wood grate, while the outer hearth extends into your living room to protect your floorboards.
The firebox is the heat-proof box where wood burns. The rear wall of the firebox typically tilts forward as it rises, while the side walls angle inward. This geometry reflects radiant heat out into the living space rather than sending all the warmth straight up the chimney.
Above the firebox is the throat, a narrow opening where smoke enters the exhaust system. The throat contains the damper, a movable metal door that opens the chimney during a fire and seals shut to block cold drafts when the fireplace is idle. Knowing how to close a fireplace damper tightly when a fire is completely cold keeps your home furnace from blowing expensive warm air up the chimney.
Behind the damper sits the smoke shelf. The smoke shelf is a flat horizontal ledge designed to catch cold downdrafts coming down the chimney. It mixes that falling cool air with rising hot exhaust gases, rolling the air into a circular loop that pushes smoke upward instead of shoving it out into the room. Above the shelf sits the smoke chamber, an inverted funnel that funnels smoke into the flue, which is the pipe or passage inside the chimney for smoke. At the very top of the stack, a concrete chimney crown sheds rain, and a wire mesh chimney cap keeps out animals and flying sparks.
Step-by-Step Guide to Building a Masonry Wood Fireplace
-
Pour a reinforced concrete foundation footing below the frost line.
Excavate the earth beneath your planned fireplace down to undisturbed soil below your local winter frost line. Build heavy wooden forms and lay a grid of half-inch steel rebar tied together with wire. Pour solid concrete at least 12 inches thick, ensuring the top surface is completely level. Reason: A brick fireplace and chimney can weigh over 10,000 pounds, and any ground movement or settling will crack the brickwork and break the fire seals.
-
Build the concrete block support base up to floor height.
Lay standard concrete masonry units using standard type M or type S structural mortar on top of your cured foundation footing. Lay the blocks in running bond until you reach the level of your home subfloor. Fill the block hollow cores with gravel or poured concrete grout, and cap the top with a steel-reinforced concrete slab at least 4 inches thick. Reason: This creates a fireproof, non-combustible base that lifts the firebox platform safely up to your room level.
-
Lay the firebox floor with refractory brick.
Place refractory brick (special firebrick made to resist intense heat) flat across the base to form the inner hearth floor. Use high-temperature refractory mortar rather than standard masonry mortar, keeping the mortar joints tight at roughly one-sixteenth to one-eighth of an inch. Reason: Standard mortar and regular clay bricks contain moisture that can crack, explode, or crumble when exposed to direct flames over 1,000 degrees.
-
Lay the firebox walls with proper angles.
Build the back and side walls using yellow refractory brick. Keep the side walls splayed outward toward the room at roughly 45 to 60-degree angles. Lay the rear wall vertically for the first several courses, then gently slope the back wall forward toward the room as you reach the upper third of the box. Reason: Sloping the rear wall bounces heat forward into your living space and directs hot smoke forward into the chimney throat.
-
Install the steel lintel and cast-iron damper.
Span the top opening of your firebox with a heavy angle-iron steel lintel to support the bricks across the top. Set the cast-iron throat damper directly on top of the firebox walls. Leave a quarter-inch gap at each end of the metal damper frame packed with ceramic insulation wool. Reason: Cast iron expands significantly when heated, and if it touches the brick directly, it will push outward and fracture your masonry walls.
-
Corbel the smoke chamber walls.
Step the masonry bricks inward by no more than one inch per course as you build upward from the damper, forming an inverted funnel shape. Parapet the interior brick surfaces with smooth refractory mortar so the chamber walls are slick. Reason: Smooth, angled smoke chamber walls allow rising smoke to accelerate smoothly into the flue without turbulent friction that causes indoor smoke spills.
-
Stack the clay flue liners inside the chimney chase.
Set modular terra cotta flue tiles on top of the smoke chamber opening, sealing each joint with acid-resistant, high-temperature mortar. Lay your structural exterior brick or stone around the flue tiles, keeping at least a one-half to one-inch air gap between the outer brick and the inner tile. Reason: The clay flue needs room to expand as it heats up without transferring that intense heat outward to the surrounding chimney walls.
-
Frame roof and floor pass-throughs with required air gaps.
As the brick chimney passes through ceilings, attics, and roof rafters, cut away all wooden framing to leave at least a two-inch clear space around the entire masonry perimeter. Install metal sheet firestops at each floor level. Reason: Leaving two inches of empty air space between chimney brick and wooden studs prevents heat transfer that can quietly ignite hidden wood framing over time.
-
Pour the sloped chimney crown and mount the spark cap.
At the top of the chimney above the roofline, build a small overhang form and pour a steel-reinforced concrete crown that slopes downward away from the flue tile. Seal the joint between the crown and the flue with flexible high-heat silicone sealant, and bolt a stainless steel mesh cap over the opening. Reason: The sloped concrete crown sheds rain away from your brick mortar joints, while the spark cap stops flying embers from setting your roof on fire.
Firebox and Flue Ratios That Stop Smoke from Rolling into Your Room
The single biggest mistake amateur builders make is guessing the size of the firebox opening and the chimney flue. A fireplace does not work like a simple room vent. It relies on a delicate balance of pressure, temperature, and volume. If the opening at the front of your fireplace is too large compared to the passage inside your flue, the chimney cannot draw air fast enough. When that happens, smoke spills out under the top brick ledge into your room every time a log shifts.
The golden rule of fireplace design is the 10-to-1 ratio. The area of the fireplace opening (width multiplied by height) must be roughly ten times the cross-sectional area of a square or rectangular flue. If you use a smooth, round metal flue pipe, the ratio can expand slightly to 12-to-1 because round pipes create less corner air friction. For example, if your finished firebox opening measures 30 inches wide by 24 inches tall, the opening area is 720 square inches. Dividing 720 by 10 gives 72 square inches. You would need a flue liner with an internal area of at least 72 square inches, such as an 8-by-12 inch nominal clay tile.
Firebox depth is just as important as the flue ratio. A firebox that is built too deep will let warm air cool down before it exits, destroying the draft and trapping smoke. A firebox that is too shallow will let room drafts blow ash and smoke out the front. For most residential rooms, a firebox depth between 16 and 20 inches is ideal. When combined with walls that angle inward at 60 degrees, this depth sends maximum radiant heat into your chairs while funneling all smoke directly under the damper.
Essential Safety Clearances and Building Code Checklist
Every wood-burning fireplace must comply with residential building codes and local safety ordinances. Fire spreads through walls invisibly through a process called pyrolysis, where wood framing exposed to moderate heat over years slowly degrades until it bursts into flames at low temperatures. Use this safety checklist before framing or lighting a fire:
- Two-inch clearance to combustibles: Maintain at least two inches of open airspace between exterior masonry walls and any wooden framing, drywall, or wiring inside the home. For exterior chimneys built outside the house walls, this clearance is typically one inch.
- Hearth extension dimensions: If your firebox opening is under 6 square feet, the non-combustible hearth floor must extend at least 16 inches in front of the opening and 8 inches on each side. If the opening is 6 square feet or larger, the hearth must extend at least 20 inches in front and 12 inches on each side.
- Combustible mantel distance: Keep wooden mantels, picture frames, and wall paneling at least 6 inches away from the edge of the firebox opening. For every inch the mantel shelf projects out into the room, add an extra inch of vertical clearance above the opening.
- The 3-2-10 chimney height rule: The top of the chimney flue must extend at least 3 feet above the highest point where it penetrates the roofline. It must also sit at least 2 feet higher than any portion of the roof or building ridge located within 10 horizontal feet.
- Combustion air intake: Modern homes are tightly sealed. Install a dedicated 4-inch exterior fresh-air duct that vents directly into the firebox floor or side wall. This prevents your fire from consuming the oxygen in your room or pulling smoke backward due to kitchen exhaust fans.
- Permits and sign-offs: Never pour concrete or frame a chimney without an approved building permit. Local inspectors must inspect your footing depth, firebox rough-in, and roof penetrations before you ever light a fire.
When Structural Weight and Masonry Require a Professional
Building a basic brick garden wall is an approachable weekend project, but building a multi-story wood-burning fireplace inside an existing house is a major structural alteration. If your home has a finished basement, building a masonry fireplace means cutting through concrete floor slabs, excavating soil by hand, and tying new rebar into your foundation. If this footing shifts even half an inch, the entire chimney can tilt away from your house, breaking gas lines, tearing roof flashing, and creating hidden gaps inside the walls.
Chimney framing also requires structural roof work. You must cut through ceiling joists and roof rafters while maintaining the load-bearing integrity of your roof. Doing this incorrectly can cause your roofline to sag under snow loads. Working at roof height while lifting 40-pound flue tiles and wet mortar carries significant fall risks, and poor flashing around the chimney base can cause slow water leaks that rot your attic rafters.
If you have never mixed refractory mortar, poured commercial-grade footings, or calculated chimney drafting physics, hire a mason certified in chimney construction. You can still save thousands of dollars by handling the prep work yourself. Demolishing old drywall, framing non-load-bearing enclosures, and painting finished hearth surrounds are manageable DIY tasks. But when it comes to pouring footings, laying the firebox throat, and stacking heavy flues through the roof, a professional mason ensures your home stays warm without catching fire.
Frequently Asked Questions
Can a homeowner build a brick fireplace on top of an existing wood floor?
No, you can never build a traditional brick or stone fireplace directly onto wooden floor joists. A masonry fireplace weighs thousands of pounds and will cause wooden framing to sag, buckle, or collapse. Masonry fireplaces must sit on a solid concrete foundation poured directly into the ground, or you must install a lightweight factory-built metal fireplace designed for wooden framing.
What type of mortar is required to lay bricks inside a firebox?
You must use pre-mixed refractory mortar that meets ASTM C199 standards for all brickwork inside the firebox and smoke chamber. Standard masonry mortar contains Portland cement and lime, which degrade, dry out, and crack under open flame. Refractory mortar uses ceramic binders that vitrify and harden under intense heat, creating an airtight, fireproof bond.
Why does smoke pour back into the house when lighting a fire?
Smoke rollout usually happens because the flue damper is closed, the chimney flue is too small for the firebox opening, or cold air is trapped inside the chimney pipe. When a chimney is cold, heavy air sinks down the pipe and pushes initial smoke into the living room. Holding a lit rolled-up newspaper near the damper for thirty seconds warms the flue and starts an upward draft before you light your logs.
How long do you have to wait before building the first fire in a new fireplace?
You should wait at least 21 to 28 days after completing construction before lighting a full wood fire. Both standard structural mortar and refractory mortar contain water that must cure and evaporate slowly. Lighting a hot fire too early turns that trapped water into steam, which creates internal pressure that fractures new bricks and blows apart mortar joints.


12 Best Corner Electric Fireplace 2026: My Ultimate Guide To Pick One

Dimplex Prism Wall Mount Fireplace: Sleek Heat With Modern Flame Style
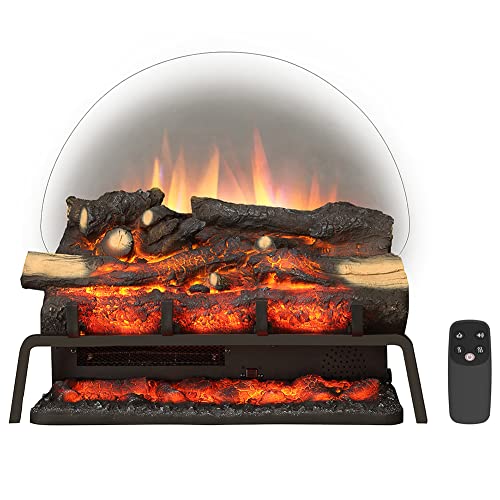
Best Electric Fireplace Insert for Large Room Heating and Style

Best 40 Inch Electric Fireplace Insert 2026 - Cozy Ambiance with Modern Power
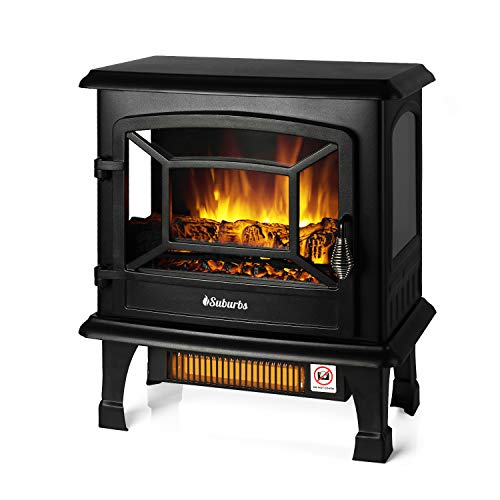
Top 12 Best Quality Electric Fireplace 2026 - Buying Guides

Best Wall Mount Electric Fireplace 2026 for Ultimate Comfort and Style

How to Start Monessen Fireplace: A Step-by-Step Guide

How to Whitewash Rock Fireplace: Simple Steps to Refresh Your Space