How to Descale a Tankless Water Heater in Under an Hour

Mineral buildup inside a water heater sounds alarming, but it is normal routine upkeep that anyone can handle safely at home. The whole fix comes down to circulating white vinegar through the heating coils with a small bucket pump to dissolve the chalky crust. Once the mild acid breaks down that buildup, a quick freshwater rinse restores strong water pressure and even heat.
A few specific factors change how this job works for each home. Plumbing lines must have isolation valves (dedicated shut-off handles with threaded drain ports) to loop the fluid through the heater cabinet safely. Households with exceptionally hard water might need a fast-acting commercial cleaner instead of kitchen vinegar, and they often need cleanings twice a year. Here is the straightforward process to connect the hoses, run the pump, and clear the lines.
Supplies, Tools, and Plumbing Checks Before You Begin
Every time you run hot water, dissolved minerals like calcium and magnesium pass through your heater. Over time, heat forces these minerals out of the water, baking them onto the metal heating coils inside the cabinet (the heat exchanger). This buildup is called limescale. Because scale acts like an insulating blanket, it traps heat, forces the burner to work harder, drops your water pressure, and can eventually crack the coils. Descaling, or dissolving this hard mineral crust with a mild acid solution, restores water flow and protects your heating system.
Before buying supplies, inspect the plumbing lines beneath your unit for isolation valves (separate shut-off handles on the pipes). A proper valve kit has two main shut-off levers, usually blue for cold water and red for hot water, along with service ports (threaded drain caps on the valve kit). These capped ports let you hook up hoses and circulate cleaner through the heater without pushing chemicals into your drinking faucets. If your heater connects straight to household pipes without these valves, you cannot flush it yourself. Call a licensed plumber to install an isolation valve kit first.
Once you confirm your valves are present, gather these essential items:
- Submersible utility pump: A small electric pump that sits underwater in a bucket to push cleaning fluid through narrow coils.
- Two clean hoses: Short washing machine or utility hoses with standard 3/4-inch female connections and fresh rubber washers.
- A 3-gallon to 5-gallon bucket: A clean plastic pail to hold your cleaning solution and the submerged pump.
- Cleaning solution: Either 3 to 4 gallons of undiluted white household vinegar or a commercial descaling solution.
- Adjustable wrench or pliers: To loosen the service port caps and the water filter plug.
- A small bowl and towel: To catch minor water drips when removing the valve caps.
You can use plain white distilled vinegar or a commercial plumbing descaler. White vinegar is cheap, non-toxic, and gentle, making it popular for annual maintenance. Because vinegar is a mild acid, it requires 45 to 60 minutes of circulation time. Commercial descaling solutions work faster, dissolving mineral crust in 30 minutes. They are formulated specifically for plumbing, breaking down heavy lime deposits without damaging rubber gaskets, plastic parts, or copper pipes.
Shutting Down the System and Connecting the Pump Loop
Flushing involves circulating liquid through an appliance connected to power and gas. Following a strict shutdown sequence keeps you safe and protects the unit.
- Turn off electrical power. Unplug the power cord from the wall outlet or switch off the electrical disconnect switch. If hardwired, flip the dedicated circuit breaker in your electrical panel. Never leave power on during a flush. If the burner fires without water flowing, the dry heat will scorch and ruin the internal coils within seconds.
- Shut off the fuel supply. For a gas heater, locate the gas shut-off valve on the supply line and turn the yellow handle 90 degrees so it sits perpendicular to the pipe. For an electric heater, verify that the double-pole breakers in your main panel remain off.
- Close the main isolation valves. Turn the main cold water handle (blue) and hot water handle (red) 90 degrees so they point across the pipes. This isolates the heater, stopping cleaning solution from entering your home plumbing.
- Remove the service port caps. Place a towel and a small bowl beneath the service ports (the threaded drain caps on the valve kit). Unscrew both caps counterclockwise with an adjustable wrench. Allow any trapped water to drain out, and verify that the rubber sealing washers stay inside the caps.
- Attach the circulation hoses. Screw one end of your first hose onto the discharge outlet of your submersible pump. Attach the other end to the cold water service port (blue valve). Screw your second hose onto the hot water service port (red valve), and place its loose end into the bottom of your bucket.
- Fill the bucket with cleaner. Place the pump flat on the bottom of your bucket. Pour in 3 to 4 gallons of undiluted white vinegar, or mix your commercial descaler with water following the bottle directions. Make sure the fluid completely covers the pump intake so it does not draw air.
Circulating the Cleaner, Rinsing the System, and Cleaning the Filter
With your loop assembled, you are ready to circulate the solution, flush out the acid, and clean the inlet filter.
- Open both service valves. Turn the small T-handles on both service ports parallel with the drain spigots to open the path into the heater coils.
- Plug in the pump. Connect the pump to a grounded wall outlet. The pump will push cleaning fluid through the cold port, circulate it across the metal heating coils inside the cabinet, and discharge it through the hot hose back into the bucket.
- Circulate the solution. Run the pump for 30 to 45 minutes with a commercial cleaner, or 45 to 60 minutes with white vinegar. The liquid may foam and turn cloudy or blue-green as the acid dissolves calcium deposits and reacts with copper pipes. If loose scale covers the pump intake screen, unplug the pump, wipe the screen clean, and restart it.
- Flush with fresh tap water. Unplug the pump and dispose of the spent cleaner down a drain. To rinse away remaining acid, close the small cold service valve, but leave the hot service valve open with its hose in an empty bucket or drain. Slowly open the main cold water isolation valve (the large blue handle). Clean tap water will flow through the coils and push residual acid out the hot hose. Run this clean water for 5 to 10 minutes until it flows clear and odorless.
- Clean the cold water filter screen. Close the main cold water valve again. Underneath the cold water inlet on the heater cabinet, locate the small plug holding the cold water filter screen. Unscrew the plug, pull out the cylindrical mesh filter, and rinse away trapped sand and grit under a running faucet. Reinstall the clean screen and hand-tighten the plug firmly.
- Restore normal operation. Close the hot service valve and remove both hoses. Reinstall the brass service caps and tighten them with a wrench. Fully open both the main cold and hot water isolation valves parallel to the pipes. Turn the gas valve parallel to the pipe, or flip the electrical breaker back on. Plug in the power cord, and run a hot water tap in your home for two minutes to purge air pockets.
How often to descale depends on your water hardness, measured in grains per gallon (gpg). If your home has soft water (under 3 gpg), descaling once every two years is usually enough. For moderate water hardness (3 to 7 gpg), flush the system every 12 months as part of routine maintenance. For very hard water (over 7 gpg) or well water, descale every 6 months. Watch for warning signs between cleanings: fluctuating shower temperatures, dropping hot water pressure, burner clicking sounds, or scale error codes flashing on your digital display panel.
What to Look for in a Tankless Water Heater Flushing Kit
A dedicated tankless water heater flushing kit bundles a submersible pump, hoses, bucket, and descaling cleaner into one package. When choosing a kit, check the pump first. Look for an oil-free submersible utility pump with thermal overload protection (a safety sensor that shuts the motor down if it runs dry or overheats). A pump with solid flow capacity and lift height circulates cleaner smoothly through narrow internal piping without straining.
Check the hoses and hardware. Choose durable hoses made from reinforced PVC or braided stainless steel that resist kinking and acid wear. Ensure the hose ends have standard 3/4-inch female hose thread fittings with thick rubber washers to prevent puddles on your floor. A sturdy 3-gallon to 5-gallon bucket provides enough depth to submerge the pump intake without splashing. Pails with tight lids make it easy to store your flushing gear neatly between cleanings.
Pick a descaler that fits your preferences. Pre-measured powder descalers dissolve quickly in warm water, store well, and are lightweight. Liquid concentrates eliminate mixing guesswork and dissolve heavy scale faster than grocery store vinegar. Confirm that your chosen solution is non-toxic and safe for domestic plumbing lines so your drinking water remains pure after rinsing.
Also consider where your heater is installed. If your unit hangs in an unheated garage or workspace, pairing it with an electric heater for a garage with a thermostat keeps the surrounding room warm so exposed valves, pumps, and water pipes do not freeze during cold snaps. In smaller homes or manufactured housing, using a dependable heater for a mobile home keeps utility closets temperate, protecting plumbing connections and making annual maintenance much easier.

- BWP Score9.4
BWP Score is a ranking system developed by Bestwinterproducts.com. BWP score has no relationship or impact from any manufacturers or sales agent websites. Learn more
- Brand6699
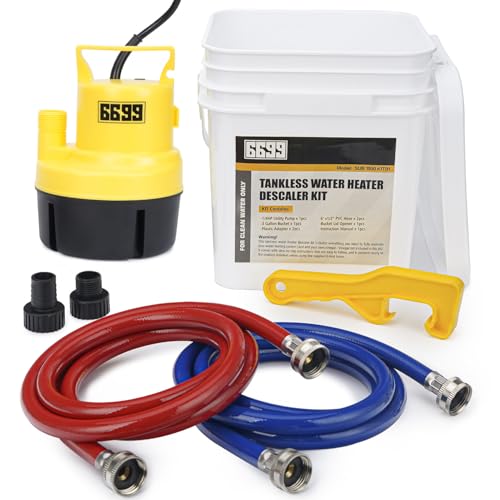
- BWP Score9.1
BWP Score is a ranking system developed by Bestwinterproducts.com. BWP score has no relationship or impact from any manufacturers or sales agent websites. Learn more
- Brand6699

- BWP Score8.7
BWP Score is a ranking system developed by Bestwinterproducts.com. BWP score has no relationship or impact from any manufacturers or sales agent websites. Learn more
- BrandChromex

- BWP Score8.6
BWP Score is a ranking system developed by Bestwinterproducts.com. BWP score has no relationship or impact from any manufacturers or sales agent websites. Learn more
- BrandChromex

- BWP Score8.4
BWP Score is a ranking system developed by Bestwinterproducts.com. BWP score has no relationship or impact from any manufacturers or sales agent websites. Learn more
- BrandSuperior Pump

- BWP Score7.9
BWP Score is a ranking system developed by Bestwinterproducts.com. BWP score has no relationship or impact from any manufacturers or sales agent websites. Learn more
- BrandChromex

- BWP Score7.4
BWP Score is a ranking system developed by Bestwinterproducts.com. BWP score has no relationship or impact from any manufacturers or sales agent websites. Learn more
- BrandChromex
Last update on 2026-10-15 / Affiliate links / Images, Product Titles, and Product Highlights from Amazon Product Advertising API
Frequently Asked Questions
Can I use regular grocery store vinegar to descale my tankless heater?
Plain white distilled vinegar works well for routine annual cleanings. Its mild acetic acid dissolves light calcium and mineral buildup without harming internal copper coils or rubber seals. But if your home has severe hard water or you have gone multiple years without flushing, a specialized plumbing descaling solution clears heavy crust much faster.
What happens if I never descale my tankless water heater?
Mineral scale forms an insulating crust over the internal heating coils, forcing the burner to work harder to heat your water. Over time, this buildup causes fluctuating shower temperatures, reduces hot water pressure, and triggers frequent error codes. Left untreated, severe scale can overheat the metal coils until they crack and leak, leading to an expensive heat exchanger replacement.
How do I know if the descaling process actually worked?
You can verify that the flush worked by watching the cleaning fluid during circulation and checking water performance afterward. Foamy, cloudy, or blue-green liquid in your bucket proves that the acid reacted with and dissolved mineral deposits inside the unit. Once you turn the system back on, you should experience steady water temperatures, restored water flow, and no warning codes on the display.


Best Warm Winter Scarves 2026 For Cozy Comfort

Best Green Ski Goggles 2026 For Clear Vision On Slopes

12 Best Corner Electric Fireplace 2026: My Ultimate Guide To Pick One

Best Battery Powered Snow Blower 2026 For Effortless Snow Clearing

Best Ski Goggles Under 30 Inches For Crisp Vision And Comfort

Best Cooling Scarf 2026 For Instant Relief And Comfort

Fake Snow for Grass: Create a Realistic Winter Lawn Display

Dimplex Prism Wall Mount Fireplace: Sleek Heat With Modern Flame Style