How to Drain an RV Water Heater Safely

Most campers assume draining an RV water heater is as simple as walking outside and unscrewing the bottom drain plug. In reality, doing that right away risks hot water blowouts, so the safe method is to shut off the power, release internal pressure, and let the tank cool completely before opening the drain. Turning off both the electric switch and gas burner beforehand also prevents the electric heating element from burning out the second the water drops.
The exact steps shift depending on what seals your heater port. Some models use a lightweight plastic plug, while others use a heavy metal rod that absorbs rust and takes a larger wrench socket to remove. You must also turn off the water pump and unhook the city water line, or the tank will refill just as fast as it empties. Here is how to drain the water cleanly without burning your hands or damaging components.
Before You Start: Essential Safety Shutoffs
Working on an RV water heater without shutting off the support systems can ruin expensive components or cause severe personal injury. Water heaters in recreational vehicles hold between 6 and 10 gallons of water under high pressure and heat. Before you touch any tool or open the exterior access door, you must shut down four separate systems in a specific order.
- Turn off the 120-volt electric heating switch: Locate the water heater switch on your interior control monitor panel and switch it off. Many units also have a secondary rocker switch located directly inside the outside access compartment on the lower left side. If your water heater receives electric power while the tank is empty, the electric heating element (the metal heating coil that warms the water) will burn out in under 30 seconds.
- Turn off the LP gas switch: Switch off the gas burner control inside your rig. You want to make sure the propane burner assembly cannot ignite while you are working in the outside compartment or after the tank has been emptied.
- Disconnect your fresh water supply: Turn off the campsite water spigot and unhook your drinking water hose from the city water inlet on the side of your camper.
- Shut off the 12-volt water pump: Flip the water pump switch to the off position on your camper control board. If this switch stays on, the pump will automatically activate the moment you pull the drain plug and will spray gallons of fresh water straight at your feet.
- Let the tank cool completely: Do not attempt to drain a tank that was heating water an hour ago. Water heaters reach temperatures of 130 to 140 degrees Fahrenheit. Let the water sit for at least six to eight hours, or run your interior hot water faucets until the water flows cold, before you open the drain plug.
Releasing Trapped Pressure from the Tank
Once your water sources and heating switches are off, you must equalize the pressure inside the tank. Water heaters operate as closed systems. As water gets hot, it expands and creates a pocket of high pressure, often between 40 and 60 pounds per square inch. If you loosen the bottom drain plug while this pressure is trapped inside, the plug can blow out like a projectile, stripping the threads and splashing dirty water across your body.
Open the outside access door on the side of your RV. Near the top of the compartment, you will see the pressure relief valve (a brass safety valve with a flip lever that vents trapped steam and water pressure). Lift the small metal lever straight out so it stands at a 90-degree angle from the brass valve body. You will hear a hiss of escaping air, and a small burst of water will trickle down the discharge pipe.
Leave the valve open for a few seconds until the hissing stops completely. If water spurts out with high force, the tank is still under pressure or the water inside may still be hot. Once the flow stops and the air pocket balances with the outside air, snap the lever back down flush against the valve. Your tank is now depressurized and safe to open from the bottom.
Step-by-Step Instructions to Drain Your RV Water Heater
With the tank cooled and depressurized, you can remove the bottom drain fitting. Follow these steps in order to get a clean, steady drain without damaging the fittings.
- Check the tank temperature with your hand against the tank casing. Reason: Touching the outer shell confirms the internal liquid is at room temperature so you avoid painful scalds if water splashes out.
- Position a shallow bucket or catch basin beneath the exterior compartment door. Reason: Catching the runoff prevents a muddy puddle from forming around your camper tires and leveling jacks.
- Fit your wrench squarely over the hex head of the drain plug or anode rod. Reason: A square, snug fit prevents you from rounding off soft plastic corners or slipping off tight metal bolt heads.
- Turn the tool counterclockwise to break the initial seal. Reason: Standard pipe threads loosen counterclockwise, and breaking the seal with steady pressure protects the tank housing from twisting.
- Spin the plug out slowly with your fingers while standing off to one side. Reason: Stepping to the side keeps your face, chest, and clothes clear of the heavy stream of water that immediately rushes out.
- Flip the pressure relief valve lever open at the top of the compartment. Reason: Letting outside air enter the top of the tank breaks the internal vacuum, allowing the water to pour out in a smooth, rapid stream instead of a slow trickle.
- Wait for the water stream to stop completely and let the remaining sediment drain out. Reason: Allowing the full drainage cycle to finish clears loose mineral flakes that naturally settle along the bottom curved wall of the tank.
- Inspect the removed plug or rod for thread damage, cracks, or heavy corrosion. Reason: Checking the part immediately tells you whether you can reuse it or need to install a fresh replacement before your next trip.
Atwood Versus Suburban Tanks: Identifying Your Drain Setup
The steps to remove the drain plug are straightforward, but the exact part you pull out depends on the brand of water heater installed in your RV. The two most common brands found in North American campers are Atwood (now owned by Dometic) and Suburban. Each uses completely different materials and requires different tools.
Atwood water heaters feature an all-aluminum tank. Aluminum naturally forms an oxide layer that resists rust, which means these tanks do not require an internal sacrificial rod. The drain port at the bottom left of an Atwood unit uses a white nylon drain plug with standard 1/2-inch NPT (standard threaded pipe fitting) threads. You typically need a 7/8-inch or 15/16-inch socket to remove it. Never install a steel, brass, or copper plug into an Atwood aluminum tank. When two different metals contact each other in water, galvanic corrosion occurs, which will weld the metal plug into the aluminum tank and permanently destroy the threads.
Suburban water heaters feature a heavy steel tank lined with porcelain glass. Because water can eventually reach tiny cracks in the porcelain lining, Suburban tanks require an anode rod (a metal rod screwed into the tank to absorb rust). The drain plug and the anode rod are one single unit. The outer head is a large steel nut, usually requiring a 1-1/16-inch deep socket and a ratchet extension to clear the burner tubes.
When you pull a Suburban plug, an 8- to 10-inch rod made of magnesium or aluminum will come out with it. As the rod protects the steel tank, the metal deteriorates, looking pitted, chewed, and rough. If the rod has lost more than 75 percent of its original thickness, or if the thin steel wire running down the center core is visible, discard it and screw in a new anode rod before refilling the system.
Flushing Out Sediment Flakes and Storing for the Season
Draining the water removes liquid, but it often leaves behind sediment (white mineral flakes at the bottom of the tank). These flakes consist of calcium and magnesium that separate from hard campground water during the heating process. Over time, sediment builds a thick layer along the floor of the tank, covering the electric element, reducing heating speed, and causing foul odors.
- Rinse with a tank cleaning wand: Attach a plastic water heater flush wand to your standard garden hose. Slide the narrow tube through the 1/2-inch drain opening, turn on the hose, and twist the wand around inside the tank. The high-pressure jet washes the bottom curves, blowing out cups of white chalky flakes until the runoff water flows completely clear.
- Locate and turn your bypass valves: If you are draining the tank for winter storage, locate the plumbing bypass valves behind the water heater inside your camper cabinets. Turn the bypass valves to divert water away from the heater. This prevents expensive RV antifreeze from filling the 6-gallon water heater tank when you winterize the rest of the camper plumbing. Antreeze should never enter your water heater tank because it leaves a persistent chemical smell and residue.
- Decide on plug storage for the winter: Do not screw a drain plug back in tightly while the tank interior is damp. You can leave the plug out completely, but spiders and mud daubers may build nests inside the open port. A reliable middle ground is to wrap a small piece of breathable mesh or screen over the opening, or thread the clean nylon plug back in by just one or two loose turns so air can circulate while insects stay out.
When you travel through freezing climates or depend on the best heater for van life to keep your interior living quarters warm, draining your plumbing lines protects your camper from cracked tanks and burst pipes. Water expands by roughly 9 percent when it freezes into solid ice. If 6 gallons of water freeze inside an unheated, sealed water heater, the expanding ice will split the welded tank seams, requiring a full replacement of the entire appliance.
Choosing the Right Drain Plugs and Tools for Maintenance
Working inside a camper water heater compartment can be frustrating because gas lines, valves, and burner tubes sit in a tight, crowded space. Keeping the right replacement hardware and specialized hand tools in your camper maintenance kit makes seasonal draining and flushing much simpler.
Look for replacement drain plugs that match your tank specifications. For Atwood tanks, pick up a multi-pack of 1/2-inch NPT nylon plugs so you always have spares on hand when original threads wear down or plastic corners round off. Plugs that include thread sealing tape (thin white plumber's tape used on threaded pipe joints to stop leaks) ensure a watertight seal without requiring you to over-tighten the soft plastic.
For tools, standard hardware store wrenches often cannot reach the drain port due to the surrounding sheet metal lip and burner assembly. An angled drain plug wrench designed specifically for RV water heater compartments makes loosening tight plugs painless. These tools feature an offset handle and dual-sided ends that fit both 7/8-inch and 15/16-inch plug heads, allowing you to loosen stubborn fittings without scraping your knuckles against sharp metal brackets.

- BWP Score9.7
BWP Score is a ranking system developed by Bestwinterproducts.com. BWP score has no relationship or impact from any manufacturers or sales agent websites. Learn more
- BrandCamco

- BWP Score8.9
BWP Score is a ranking system developed by Bestwinterproducts.com. BWP score has no relationship or impact from any manufacturers or sales agent websites. Learn more
- BrandLukiYuChen

- BWP Score8.4
BWP Score is a ranking system developed by Bestwinterproducts.com. BWP score has no relationship or impact from any manufacturers or sales agent websites. Learn more
- BrandFrienda
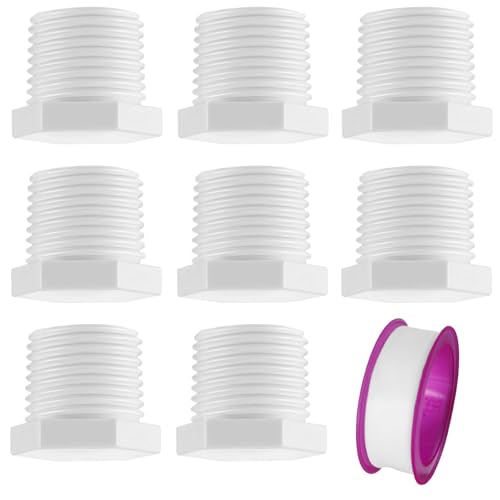
- BWP Score7.3
BWP Score is a ranking system developed by Bestwinterproducts.com. BWP score has no relationship or impact from any manufacturers or sales agent websites. Learn more
- BrandTBESEVENXT
- BWP Score7.3
BWP Score is a ranking system developed by Bestwinterproducts.com. BWP score has no relationship or impact from any manufacturers or sales agent websites. Learn more
- BrandTBESEVENXT
Last update on 2026-10-12 / Affiliate links / Images, Product Titles, and Product Highlights from Amazon Product Advertising API
FAQs
How do I know the water is cool enough to drain?
Turn on the hot water faucet at your camper kitchen sink with the water pump or city water connected. Let the stream run for two minutes, then feel the temperature of the water with your fingers. If the faucet water feels cool or matches the ambient outside air, your water heater tank is safe to open.
Why does the water only trickle out when I pull the plug?
If water barely drips from the drain port after removing the plug, the tank has created a vacuum or the drain hole is blocked by sediment. Flip open the metal lever on the pressure relief valve at the top of the heater to allow air inside. If water still trickles, gently poke a small screwdriver or plastic rod into the drain hole to break up packed mineral flakes blocking the opening.
Can I replace my plastic Atwood plug with a brass valve?
Do not install a brass drain valve or brass petcock directly into an aluminum Atwood tank. Brass and aluminum are dissimilar metals that trigger galvanic corrosion when exposed to moisture and heat. Over time, the brass will cause the aluminum tank threads to corrode away, resulting in permanent water leaks and a ruined tank.
What should I do if my drain plug is stuck and will not turn?
If a nylon plug resists turning, avoid using extreme force with an oversized wrench, which will round off the soft plastic corners. Spray the outer threads lightly with water or a mild penetrating fluid, tap the socket gently to seat it straight, and apply slow, steady counterclockwise pressure. If the plug head strips completely, an internal pipe extractor tool can bite into the hollow center of the plastic plug to twist it free.


Best Warm Winter Scarves 2026 For Cozy Comfort

Best Green Ski Goggles 2026 For Clear Vision On Slopes

12 Best Corner Electric Fireplace 2026: My Ultimate Guide To Pick One

Best Battery Powered Snow Blower 2026 For Effortless Snow Clearing

Best Ski Goggles Under 30 Inches For Crisp Vision And Comfort

Best Cooling Scarf 2026 For Instant Relief And Comfort

Fake Snow for Grass: Create a Realistic Winter Lawn Display

Dimplex Prism Wall Mount Fireplace: Sleek Heat With Modern Flame Style