Essential Steps to Flawlessly Finish Drywall around a Fireplace
Giving your fireplace area a neat, polished appearance by finishing the drywall can significantly elevate the aesthetic of your space. The fireplace, a quintessential element in many homes, isn't just a source of warmth; it's often a statement piece that draws attention. Thus, surrounding it with professionally finished drywall is crucial. Whether you're a newbie DIY enthusiast or an experienced homeowner, a few foundational steps will help you achieve that polished look. We've broken down the process, ensuring you grasp the nuances of each stage, from prepping your workspace to applying the final coat. Trust us; you're closer than you think to that dreamy, magazine-worthy fireplace setting!
We've all seen those picture-perfect living rooms with a stunning fireplace as the centerpiece. But here's the thing – it's not just about the fireplace. The magic often lies in the details, like the way the drywall seamlessly blends with the fireplace, creating a smooth transition. So, buckle up, dear reader. We're about to delve deep into the world of finishing drywall around fireplaces. From tools to techniques, we've got you covered. Dive in, and let's ignite your DIY spirit!
Mastering the Art of Drywall Around Your Fireplace
The realm of interior design has witnessed many transformations over the years. Yet, the elegance of a fireplace remains a consistent centerpiece in many households. Finishing the drywall around a fireplace, however, can be a daunting task. Yet, with the right techniques, it's possible to create a sleek, modern ambiance that complements the warmth of the flames.
Every fireplace project begins with ensuring safety. Fireplaces generate heat and can pose a risk if the surrounding materials are not fire-resistant. This makes the choice of drywall crucial. Selecting the correct type of drywall is paramount. It's advisable to use Type X drywall, which is specifically designed to withstand higher temperatures and offers a fire-resistance rating. This ensures not only the longevity of your design but also the safety of your household.
Beyond safety, aesthetics play a significant role. The fireplace is often the focal point of a room, and the way you finish the surrounding drywall can significantly influence the room's vibe. Whether you're looking for a rustic charm, minimalist modern, or a vintage finish, the texture and paint of the drywall can bring your vision to life.
Of course, having the right tools at your disposal can make the process smoother. Ensure you have a taping knife, joint compound, and sanding tools. Remember, patience is key! It's all about layering and ensuring each layer is dry before proceeding.
The Step-by-Step Process to a Flawless Finish
So, where does one begin when aiming for that impeccable finish? First, it's essential to prepare the surface. Begin by cleaning the area around the fireplace, ensuring it is free from dirt, dust, and any previous paint flakes. This ensures that the new material adheres well and provides a smooth finish.
Next, you'll want to apply the joint compound using the taping knife. Spread it evenly, ensuring all gaps and seams are filled. This step might require multiple coatings. After each layer, wait for it to dry thoroughly. It's tempting to speed up the process, but ensuring each layer is dried will provide a sturdier finish.
Sanding is the next crucial step. Once the joint compound is dry, sand the surface to eliminate any unevenness. It's a messy task, so it's advisable to keep the area well-ventilated and wear protective gear. The goal here is to attain a smooth finish which will enhance the final look.
Lastly, it's time to paint. Select a color that complements both the fireplace and the overall decor of your room. Using a primer first can ensure the paint's longevity and provide a more vibrant finish.
Addressing Challenges: Overcoming Common Hurdles
As with any DIY project, there's always the potential for hiccups along the way. One common challenge many face is bubbles forming on the drywall. This often results from moisture trapped in the compound or applying too much joint compound. To fix this, simply slice the bubble, fill it with a new compound, and sand the area for a smooth finish.
Cracks are another common problem, especially around fireplaces where the heat can cause materials to expand and contract. If you notice a crack forming, don't panic! Start by widening the crack slightly with a utility knife, then fill it with a joint compound, allowing it to dry before sanding it down.
Sometimes, even with the best precautions, discoloration might occur, especially if the fireplace is used frequently. In such cases, using a stain-blocking primer before painting can keep the drywall looking fresh and vibrant.
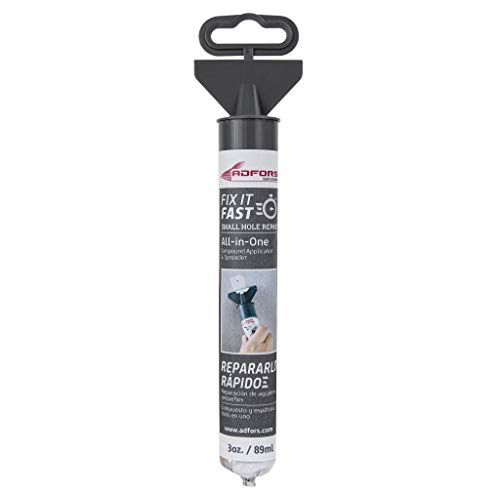
In the rare event that the drywall becomes too damaged or there are persistent problems, it might be wise to seek professional advice. Remember, while DIY projects can be fun and cost-effective, there's no harm in seeking expert insights for perfect results.
Tips and Tricks for an Outstanding Outcome
While the process might seem linear, there are a few tips and tricks that can make your endeavor more successful. First and foremost, always measure the area you're working on. This ensures you have adequate material and prevents wastage.
When applying joint compound, use the "less is more" mantra. It's easier to add more layers than to remove excess. Plus, thinner layers dry faster and are less prone to cracking.
For those aiming for a textured look, consider using specialized tools that can create patterns on the wet joint compound. From swirls to rugged finishes, the possibilities are endless.
Lastly, always test your paint on a small patch before painting the entire area. This ensures that the color looks as expected when dry and can prevent any unwelcome surprises.
Maintaining the Beauty: Long-term Care
Once your drywall is flawlessly finished around your fireplace, the journey doesn't end. Maintaining its beauty is crucial for a lasting impact. Regularly clean the drywall to prevent dust accumulation. Use a soft, damp cloth and avoid abrasive cleaning agents that can wear out the paint.
If you notice minor scratches or dents over time, a small touch-up with joint compound and paint can fix the issue. For more significant damages, consulting a professional might be the best approach.
Fireplaces can lead to soot accumulation on surrounding surfaces. Regularly cleaning the fireplace and using a protective screen can minimize this issue.
Finally, remember that while aesthetics are essential, safety is paramount. Regularly inspect the area for any signs of wear and tear, especially if the fireplace is frequently used. Ensuring that the drywall remains in good condition not only keeps your space looking pristine but also ensures the safety of your home.
Explore further:
.jpg)

How to Start Monessen Fireplace: A Step-by-Step Guide

How to Whitewash Rock Fireplace: Simple Steps to Refresh Your Space

How to Make a Cardboard Fireplace: Easy & Creative Ideas

Unleash the Secrets of Cleaning a Gas Fireplace Burner

Unleashing the Charm: Restoring a Fireplace in Easy Steps

Unlock the Art of Crafting Your Own Gas Fire Pit

Ignite Warmth: Your Guide to Creating a Water Vapor Fireplace

Dynasty Electric Fireplace 2026 Top Picks For Cozy Living