
How to Hide TV Wires Above Fireplace Neatly

How to hide TV wires above fireplace isn't just about making a room look tidier. Loose cables can distract from a beautiful fireplace, collect dust, and even become a safety concern if they're exposed to heat or accidentally pulled. A clean installation creates a balanced focal point that feels intentional instead of cluttered, and that's often the missing piece that pulls an entire living room together. Small cable management upgrades may seem minor at first, yet they often leave the biggest visual impact after everything is finished.
Every fireplace layout tells a different story. Brick surrounds, stacked stone, drywall, floating mantels, and built-in shelving each come with their own challenges, so copying someone else's setup rarely produces the same result. Planning the cable route before drilling or mounting anything helps prevent unnecessary repairs later. A little patience upfront usually saves a lot of frustration once the television is securely mounted.
Heat deserves careful attention before hiding any cables. Television power cords and HDMI cables aren't designed to sit directly against high-temperature surfaces for extended periods, so understanding where the fireplace generates the most warmth matters. Measuring the temperature around the mounting area can reveal whether additional protection or an alternative routing path is needed. That simple step keeps both your equipment and your wall installation in much better shape over time.
Surface-mounted raceways, in-wall cable management kits, decorative trim, and furniture placement all solve the same problem in different ways. Some homeowners prefer a weekend DIY project that leaves almost no visible trace, while others choose solutions that can be removed later without opening the wall. Choosing the right approach depends on the wall material, local electrical codes, and how permanent the installation should be. There's no single answer that fits every fireplace, and that's perfectly fine.
Appearance matters, but practicality shouldn't take a back seat. Future upgrades become much easier when extra cable capacity is left inside the wall or raceway for streaming devices, gaming consoles, or soundbars that may be added later. Nobody enjoys reopening a finished wall just to run one additional HDMI cable. Thinking a few steps ahead often pays off more than expected.
A polished entertainment wall feels calm instead of chaotic. Hidden cables naturally draw attention toward the television, artwork, mantel décor, and fireplace instead of a bundle of dangling wires. How to hide TV wires above fireplace combines careful planning, safe installation practices, and thoughtful design choices to create a cleaner space that stays functional for years instead of only looking good on installation day.

- BWP Score9.4
BWP Score is a ranking system developed by Bestwinterproducts.com. BWP score has no relationship or impact from any manufacturers or sales agent websites. Learn more
- BrandZhiYo

- BWP Score9.4
BWP Score is a ranking system developed by Bestwinterproducts.com. BWP score has no relationship or impact from any manufacturers or sales agent websites. Learn more
- BrandCOOVIE

- BWP Score9.2
BWP Score is a ranking system developed by Bestwinterproducts.com. BWP score has no relationship or impact from any manufacturers or sales agent websites. Learn more
- BrandDelamu

- BWP Score9.2
BWP Score is a ranking system developed by Bestwinterproducts.com. BWP score has no relationship or impact from any manufacturers or sales agent websites. Learn more
- BrandYecaye
- BWP Score9.2
BWP Score is a ranking system developed by Bestwinterproducts.com. BWP score has no relationship or impact from any manufacturers or sales agent websites. Learn more
- BrandBGHEOUYV

- BWP Score9.2
BWP Score is a ranking system developed by Bestwinterproducts.com. BWP score has no relationship or impact from any manufacturers or sales agent websites. Learn more
- BrandYecaye

- BWP Score9.2
BWP Score is a ranking system developed by Bestwinterproducts.com. BWP score has no relationship or impact from any manufacturers or sales agent websites. Learn more
- BrandWuitaouy

- BWP Score9.0
BWP Score is a ranking system developed by Bestwinterproducts.com. BWP score has no relationship or impact from any manufacturers or sales agent websites. Learn more
- BrandDelamu

- BWP Score6.8
BWP Score is a ranking system developed by Bestwinterproducts.com. BWP score has no relationship or impact from any manufacturers or sales agent websites. Learn more
- BrandDreamscreens
Last update on 2026-07-26 / Affiliate links / Images, Product Titles, and Product Highlights from Amazon Product Advertising API
How To Hide TV Wires Above Fireplace Safely
A wall-mounted television can look sharp from across the room, then lose its polish the second a black power cord drops toward the mantel. That visual clutter is annoying, but the bigger issue is that fireplaces add heat, masonry, limited access, and electrical restrictions to what would otherwise be a routine cable-management job. Learning how to hide TV wires above fireplace starts with choosing a route that protects the television, keeps power connections accessible, and doesn’t leave the wall scarred by a rushed installation. The cleanest result usually comes from planning the cable path before touching the drill.
Plan The Wire Route Before Opening The Wall
Start by listing every cable the setup actually needs, including the television power cord, HDMI cables, an optical audio cable, Ethernet, coax, and any leads for a soundbar. A single streaming device may keep the setup simple today, but gaming consoles or upgraded audio equipment can quickly fill a narrow conduit later. Planning for future cables prevents the frustrating job of reopening a patched wall just to add one connection. Leave room for at least one spare low-voltage cable even if the extra capacity seems unnecessary right now.
Sketch the television, mantel, fireplace opening, outlets, studs, and nearby cabinets on paper before choosing an entry point. The shortest route isn’t always the smartest because it may cross a hot zone, framing member, flue chase, or masonry section that’s difficult to repair. A slightly longer path through a side cabinet can offer better access and lower heat exposure. That tradeoff is often worth a few extra feet of cable.
Measure the mounting position with the television bracket in mind, not just the television screen. Cable openings placed too close to the bracket can become blocked by the mounting plate or compressed when the screen tilts back. Keep the exit point within the television’s footprint while allowing comfortable plug clearance and enough slack for service. Tight bends can damage HDMI cables, particularly thicker models designed for higher bandwidth.
Check both sides of the proposed wall before drilling. A fireplace wall may hide pipes, electrical wiring, gas lines, ductwork, or structural framing that isn’t obvious from the room. Use a reliable stud finder with wire detection, inspect accessible spaces, and cut a small exploratory opening only after the path looks clear. Guessing behind a fireplace wall can turn a cosmetic project into a costly repair.
Check Heat Levels Around The Television
Heat should shape every decision because electronics and cable jackets degrade faster when they’re repeatedly exposed to excessive temperatures. Run the fireplace long enough to reach its normal operating condition, then check the wall and mantel area using the fireplace maker’s clearance guidance. The section directly above the opening often gets hotter than nearby areas, especially without a deep mantel to redirect rising air. Safe television placement matters more than achieving a perfectly centered look.
A mantel can act as a heat deflector, but its depth, material, and distance from the firebox all affect how well it works. A shallow decorative shelf may provide little protection, while a deeper noncombustible mantel can push hot air farther into the room. Don’t assume the mantel automatically makes the area safe. Confirm minimum mounting clearances for both the fireplace and television before committing to the layout.
Gas, wood-burning, and electric fireplaces create very different conditions. Wood and gas units can produce stronger radiant and convective heat, while many electric models keep more heat directed through a front outlet. Even electric units need care because blocking vents or routing cables near a heater outlet can trap warmth. For a separate room upgrade involving realistic flame effects without burning wood, consider electric fireplace logs while keeping all manufacturer clearances intact.
Look for practical warning signs after the television has been running above an active fireplace. A hot lower bezel, softening cable insulation, intermittent video signals, or unexplained shutdowns can point to excess heat. Move the equipment or revise the installation rather than treating those signs as harmless quirks. Repeated thermal stress can shorten equipment life even when no immediate damage is visible.
Separate Power Cords From Low-Voltage Cables
Power wiring and low-voltage signal cables follow different installation rules, so they shouldn’t be treated as one bundle. HDMI, Ethernet, coax, and optical cables can usually pass through listed low-voltage wall plates or conduit. A television’s detachable power cord generally shouldn’t be dropped loosely inside a wall cavity because its jacket may not be rated for concealed installation. In-wall power kits solve this problem by using approved components designed for the job.
A proper power relocation kit typically creates a recessed receptacle behind the television and connects it to a lower inlet using code-compliant wiring. The lower inlet then plugs into an existing wall outlet with a standard cord that remains accessible in the room. This arrangement hides the visible power lead without burying an ordinary extension cord behind drywall. Extension cords inside walls create an avoidable safety risk and may violate local electrical requirements.
Keep signal cables a reasonable distance from electrical wiring whenever the wall layout permits. Parallel runs placed tightly together can contribute to interference in some installations, especially with analog audio or poorly shielded cables. Crossing at roughly a right angle is usually preferable when the two paths must intersect. Clean signal separation also makes future troubleshooting much less confusing.
Hire a licensed electrician if the project requires moving a receptacle, extending a branch circuit, working around a fireplace chase, or interpreting unclear local codes. DIY confidence doesn’t replace the need for correct grounding, box fill, wire protection, and approved connections. Electrical work hidden behind a television is still electrical work, even though nobody sees it afterward. Code-compliant power placement protects the home long after the wall looks finished.
Choose Between In-Wall And Surface Raceway Methods
In-wall routing creates the cleanest appearance because the cables disappear between an upper and lower opening. Drywall installations with an open stud bay are usually the easiest candidates, though insulation and fire blocking can complicate the route. Flexible fish tape, pull rods, and a low-voltage mounting bracket help guide cables without removing a large section of wall. Small, controlled openings are easier to patch and keep the finished installation tidy.
Surface raceways make more sense for renters, masonry walls, shallow fireplace chases, or layouts where opening the wall feels risky. A paintable channel can carry cables vertically beside the fireplace or horizontally toward cabinetry. The channel remains visible at close range, but careful alignment and matching wall paint keep it from drawing the eye. Reversible cable management is often the smarter compromise in spaces that may change later.
Raceway size matters more than its packaging may suggest. A narrow channel can look discreet while empty, then refuse to close once a thick HDMI cable and power solution are added. Measure connector heads, not just cable diameters, because plugs are usually the widest parts that must pass through. Choose a channel with extra internal capacity so the cover closes without pinching or sharply bending the cables.
Masonry surfaces require different fasteners and a more deliberate route. Adhesive-backed raceways may loosen on dusty brick, uneven stone, or warm surfaces, so mechanical anchors are often more dependable. Avoid drilling into mortar or brick until the exact cable path and fireplace construction are known. Stone and brick repairs are much harder to disguise than a small drywall patch.
Route Cables Through Drywall Without Making A Mess
Mark the upper opening behind the television where the screen will conceal it completely. Place the lower opening near an outlet, cabinet, console, or side shelf that can hold connected devices without stretching the cables. Cut carefully with a drywall saw and stop if the blade meets unexpected resistance. Controlled cutting reduces the chance of damaging hidden wires or slicing through insulation unnecessarily.
Fire blocks can stop a fish tape halfway down the stud bay. These horizontal framing pieces may require a small access opening, a flexible drill bit, or a new cable route through an adjacent bay. Don’t force a drill blindly through the obstruction because plumbing, wiring, or fireplace components may sit beyond it. A wider inspection opening is easier to repair than damage hidden inside the wall.
Use conduit where practical, particularly if the installation may change. A smooth inner tube allows HDMI or Ethernet cables to be replaced without cutting drywall again, though the conduit must be wide enough for connector heads and gentle bends. Add a pull string and leave it in place after every cable run. Future service access turns a one-time installation into a system that can adapt.
Label both ends of each cable before connecting equipment. HDMI leads look nearly identical once they disappear into a wall, and unplugging devices one at a time gets old fast. Small labels such as TV, console, soundbar, and streaming box make setup changes far less irritating. Clear cable identification saves time whenever a device needs replacement or troubleshooting.
Hide Wires Around Brick And Stone Fireplaces
Brick and stacked stone can make concealed routing difficult because there may be no open wall cavity behind the surface. Chiseling a channel into masonry is messy, permanent, and easy to get wrong, especially near a working fireplace. A raceway placed along a mortar line or the edge of a mantel often looks cleaner than an ambitious masonry cut. Following existing visual lines helps the channel blend into the fireplace design.
Use the room’s architecture to redirect attention. A cable channel can travel behind a mantel leg, along the edge of built-in shelving, or into a nearby cabinet rather than dropping through the center of the fireplace surround. That route may be longer, yet the wire becomes much less noticeable. Strategic cable placement usually beats trying to camouflage a channel across textured stone.
Paintable raceways tend to disappear better on flat brick than on heavily varied stone. Match the dominant surface color instead of attempting to copy every shade in the surround. On dark masonry, a charcoal or black channel may look more deliberate than a poorly matched beige strip. Visual consistency matters more than making the raceway completely invisible.
An electric insert may simplify future changes if the existing fireplace no longer suits the room or produces more heat than the television wall can comfortably handle. To pair a controlled flame display with a cleaner media-wall layout, compare a led fireplace insert that fits the available opening and venting arrangement. That choice won’t remove the need for proper cable routing, but it may offer more predictable heat direction than an older installation.
Keep Streaming Devices And Consoles Out Of Sight
Hidden television wires still leave a clutter problem if streaming boxes, controllers, and adapters pile up on the mantel. Mount small devices behind the television using brackets that maintain airflow and preserve remote connectivity. Avoid trapping equipment between the screen and a hot wall. Ventilation space matters because compact electronics can generate surprising heat during long viewing sessions.
Infrared-controlled devices may need a repeater if they sit inside a closed cabinet or behind the television. Bluetooth and Wi-Fi devices offer more placement freedom, though thick masonry and metal enclosures can weaken their signals. Test each device in the planned location before drilling permanent mounting holes. Reliable remote control is part of a clean installation, not an afterthought.
A recessed media box behind the television can hold outlets, cable slack, adapters, and smaller streaming hardware in one contained space. Choose a box deep enough for the plugs without forcing the television away from the wall. Slim mounts leave very little clearance, especially once angled connectors and surge-protection equipment are included. Recessed storage depth should match both the mount and the connected hardware.
Game consoles usually need more airflow and easier access than a streaming stick. Place them in side cabinets, ventilated shelves, or a media console rather than squeezing them behind the screen. Route a longer certified HDMI cable through the planned pathway and keep the console’s exhaust area open. Easy maintenance access beats a fully hidden setup that requires removing the television every time something freezes.
Protect Cable Performance And Future Compatibility
Long HDMI runs can fail even when the cable looks perfectly normal. Signal reliability depends on length, bandwidth, connector quality, and the video format being transmitted. Use cables rated for the equipment’s required resolution and refresh rate, especially for gaming or high-bandwidth media devices. Certified cable performance reduces flickering, black screens, and frustrating handshake errors.
Test every cable before placing it inside the wall. Connect the television and source device, play high-resolution content, verify audio, and check any gaming features that matter. A cable that carries a menu screen may still struggle with demanding video settings. Pre-installation testing costs a few minutes and can prevent hours of wall repair.
Avoid tight coils of extra cable behind the television because they consume space, restrict airflow, and make connections harder to inspect. Use gentle loops secured with reusable hook-and-loop ties rather than tight plastic zip ties. Leave enough service slack to tilt or remove the television safely. Managed cable slack supports both clean appearance and practical maintenance.
Think beyond the television wall while planning household electrical upgrades. A media setup may share demands with heating, hot water, and other high-load equipment, so major changes should be evaluated as part of the home’s overall electrical capacity. For a separate efficiency-focused project, compare an electric heat pump water heater with a qualified installer who can assess panel capacity and placement needs. Coordinated electrical planning helps prevent overloaded circuits and expensive repeat work.
How To Hide TV Wires Above A Fireplace Without Wall Damage
A tidy television wall can still become a headache if the cables are hidden in a way that blocks access, traps heat, or leaves permanent holes in an expensive fireplace surround. The next stage of how to hide TV wires above fireplace focuses on finishing details that keep the installation neat after devices are added, replaced, or moved. Repair-friendly methods, accessible connections, and careful cable support matter just as much as getting the wires out of sight. A clean setup should remain easy to live with, not turn every equipment change into another remodeling project.
Finish The Installation Without Damaging The Wall
Drywall openings rarely look polished until the edges are covered with proper wall plates or recessed boxes. Rough cuts hidden behind the television may seem harmless, but exposed gypsum can crumble whenever cables are pulled through. A low-voltage mounting bracket gives the opening a defined edge and provides a secure place for the plate screws. Clean wall openings protect the surface while making future cable changes far less messy.
Match the wall plate to the actual cable arrangement instead of buying the smallest cover available. Brush plates handle several low-voltage cables well because connectors can pass through without being removed. Keystone plates create a more organized look, though every added coupler introduces another connection point that could eventually loosen. Direct cable runs generally reduce signal problems, while modular plates offer easier organization and a cleaner face.
Patch any exploratory holes with the same care used on visible wall damage. Small access cuts can be saved and reinstalled with backing strips, joint compound, and light sanding rather than filled with a thick lump of patching material. Match the existing wall texture before repainting, since a smooth repair on an orange-peel wall can stand out under television lighting. Careful surface repair keeps the project from looking like a rushed weekend fix.
Brick and stone need a gentler finishing approach because a misplaced hole can’t be blended with ordinary wall compound. Use mortar joints for removable fasteners whenever the fireplace construction allows it, since mortar is generally easier to repair than the face of a brick. Stone veneer can crack if anchors are overtightened or placed too close to an edge. Minimal masonry drilling preserves the surround and leaves more options if the television is moved later.
Make Surface Raceways Look Intentional
A raceway doesn’t have to disappear completely to look right. Align it with a mantel edge, cabinet side, trim line, or corner so it follows a feature the eye already expects to see. A channel wandering diagonally across the wall will draw attention no matter how closely the paint matches. Straight, architectural routing makes a visible cable cover feel like part of the room instead of an afterthought.
Prepare the mounting surface before applying an adhesive-backed channel. Dust, soot, textured paint, and cleaning residue can weaken the bond, particularly near a fireplace where temperature changes stress the adhesive. Wipe the area with a cleaner suitable for the wall finish and let it dry fully before pressing the raceway into place. Good surface preparation prevents sagging covers and loose corners after the first heating season.
Paint the raceway before loading it with cables if the cover separates from the base. This keeps paint away from connectors and prevents the channel from becoming sealed shut along its edges. Use the same wall paint and sheen rather than relying on a color that merely looks close under store lighting. Matching the finish, not only the color, helps the cover blend under daylight and evening lamps.
Leave removable sections accessible near devices and outlets. Caulk may make the edges look seamless, but it also turns a serviceable cover into something that must be cut apart during the next equipment change. A snug cover with clean joints is usually enough for a finished appearance. Serviceable raceways save time when an HDMI cable fails or a new console needs a different connection.
Manage Cables Behind A Tilting Or Full-Motion Mount
Moving mounts need more slack than fixed brackets because the television travels forward, sideways, or downward during adjustment. Too little slack can pull connectors from their ports or place constant pressure on the cable ends. Too much slack can sag below the screen or become pinched in the mount arms. Controlled service loops give the television room to move without creating a visible bundle.
Move the television through its entire range before securing the final cable position. Watch the wires at full extension, maximum tilt, and the tightest folded position against the wall. A route that looks safe while the screen is centered may cross a hinge or pinch point once the mount swings sideways. Full-range movement testing reveals problems before repeated motion damages a cable.
Attach cables to the stationary and moving sections with reusable hook-and-loop straps rather than rigid plastic ties. Hook-and-loop fasteners can be loosened during upgrades and won’t squeeze the cable jacket as tightly. Keep straps away from sharp metal edges and leave gentle bends near every connector. Flexible cable support protects ports while keeping the rear of the television organized.
Right-angle adapters can reduce clearance problems, but they should match the port direction and required signal standard. An adapter pointing toward the mount plate may create more trouble than a straight connector. Every adapter also adds another joint that can loosen while the television moves. Fewer connection points usually provide better reliability, so use angled pieces only where they solve a real space problem.
Keep The Mantel And Media Area Free Of Clutter
A hidden wire route loses much of its value if power bricks, remotes, and streaming boxes remain scattered across the mantel. Group small accessories in a ventilated cabinet, recessed box, or shelf near the television rather than balancing them close to the firebox. Adhesive device mounts can hold lightweight streaming hardware behind the screen, but they need enough airflow and a stable surface. Concealed device storage should reduce clutter without trapping heat.
Soundbars create another cable path that deserves its own plan. Mounting the bar directly below the television keeps the audio and screen visually connected, though power and signal leads still need room to move with an adjustable bracket. Running those cables through the same low-voltage pathway can work if capacity allows and the bends stay gentle. Coordinated soundbar wiring prevents a single dangling cord from spoiling an otherwise clean installation.
Decor can hide small sections of raceway, but it shouldn’t block fireplace clearances or crowd electronic vents. Tall frames, garlands, and stacked objects may redirect heat toward the television or make cable access awkward. Keep the mantel arrangement simple enough that components can be inspected without dismantling the display. Open airflow and clear access matter more than filling every empty spot.
Some rooms need a lower-heat focal point because the current fireplace pushes too much warmth toward the screen. A compact electric fireplace under 200 can suit a separate media area where controlled placement and a modest budget matter, provided its clearance instructions fit the room. That change isn’t a shortcut around electrical rules, yet it may simplify a layout that feels cramped around an older firebox. Predictable heater placement can make television and cable planning easier in smaller spaces.
Preserve Access For Repairs And Equipment Changes
Every hidden connection should remain reachable without cutting the wall. Place outlets, couplers, and adapters behind removable wall plates or inside listed recessed boxes rather than burying them in sealed cavities. Connections fail more often than the cable jacket itself, so inaccessible joints create unnecessary trouble. Accessible connection points make diagnosis faster when the picture suddenly drops or audio disappears.
Photograph the open wall before installing plates and patching access holes. Include the stud positions, cable path, power-kit wiring, conduit, and any fire blocks visible in the opening. Store the images with rough measurements from nearby corners or trim. A simple installation record reduces guesswork during future repairs and helps prevent accidental drilling into concealed wiring.
Keep spare pull string inside any conduit after the final cable is installed. Tie it securely at both ends so it can’t slip into the tube, and label it to prevent someone from mistaking it for waste material. Pull a new string alongside every replacement cable instead of using the existing string once and losing it. Permanent pull access makes future upgrades possible without reopening the wall.
Don’t pack a recessed box so tightly that plugs must be forced into position. Power adapters need room for ventilation, and HDMI connectors shouldn’t bear the weight of bundled cable. Use shorter cords where practical, secure excess length loosely, and keep ventilation openings clear. Comfortable component spacing protects connectors and makes the setup easier to service.
Reduce Heat And Soot Around Hidden Wiring
Wood-burning fireplaces can add soot and fine ash to nearby surfaces, even when the chimney drafts properly. Dust buildup around television vents and cable openings can restrict airflow and make the installation look grimy. Clean the lower edge of the television, wall plates, and exposed raceway sections with methods approved for those surfaces. Routine dust control supports cooling and keeps the finished wall looking sharp.
Check adhesive channels after major seasonal temperature changes. Warm walls can soften some adhesives, while cooler conditions may cause brittle covers or loosened joints. Pressing a failing strip back into place usually provides only a temporary fix. Mechanical fastening may be more reliable on masonry, textured walls, and surfaces that regularly heat and cool.
Inspect cable jackets near the fireplace for discoloration, stiffness, cracks, or warping. Those signs suggest the route may be too close to a heat source, even if the television still operates normally. Replace damaged cables and move the pathway rather than wrapping the affected section with tape. Heat-damaged insulation is a placement problem, not a cosmetic flaw.
Furniture and textiles near the hearth can alter how heat moves through the room. Separately, cold seasons often bring accessories into the same living area, and a mens cashmere scarf belongs on a coat hook or in closed storage rather than draped over a warm mantel. Loose fabric near heating equipment can obstruct airflow or fall toward the firebox. Clear fireplace surroundings protect both the cable installation and everyday household items.
Avoid Common Wire-Hiding Shortcuts
Dropping a television power cord through two holes in the drywall may look tidy, but ordinary appliance cords generally aren’t intended to serve as concealed building wiring. The same warning applies to extension cords tucked behind trim, run through cabinets, or buried under decorative panels. Use a listed power-relocation system or have a receptacle installed in the correct location. Proper in-wall power removes the visible cord without replacing clutter with a hidden hazard.
Running cables through the fireplace chase without confirming its construction is another risky shortcut. A chase may contain venting, insulation, framing, gas components, or required air space around a flue. Even an apparently empty section can be subject to clearance rules that aren’t obvious from the room. Fireplace cavities aren’t general cable pathways unless the system design and local requirements clearly allow the route.
Using the cheapest extra-long HDMI cable can create intermittent problems that are hard to trace after the wall is closed. A picture may appear during basic viewing yet fail at higher resolution, refresh rate, or color depth. Match the cable specification to the connected equipment and test demanding content before concealment. Signal-tested cables prevent the wall from becoming the first suspect whenever the screen flickers.
Hiding every component behind the television can also go too far. Large power adapters, network switches, and gaming devices need ventilation and occasional physical access. A side cabinet with a short concealed run may look nearly as clean while remaining easier to maintain. Practical access often delivers a better long-term result than forcing every device into the narrow space behind the screen.
Inspect The Setup After Regular Fireplace Use
Run the fireplace and television together under normal household conditions after the installation is complete. Check the lower television edge, wall surface, cable exits, and nearby devices for unusual warmth. Repeat the inspection after the room has been heated for a while, since a quick test may not reveal gradual heat buildup. Real-use heat checks provide more useful information than judging the setup while the fireplace is cold.
Listen for buzzing adapters, watch for video dropouts, and notice whether remote signals become unreliable after equipment warms up. These symptoms may point to cramped components, stressed connectors, or a cable route that needs adjustment. Don’t wait for a total failure before opening the mount and checking the rear area. Early troubleshooting limits damage and keeps a small issue from becoming a larger repair.
Tighten accessible mount hardware according to the bracket instructions after the television has settled into place. Don’t overtighten wall-plate screws, masonry anchors, or cable clamps in an attempt to make the setup feel more secure. Excessive pressure can crack plastic boxes, damage drywall, or crush cable jackets. Firm, correctly supported hardware is safer than brute force.
Review the cable layout whenever a new device is installed. Remove unused leads, relabel active connections, and confirm that added power adapters haven’t blocked airflow inside a recessed box or cabinet. Keep the planned service loops intact instead of pulling every cord tight to gain a little space. Regular cable maintenance preserves the clean appearance while keeping the television wall safe, accessible, and ready for future changes.

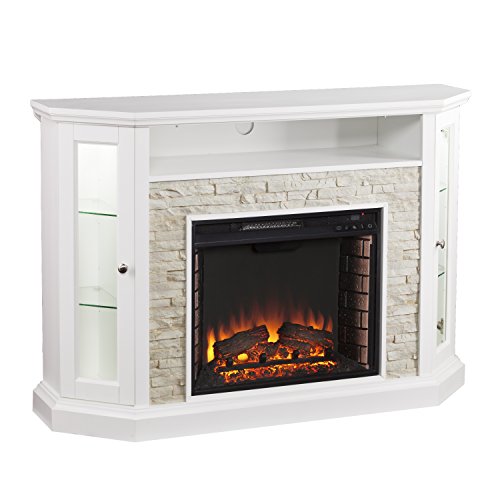
12 Best Corner Electric Fireplace 2026: My Ultimate Guide To Pick One
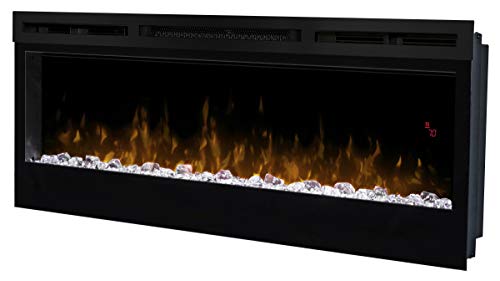
Dimplex Prism Wall Mount Fireplace: Sleek Heat With Modern Flame Style
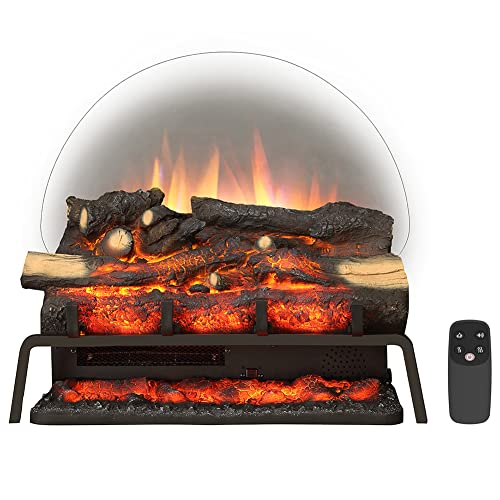
Best Electric Fireplace Insert for Large Room Heating and Style

Best 40 Inch Electric Fireplace Insert 2026 - Cozy Ambiance with Modern Power
Top 12 Best Quality Electric Fireplace 2026 - Buying Guides

Best Wall Mount Electric Fireplace 2026 for Ultimate Comfort and Style

How to Start Monessen Fireplace: A Step-by-Step Guide

How to Whitewash Rock Fireplace: Simple Steps to Refresh Your Space






