How to Install a Gas Fireplace Insert and When to Call a Pro

Start by measuring the height, width, and depth of your existing fireplace opening. Proper dimensions ensure a new unit fits, but sizing is only the first step. Installing a gas fireplace insert involves running flexible vent pipes down the chimney, sliding the metal unit into the hearth, and hooking up utilities. A homeowner can safely prep the space and position the chassis, but connecting the gas line and venting requires a licensed professional to prevent fuel leaks.
The project details depend on your setup. Brick chimneys accept flexible pipes easily, while factory-built metal fireboxes have stricter clearances. A direct-vent system needs two pipes pulled to the roof cap, whereas a vent-free unit skips chimney work. Existing gas and electrical lines near the hearth also save major labor. Here is how the process works from start to finish so you know where a specialist needs to take over.
How Do You Measure Your Fireplace for an Insert?
A gas insert must fit snugly inside your existing firebox (the inner cavity where fires burn). If the chassis is even half an inch too tall or deep, the metal frame will stick out past the hearth. Taking six measurements prevents ordering errors and confirms your hearth meets safety clearances.
Grab a tape measure, a notepad, and a flashlight. Record each dimension to the nearest eighth of an inch:
- Front opening width: Measure across the front opening from left to right at both the top and bottom. Record the smaller number.
- Rear opening width: Most wood fireplaces taper inward toward the back. Measure across the rear brick face, which is often the tightest pinch point.
- Opening height: Measure vertically from the firebox floor to the lowest point of the opening or steel lintel bar.
- Firebox depth: Measure from the front face of the masonry straight back to the rear wall along the floor and near the top.
- Hearth extension: Measure how far your non-combustible floor extends into the room, along with its thickness.
- Clearances to combustibles: Measure the distance from the opening top to your wood mantel, and from the sides to any nearby trim or walls.
Manufacturer manuals specify minimum clearances to mantels and side walls. If your mantel sits closer than listed, you will need a metal deflector hood or a shallower insert.
How Do Vent Pipes Fit Down Your Chimney?
Most modern gas inserts use a direct-vent system. Direct vent means a sealed two-pipe system that draws outside air to feed the flames and vents exhaust safely back outside. Unlike an open wood fire, a direct-vent insert never pulls heated room air up the chimney or pushes drafts into your living room.
These systems require two flue liners (flexible metal vent pipes inside the chimney). One pipe measures three inches across for combustion air, while the other measures three or four inches across for exhaust. Both flexible aluminum or stainless steel pipes run the entire height of your chimney from the roof cap down to the firebox.
Before installing pipes, address your old chimney damper. The damper is the movable metal plate inside the throat of the chimney that closes off drafts. Because the flexible pipes must pass straight through this throat, you must remove the damper plate or lock it open permanently with a steel clamp. For more on how chimney throats operate, see our guide on how to handle a fireplace damper.
Dropping the liners requires two people. One person stands on the roof uncoiling the pipe, while a helper guides the bottom end from inside the hearth. Attaching a rope and rounded pull cone helps guide the flexible pipe past rough masonry ledges without ripping the metal.
At the roof, the liners attach to a chimney termination cap. This metal cap seals the top flue opening with a flashing plate and silicone sealant. It keeps the intake and exhaust separated and stops rain, debris, and animals from entering the chimney.
How Do You Run Gas and Power Lines Safely?
A gas insert needs two utilities: fuel to produce heat and electricity to run the blower fan and controls. Planning these connections before sliding the heavy chassis into place prevents costly mistakes.
For fuel, your installer routes a dedicated gas line into the firebox cavity. In a brick hearth, this involves drilling through the side or rear masonry with a rotary hammer drill. The line supplies either natural gas or propane, matching your unit. Building codes require a manual shut-off valve located near the hearth or behind the lower control panel so you can cut fuel quickly during servicing.
Electricity powers the internal blower fan (the heating vent or blower grille that pushes warm air into your room). It also powers electronic spark ignitions and remote control receivers. The cleanest approach is having an electrician install a standard 120-volt wall outlet inside the lower back corner of the firebox.
Never run an extension cord through masonry walls or beneath the hearth trim. Extension cords can pinch, overheat, or melt against hot sheet metal, creating an immediate fire hazard.
Working with fuel lines and wiring presents serious safety hazards. A loose gas joint can leak vapor into your walls, and faulty wiring creates shock risks. While homeowners can handle measuring and cleaning, hiring a licensed plumber and electrician for the utility connections ensures your system complies with local fire safety codes.
What Are the Steps to Slide In the Insert?
Once your chimney liners, gas line, and electrical outlet are ready, you can position the insert chassis into the opening. Follow these steps in order to avoid scratching surfaces or pinching lines:
- Clean the firebox floor: Sweep away loose soot, mortar chips, and wood ash with a vacuum. Grit left behind will scratch your hearth tiles and prevent the metal base from sitting flat.
- Protect your hearth surface: Lay a thick moving blanket or heavy cardboard across the hearth. The metal insert chassis often weighs over one hundred pounds, and sharp steel edges can chip slate or scratch wood flooring.
- Position the vent collar plate: Many inserts feature a detachable exhaust slide plate on top. Connect your two flexible flue liners to this plate using hose clamps and high-temperature sealant before sliding the appliance into the cavity.
- Slide the chassis halfway in: Move the metal box slowly across your floor protector. Stop halfway into the opening to check that the gas line and power cord are not pinched against sharp corners.
- Engage the vent collar: Push the chassis the rest of the way into the firebox until the top opening aligns with the vent plate. Engage the locking lever or secure the retention screws as directed in the manual.
- Level the unit: Locate the adjustable leveling bolts at each corner of the base. Set a spirit level on top of the chassis. Turn the bolts with a wrench until the unit sits level and stable without rocking.
How Do You Hook Up Gas and Mount the Trim?
With the metal box leveled in place, you are ready for final utility connections, safety checks, and trim installation. Follow these steps carefully:
- Connect the gas supply line: Attach a flexible corrugated stainless steel gas line between the manual shut-off valve and the insert inlet valve. Apply gas-rated pipe sealant or yellow PTFE tape to male pipe threads, but leave flared brass fittings dry and clean.
- Inspect all joints for leaks: Turn on the gas shut-off valve. Brush a generous coat of commercial non-corrosive gas leak detector fluid or thick soapy water over every fitting. Watch each joint closely for several minutes. If growing bubbles appear, turn off the gas, tighten the fitting, and inspect again until the bubbles stop. Never use an open flame to check for fuel leaks.
- Plug in electrical components: Plug the blower fan power cord into the 120-volt outlet inside the cavity. Connect any remote receiver wires or wall switches to the designated terminals on the control module.
- Arrange the burner media: Place the ceramic log set, burner grates, and glowing embers over the burner pan exactly as shown in the manual diagram. Avoid piling embers over the burner ports, which can block airflow and cause soot buildup.
- Mount the surround and draft seal: Stick self-adhesive fiberglass insulation strips along the back perimeter of the surround (the metal trim covering gaps around the unit). This insulation compresses against the rough brick face to seal out cold drafts. Hook the surround panel onto the chassis brackets and secure it with mounting screws.
What Accessories Help You Finish the Installation?
A smooth gas insert installation depends on several key accessories that bridge the gap between an old brick fireplace and a modern heating appliance. Gathering these items before you begin helps prevent air leaks, reduces mechanical noise, and creates a neat, finished look.
Look for these practical installation supplies when planning your project:
- Whistle-free flexible gas lines: Standard corrugated gas lines often create an annoying high-pitched whistling noise as fuel passes through the ridges. Flexible lines built with varied corrugation patterns disrupt internal vibration and keep fuel flow quiet.
- Self-adhesive fiberglass insulation strips: Applying high-density insulation tape behind your metal surround panel creates a tight seal against uneven masonry. This prevents cold outdoor air and chimney odors from seeping into your room.
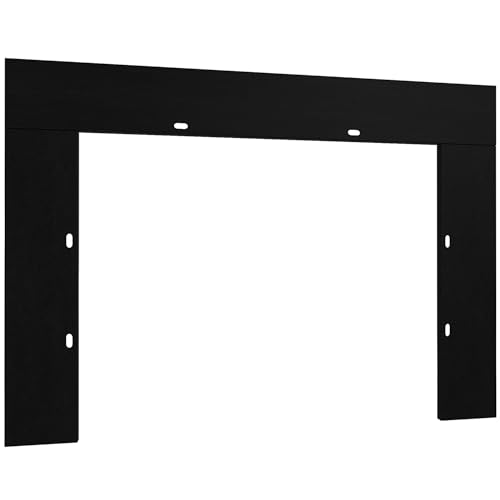
- Properly sized trim kits: Old fireplace openings rarely match standard modern insert dimensions. Three-sided or four-sided metal trim panels overlap oversized gaps and blend the unit into your brickwork.
- High-heat glowing embers: Spreading loose rock wool or mineral vermiculite across the burner ports creates a realistic glowing coal bed beneath the ceramic logs.
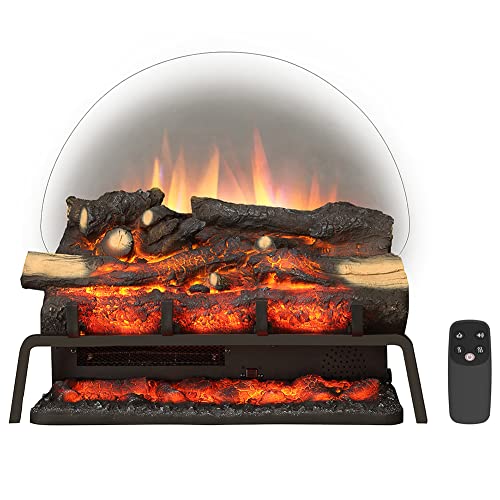
If measuring your chimney reveals tight bends or if running new gas lines through your foundation is too costly, you have alternatives. Many homeowners choose an electric fireplace insert for large room heating instead, which slides into your existing opening and plugs straight into a wall outlet without chimney venting or gas piping.

- BWP Score9.6
BWP Score is a ranking system developed by Bestwinterproducts.com. BWP score has no relationship or impact from any manufacturers or sales agent websites. Learn more
- BrandComfort Glow

- BWP Score9.2
BWP Score is a ranking system developed by Bestwinterproducts.com. BWP score has no relationship or impact from any manufacturers or sales agent websites. Learn more
- BrandGlowing Fireplace Embers

- BWP Score9.2
BWP Score is a ranking system developed by Bestwinterproducts.com. BWP score has no relationship or impact from any manufacturers or sales agent websites. Learn more
- BrandRealFyre

- BWP Score9.0
BWP Score is a ranking system developed by Bestwinterproducts.com. BWP score has no relationship or impact from any manufacturers or sales agent websites. Learn more
- BrandMidwest Hearth
- BWP Score8.8
BWP Score is a ranking system developed by Bestwinterproducts.com. BWP score has no relationship or impact from any manufacturers or sales agent websites. Learn more
- BrandRODALFLAME

- BWP Score8.8
BWP Score is a ranking system developed by Bestwinterproducts.com. BWP score has no relationship or impact from any manufacturers or sales agent websites. Learn more
- BrandGASPRO

- BWP Score8.6
BWP Score is a ranking system developed by Bestwinterproducts.com. BWP score has no relationship or impact from any manufacturers or sales agent websites. Learn more
- BrandRUTLAND PRODUCTS

- BWP Score8.2
BWP Score is a ranking system developed by Bestwinterproducts.com. BWP score has no relationship or impact from any manufacturers or sales agent websites. Learn more
- BrandMidwest Hearth

- BWP Score7.8
BWP Score is a ranking system developed by Bestwinterproducts.com. BWP score has no relationship or impact from any manufacturers or sales agent websites. Learn more
- BrandSkyflame

- BWP Score7.2
BWP Score is a ranking system developed by Bestwinterproducts.com. BWP score has no relationship or impact from any manufacturers or sales agent websites. Learn more
- BrandFrienda
Last update on 2026-10-02 / Affiliate links / Images, Product Titles, and Product Highlights from Amazon Product Advertising API
FAQs
Can I install a gas fireplace insert by myself?
You can handle preparatory jobs like cleaning the firebox, measuring the opening, and attaching the decorative trim surround. However, running gas supply lines, making fuel fittings, and checking combustion pressure should be left to a licensed professional. Most local building codes require certified technicians for gas work to protect your home from fire hazards and ensure insurance coverage.
Do I need an electrical outlet inside the fireplace?
Most modern gas inserts require a standard 120-volt wall outlet to power the convection blower fan and electronic ignition modules. While some models feature battery backups to ignite the flame during power outages, the blower fan needs household electricity to push heated air into your living room. An electrician can install an approved outlet inside the firebox.
What happens to the old damper during installation?
The old chimney damper must be removed or clamped permanently open. Direct-vent inserts run two flexible metal pipes through the chimney throat, and a swinging damper plate could crush or puncture those pipes. Most venting kits include a metal clamp to lock the damper blade open so it can never swing shut against the pipes.
What safety permits and inspections are required?
Most local building departments require a mechanical or plumbing permit before running gas piping or venting through a roof. Once the installation is finished, a municipal inspector reviews the gas pressure, pipe joints, and vent termination clearances to verify the work meets national fuel gas standards. Skipping permits can void your appliance warranty and cause problems when selling your home.


12 Best Corner Electric Fireplace 2026: My Ultimate Guide To Pick One

Dimplex Prism Wall Mount Fireplace: Sleek Heat With Modern Flame Style
Best Electric Fireplace Insert for Large Room Heating and Style

Best 40 Inch Electric Fireplace Insert 2026 - Cozy Ambiance with Modern Power
Top 12 Best Quality Electric Fireplace 2026 - Buying Guides

Best Wall Mount Electric Fireplace 2026 for Ultimate Comfort and Style

How to Start Monessen Fireplace: A Step-by-Step Guide

How to Whitewash Rock Fireplace: Simple Steps to Refresh Your Space