How to Install a Thermocouple on a Gas Fireplace

Unthread the old line and seat the new. After shutting off the gas and letting the firebox cool, unscrew the thin copper line from the main gas block and pull the worn sensor tip from the starter flame bracket. Simply seat the new probe directly in the flame path and hand-tighten the valve nut plus a quarter-turn so your pilot stays lit when you release the knob.
The exact installation changes slightly based on how the tip attaches to the bracket, since some slide into a spring clip while others use a small threaded nut. The length of the copper lead also matters so it reaches the valve without kinks, and the system must use a single-wire heat probe rather than a thicker dual-wire power sensor. Checking these few fittings beforehand makes the fix smooth and keeps your fireplace heating reliably all winter.
A Dying Pilot Usually Means A Failing Heat Sensor
You push the control knob, hear gas hiss, click the igniter, and hold the knob down for thirty seconds. A bright blue flame dances in the burner. The second you lift your thumb, you hear a click, and the fire goes dark. When a gas fireplace pilot will not stay lit, the thermocouple (heat sensor probe) is usually the part that failed.
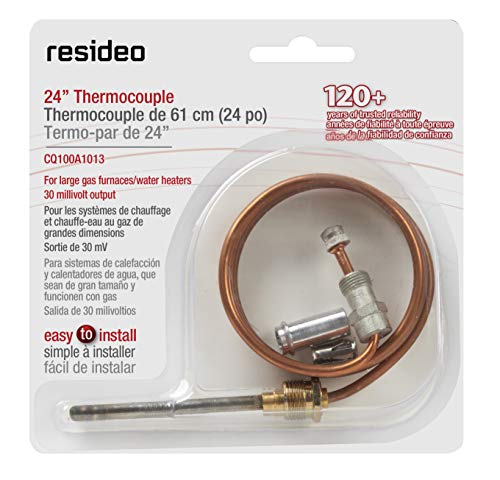
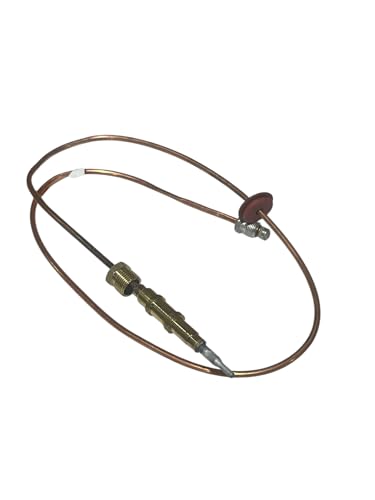
The heat sensor probe is a safety device made from two metals joined at the tip. When the starter flame heats that tip, it generates an electric current of about 30 millivolts. That pulse travels down a copper tube to the main gas block (control valve). Inside that block, a magnetic seal holds the gas port open as long as the current flows. If the flame goes out or the sensor fails, the magnet loses power and snaps the valve shut to keep raw gas from leaking into your home.
Before replacing the probe, check if it is just dirty. Soot or mineral crust can coat the metal probe, insulating the tip from the flame. Clean it by rubbing the tip gently with a scouring pad or steel wool until bare metal shines. If a clean probe still will not hold the pilot, the internal junction has burned out.
Do not confuse a thermocouple with a thermopile (thick dual-wire power sensor). A thermocouple is a slender single copper line that powers only the pilot safety magnet. A thermopile is much thicker, wrapped in a metal or fiberglass sheath with two lead wires. That thicker sensor produces 750 millivolts to power wall switches and main burners. If the pilot stays lit but the main fire will not ignite, the thermopile is at fault. If the pilot dies the moment you release the knob, the thermocouple is the issue.
Turn Off The Gas And Power Before Starting
Working with gas appliances requires calm, careful safety preparation. You do not need to shut off the gas supply for your entire house. Follow these initial safety checks before grabbing your tools:
- Let the unit cool completely: Firebox metal, burner brackets, and glass stay hot for hours. Wait at least one hour after turning off the fireplace before touching any internal parts.
- Shut off the fireplace gas supply: Look inside the lower access panel under the firebox. Find the manual gas shutoff valve on the fuel line. Turn the handle a quarter-turn so it sits perpendicular (at a right angle) to the pipe. This stops fuel flow to the fireplace while leaving other home appliances running.
- Cut electrical power: Your fireplace may have an electric blower fan or electronic switch. Unplug the power cord from the standard 120-volt wall outlet under the fireplace, or switch off the dedicated circuit breaker in your electrical service panel.
- Remove logs and glass carefully: Unlatch the front glass screen and set it on a soft blanket. If you have an older vented unit in an open hearth, review how to close a fireplace damper to stop cold drafts while you work. Take a quick photo of the log set so you remember where every piece sits, then set the logs aside on cardboard.
Unscrew The Valve Nut And Unclip The Old Probe
Once the firebox is cold and the gas is off, you can remove the damaged sensor using basic hand tools. Follow these steps to take out the old part without damaging nearby fittings:
- Locate the valve connection: Look inside the lower cavity below the burner. Trace the thin copper line back from the starter flame bracket (pilot assembly) to the main gas block (control valve). The copper line ends at a small brass nut on the valve body.
- Loosen the brass nut: Place a small open-end wrench (typically 7/16-inch or metric equivalent) onto the brass nut. Turn it counterclockwise to loosen the fitting, then finish unscrewing it by hand. Never yank or twist the copper line while the nut is still engaged in the valve port.
- Identify the bracket mounting style: Look at the starter flame bracket inside the firebox. Fireplace makers secure the probe tip with a snap-in push clip, a bottom locknut, or a friction barrel sleeve.
- Free the sensor tip: If your bracket has a spring clip, slide the clip off with needle-nose pliers and pull the probe down. If the bracket uses a threaded collar, unscrew the locknut from beneath the bracket shelf. Slide the probe tip straight out of its mounting hole.
- Snake the copper tube free: Pull the old sensor tip and copper line down through the firebox floor into the lower access area. Keep the old sensor on hand to compare its length against your replacement lead.
Seat The New Probe And Hand-Tighten The Valve Connection
Installing the new lead requires a gentle touch. Copper tubing is soft, and overtightening fittings can ruin the new part before firing it up.
- Uncoil the copper tube carefully: Remove your replacement heat sensor probe from its box. Slowly unroll the copper lead using both hands in smooth curves. Never bend the copper tube sharply or pinch it with pliers. The tube contains an insulated electrical wire, and a sharp kink will crush the insulation and ruin the circuit.
- Seat the probe in the bracket: Feed the tip of the new probe up through the firebox floor. Slide the sensor tip into the starter flame bracket until it sits at the exact same height as the old one. The upper third of the probe must sit directly in the pilot flame path.
- Lock the tip in place: Secure the probe using your original bracket style. Press the snap clip into the probe groove until it clicks, or thread the mounting nut onto the probe base and tighten it snug. The probe must sit firmly without wobbling.
- Start the brass valve nut by hand: Bring the brass nut at the other end of the copper lead to the port on the main gas block. Line up the nut so it enters straight. Turn the nut clockwise using only your bare fingers. It should turn freely for several rotations. If it binds immediately, stop. Forcing a crooked nut will strip the soft valve threads. Back it out, realign, and restart by hand.
- Tighten one-quarter turn past finger-tight: Once the brass nut is snug by hand, use your wrench to turn it just one-quarter turn clockwise. That is all the force it needs. Overtightening will crush the soft contact tip inside the nut and break the electrical circuit.
Relight The Pilot And Check The Flame Coverage
With the new part in place, you can restore fuel and verify that the sensor holds the safety valve open.
- Turn on the gas valve: Rotate the inline gas shutoff handle so it aligns parallel to the fuel pipe. Wait one minute and sniff near the fittings. If you smell gas, close the valve immediately.
- Purge air from the pilot line: Turn the fireplace control knob from OFF to PILOT. Push the knob down and hold it for 30 seconds so fresh gas clears any trapped air from the line.
- Ignite the flame: While holding the knob down, click the piezo igniter repeatedly until the pilot flame lights. If your fireplace uses manual lighting, hold a long lighter next to the starter nozzle until it catches.
- Warm the new sensor: Keep the control knob pressed down for a full 45 seconds after the flame appears. The new probe needs time to heat up and send its electrical signal to the magnet inside the gas block.
- Release the knob: Slowly let go of the control knob. The blue flame should stay lit. If the flame holds, your installation succeeded.
- Check flame contact: The blue flame should bathe the top 3/8 to 1/2 inch of the probe tip. If the flame barely touches the tip or misses it completely, adjust the probe height in the bracket so the tip sits squarely in the heat.
- Verify the main burner operation: Turn the control knob to ON and flip your fireplace wall switch. The main burner logs should ignite smoothly. Turn the burner off, let the firebox cool, and reinstall your ceramic logs and glass door.
Call A Professional If You Smell Gas Or See Damage
Most thermocouple replacements are simple DIY repairs, but working around gas appliances always carries safety limits. Stop working and call a qualified professional in any of these situations:
- Persistent gas odors: If you smell rotten eggs or natural gas at any point when the pilot flame is off, close the inline gas valve immediately. Leave your home and call your local gas utility or fire department from a safe distance. Never light a flame or flip electrical switches if you smell gas.
- Stripped valve threads: If the brass nut on the new sensor spins without tightening or refuses to thread straight, the threads inside the main gas block may be damaged. Forcing it can create gas leaks. Replacing the gas block requires a licensed gas professional.
- Damaged pilot gas lines: Do not confuse the copper sensor line with the aluminum pilot gas tube. The aluminum tube carries pressurized gas to the starter flame. If that tube is kinked, cracked, or loose, it must be replaced by a technician.
- The pilot still will not stay lit: If you installed a clean, new probe correctly and the flame still dies the second you release the knob, the internal magnetic coil inside the control valve may be broken. A technician will need to check the valve magnet. When gas repairs become frequent on older units, some homeowners choose to switch to an electric firebox insert to get reliable warmth without gas line upkeep.
Choose The Right Sensor Length And Thread Size For Replacement
Finding a matching replacement part before you begin ensures the installation goes smoothly. You do not always need an expensive original part from your fireplace brand, but several key measurements must match:
Check the total length of the copper line. Replacement leads typically come in standard lengths of 24 inches or 36 inches. Measure your original line from the probe tip to the brass nut at the valve. Pick a lead that is slightly longer than your measurement rather than one that is too short. You can easily curve excess copper line in wide loops inside the lower cabinet, but a short lead will stretch tight against hot burner metal and fail early.
Check the mounting style at the burner bracket. If your bracket uses a push-in spring clip, choose a replacement sensor with a smooth barrel collar and retaining clip. If your bracket uses a threaded collar, pick a sensor that comes with a bottom locknut. Universal replacement kits often include multiple adapter nuts and clips to fit various bracket designs.
Match the connection nut to your control valve port. The brass nut at the valve end must match the threads of your main gas block. Residential gas fireplaces commonly use standard imperial threads, while some compact units use metric fittings. A universal kit with adapter nuts makes matching simple, while a brand-specific lead ensures an exact factory fit.
Confirm you are buying a 30-millivolt sensor. Check that the part is a single-lead thermocouple rather than a thick dual-wire power sensor. Standard thermocouples are rated for 30-millivolt pilot circuits, which provides the proper output to keep your safety valve open and your fireplace running reliably.

- BWP Score10.0
BWP Score is a ranking system developed by Bestwinterproducts.com. BWP score has no relationship or impact from any manufacturers or sales agent websites. Learn more
- BrandGnDaYoug

- BWP Score9.2
BWP Score is a ranking system developed by Bestwinterproducts.com. BWP score has no relationship or impact from any manufacturers or sales agent websites. Learn more
- BrandLenox
- BWP Score9.2
BWP Score is a ranking system developed by Bestwinterproducts.com. BWP score has no relationship or impact from any manufacturers or sales agent websites. Learn more
- BrandHoneywell Home

- BWP Score9.2
BWP Score is a ranking system developed by Bestwinterproducts.com. BWP score has no relationship or impact from any manufacturers or sales agent websites. Learn more
- BrandEarth Star

- BWP Score9.0
BWP Score is a ranking system developed by Bestwinterproducts.com. BWP score has no relationship or impact from any manufacturers or sales agent websites. Learn more
- BrandMETER STAR
- BWP Score8.8
BWP Score is a ranking system developed by Bestwinterproducts.com. BWP score has no relationship or impact from any manufacturers or sales agent websites. Learn more
- BrandFixitshop

- BWP Score8.8
BWP Score is a ranking system developed by Bestwinterproducts.com. BWP score has no relationship or impact from any manufacturers or sales agent websites. Learn more
- BrandKBZ

- BWP Score8.8
BWP Score is a ranking system developed by Bestwinterproducts.com. BWP score has no relationship or impact from any manufacturers or sales agent websites. Learn more
- BrandGanivsor
Last update on 2026-10-02 / Affiliate links / Images, Product Titles, and Product Highlights from Amazon Product Advertising API


12 Best Corner Electric Fireplace 2026: My Ultimate Guide To Pick One

Dimplex Prism Wall Mount Fireplace: Sleek Heat With Modern Flame Style
Best Electric Fireplace Insert for Large Room Heating and Style

Best 40 Inch Electric Fireplace Insert 2026 - Cozy Ambiance with Modern Power
Top 12 Best Quality Electric Fireplace 2026 - Buying Guides

Best Wall Mount Electric Fireplace 2026 for Ultimate Comfort and Style

How to Start Monessen Fireplace: A Step-by-Step Guide

How to Whitewash Rock Fireplace: Simple Steps to Refresh Your Space