How to Safely Install an Electric Fireplace Insert

Most people think setting up an electric insert means tearing down walls or hiring an expensive contractor. The truth is much simpler: most projects only require you to slide the firebox into your opening and connect it to a safe power source. Once the space is clean and measured, the physical installation rarely takes more than an afternoon.
The exact process depends on whether you are converting an old brick hearth or building a new drywall cutout from scratch. Existing masonry needs the chimney flue sealed to block cold drafts, while new walls demand precise framing. How you supply electricity also plays a big part, deciding between a standard three-prong wall plug or a dedicated circuit (an electrical line serving only one outlet). Checking whether your heater vents from the front or top keeps surrounding walls and screens completely safe. Taking things step by step makes the entire project smooth and worry-free.
Measuring Opening Depth and Verifying Circuit Power
Before buying an insert or lifting tools, take accurate measurements and check your electrical capacity. Installing an electric fireplace insert is simple, but guessing on firebox dimensions or circuit limits causes most installation headaches.
Use this pre-installation checklist to confirm your hearth and electrical line are ready:
- Measure front and rear opening width: Older masonry fireboxes (the inner brick or metal fire cavity) almost always taper inward toward the back. Measure across the front opening, then reach inside and measure across the back wall. Use the smaller back measurement when checking if an insert will slide in.
- Check opening height across the hearth: Measure from the hearth floor to the top lintel on the left, center, and right. Uneven brickwork can shave half an inch off one side. Base your sizing on the shortest height.
- Measure total usable depth: Pull your tape measure from the back brick wall out to the front opening edge. Account for any raised brick lip or ash drop door that might stop the metal box from resting flat.
- Locate a dedicated circuit: A dedicated circuit is an electrical line serving only one outlet, meaning it does not share a breaker with other power-hungry appliances like microwaves, space heaters, or hair dryers. Check your panel to see which outlets share common breakers.
- Verify circuit breaker amperage: On high heat, an electric fireplace runs at 1,500 watts, drawing around 12.5 amps on a standard 120-volt wall outlet. If your insert shares a 15-amp line with a television, lamps, or room electronics, turning on the heat will likely trip the breaker.
Prepping an Old Brick Fireplace for an Insert
Converting an old wood-burning hearth requires basic cleanup and airflow control. You need a clean, dry, draft-free cavity before sliding your new electric firebox into place.
- Deep clean the brick firebox: Remove old ashes and soot using a wire brush and a shop vacuum with a fine-dust filter. Thorough cleaning keeps the insert heater fan from spreading old soot smells into your living room.
- Seal the chimney damper: The damper is the metal flap inside the chimney that controls airflow. Learn how to close a fireplace damper tightly to block drafts, rain, and debris. If your damper leaks cold air, cut a piece of rigid foam board to plug the flue opening completely.
- Plan the power supply route: Decide how the heavy three-prong plug will reach power. Never run a power cord across your open hearth floor where someone could trip. The safest choice is having a licensed electrician install an outlet inside the firebox or route a line through an ash dump cleanout door. If your model supports hardwiring (connecting wires directly without a plug), an electrician can run conduit directly into the connection box.
Steps to Slide In and Secure Your Electric Fireplace Insert
Once your opening is clean, measured, and wired, the physical installation takes about an afternoon. Follow these numbered steps to position, anchor, and finish your electric insert safely.
- Attach any side brackets or leveling feet while the unit is on the floor.
Reason: Fastening hardware on an open floor gives you full visibility and leverage, whereas tightening side screws inside a tight hearth cavity is nearly impossible.
- Inspect the chassis and plug in the power cord to verify operation.
Reason: Checking that the flame screen lights up and the internal blower turns on while accessible saves you from having to pull a fully anchored unit back out of the wall.
- Position the power cord along your planned exit path.
Reason: Guiding the cord into position before sliding the insert backward prevents the metal housing from pinching or cutting the electrical insulation.
- Slide the firebox insert into the opening with a helper.
Reason: Fireplace inserts often weigh between 30 and 50 pounds, so a two-person lift prevents gouging hearth tiles, scratching brick, or straining your back.
- Check that the unit is level and plumb against the opening face.
Reason: If the firebox sits crooked, the front glass panel can bind during installation, and the unit may tilt forward when you push control buttons.
- Drive mounting screws through the side flanges into your wall studs or masonry.
Reason: Securing the insert firmly in place stops it from shifting when kids touch the controls or when you plug in accessories.
- Place the interior decorative media into the ember bed.
Reason: Arranging your log set or glass crystal bed before mounting the front glass ensures decorative pieces sit stable without rolling against the glass.
- Hang and secure the front cool-touch glass panel.
Reason: The front glass seals the display compartment from household dust, protects the flame motor, and keeps children from touching moving parts.
Covering Perimeter Gaps with Trim Kits
Traditional brick fireplaces were built by hand, so opening dimensions rarely match standard factory appliance sizes. If your electric insert leaves a gap of one to three inches around the edges, do not worry. This gap is normal and easily hidden.
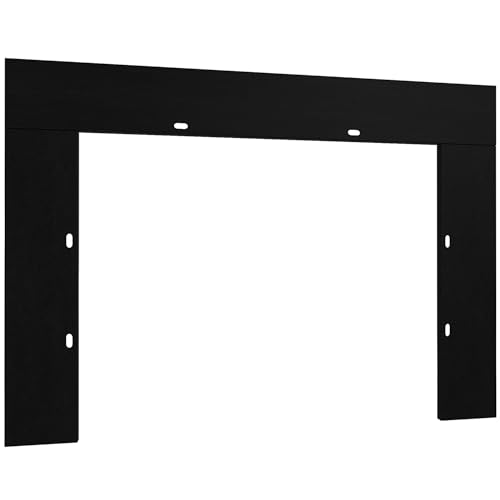
A trim kit is an outer border frame designed to hide gaps between the insert chassis and your rough masonry or drywall opening. Most trim surrounds use three or four metal faceplates that frame the perimeter of the firebox. Some styles snap into place using heavy-duty magnets, while others attach directly to pre-drilled holes on the outer flange with small black screws.
When selecting a trim kit, measure the overall outer span of your fireplace opening, not just the insert dimensions. The trim kit needs to overlap the raw brick edges by at least an inch to create a clean, finished border. Choosing a matte black metal surround that matches your insert creates a seamless look, making the unit appear like a custom, built-in hearth feature.
Clearance Rules and Cord Safety
Electric fireplaces do not produce real combustion flames, but their heating vents generate serious warmth. Basic fan-forced coil heaters produce around 4,600 to 5,200 BTUs of supplemental heat to warm spaces up to 400 square feet, while an electric fireplace insert for large room heating uses an infrared quartz system to warm objects directly across spaces up to 1,000 square feet. Electric fireplaces provide supplemental zone heating to reduce central furnace run-time, not primary whole-home heat. Keeping airflow clear protects your living room from heat damage.
Keep these critical safety clearances in mind as you finish your setup:
- Maintain a 3-foot safety zone: Keep all blankets, drapes, curtains, upholstered chairs, and rugs at least 3 feet (36 inches) away from the front heating vent or blower grille. Blocking heat airflow causes temperatures inside the housing to spike.
- Check TV mounting height: If you mount a television above your electric insert, maintain at least 8 to 12 inches of clearance between the top of the fireplace and the bottom of the TV screen. Front-facing heating vents push warm air into the room, while top-vented models push hot air directly upward. If you have a top-vented heater, install a deep mantel shelf between the fireplace and television to serve as a heat deflector that shields sensitive TV components.
- Avoid extension cords and surge strips: Always plug the heavy three-prong plug directly into a grounded wall receptacle. Never use an extension cord or a power strip. An electric heater pulling 1,500 watts creates continuous current flow that can overheat lightweight cords, melting the plastic jacket and starting a house fire.
- Differentiate cool-touch glass from the heater grille: The large front viewing glass stays cool to the touch, making it safe around pets and toddler fingers. But the metal heater discharge grille right above or below the glass gets hot during operation. Warn family members never to touch the metal grille while the heater runs.
Choosing the Right Fireplace Type for Your Space
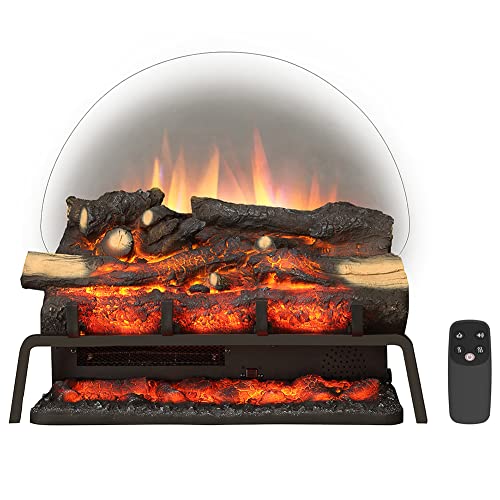
Finding an insert that installs smoothly starts with choosing the right design for your specific opening. If you want to keep the classic look of your existing hearth with minimal effort, an electric log set offers a freestanding alternative that simply rests on your firebox floor. For a sleek, sealed appearance that completely fills the cavity, a self-contained firebox insert is the better path.
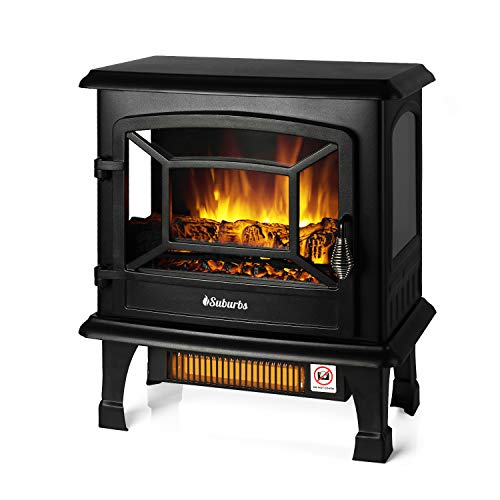
Before purchasing, check the position of the heater blower vents on the unit. For masonry conversions and recessed wall cutouts, choose a model with front-facing heat discharge so warmth flows freely into your living space without building up inside the wall. If you want a dependable unit that blends realistic flame displays with reliable heating capacity, explore options like the best quality electric fireplace designs to find a style that matches your room layout. Confirm that the manufacturer offers matching trim kits to simplify finishing the outer edges.

- BWP Score10.0
BWP Score is a ranking system developed by Bestwinterproducts.com. BWP score has no relationship or impact from any manufacturers or sales agent websites. Learn more
- BrandEliteEdge

- BWP Score9.8
BWP Score is a ranking system developed by Bestwinterproducts.com. BWP score has no relationship or impact from any manufacturers or sales agent websites. Learn more
- BrandPixelora

Tangkula 26”Electric Fireplace Insert, 750W/1500W Recessed Curved Fireplace Heater with
View on Amazon- BWP Score9.6
BWP Score is a ranking system developed by Bestwinterproducts.com. BWP score has no relationship or impact from any manufacturers or sales agent websites. Learn more
- BrandTangkula

- BWP Score9.4
BWP Score is a ranking system developed by Bestwinterproducts.com. BWP score has no relationship or impact from any manufacturers or sales agent websites. Learn more
- BrandLegend Flame

- BWP Score9.0
BWP Score is a ranking system developed by Bestwinterproducts.com. BWP score has no relationship or impact from any manufacturers or sales agent websites. Learn more
- BrandElectactic

- BWP Score9.0
BWP Score is a ranking system developed by Bestwinterproducts.com. BWP score has no relationship or impact from any manufacturers or sales agent websites. Learn more
- BrandElectactic
- BWP Score8.8
BWP Score is a ranking system developed by Bestwinterproducts.com. BWP score has no relationship or impact from any manufacturers or sales agent websites. Learn more
- BrandRODALFLAME

- BWP Score8.8
BWP Score is a ranking system developed by Bestwinterproducts.com. BWP score has no relationship or impact from any manufacturers or sales agent websites. Learn more
- BrandRODALFLAME

- BWP Score8.8
BWP Score is a ranking system developed by Bestwinterproducts.com. BWP score has no relationship or impact from any manufacturers or sales agent websites. Learn more
- BrandRiseon
Last update on 2026-10-02 / Affiliate links / Images, Product Titles, and Product Highlights from Amazon Product Advertising API
FAQs
Do I need to seal my chimney flue before installing an electric insert?
Yes, you should always close and seal your chimney damper before placing an electric insert into a masonry fireplace. An open chimney pulls heated room air out of your home during winter and lets rain, soot, and outdoor drafts blow down onto your electric unit. Sealing the flue protects the internal electronics and keeps your supplemental room heat where you want it.
Can I plug an electric fireplace insert into a standard extension cord?
No, you should never plug an electric fireplace insert into an extension cord or a power strip. Running a 1,500-watt heater on high pulls around 12.5 amps of continuous current, which can quickly overheat thin extension cord wires. That continuous electrical load can melt wire insulation and create a severe fire hazard in your home.
How do I safely run power into an existing brick firebox?
The safest way is to hire a licensed electrician to install a standard 120-volt wall outlet directly inside the rear of your brick firebox or route wiring through an ash cleanout door. If you choose to use an existing wall outlet nearby, never run the power cord across the hearth where it can be stepped on or pinched. An electrician can run surface conduit along the base of the hearth to keep all wiring tidy and code-compliant.
What should I do if the heater stops working while the flame effect still runs?
First, check whether your adjustable thermostat setting is higher than the current room temperature, as the heater will not engage if the room is already warm. Next, inspect the intake vents for accumulated dust or pet hair that may have tripped the internal overheat safety shutoff. If the safety shutoff tripped, unplug the unit for 10 to 15 minutes to let the internal switch reset before plugging it back in.


12 Best Corner Electric Fireplace 2026: My Ultimate Guide To Pick One

Dimplex Prism Wall Mount Fireplace: Sleek Heat With Modern Flame Style
Best Electric Fireplace Insert for Large Room Heating and Style

Best 40 Inch Electric Fireplace Insert 2026 - Cozy Ambiance with Modern Power
Top 12 Best Quality Electric Fireplace 2026 - Buying Guides

Best Wall Mount Electric Fireplace 2026 for Ultimate Comfort and Style

How to Start Monessen Fireplace: A Step-by-Step Guide

How to Whitewash Rock Fireplace: Simple Steps to Refresh Your Space