How to Paint a Tiled Fireplace: A Step-by-Step Guide
Transforming your tiled fireplace into a stunning centerpiece doesn’t have to be a daunting task. Whether you’re looking to update its look or give your home a fresh, modern vibe, painting your tiled fireplace can be the perfect solution. This comprehensive guide walks you through the essential steps and tips for achieving professional-looking results with ease. You'll learn about the tools and materials you need, the prep work that’s crucial for smooth application, and the painting techniques that make all the difference. Plus, we’ll cover the types of paint that work best with tile surfaces, ensuring a durable, long-lasting finish. Whether you're a DIY novice or an experienced homeowner, this guide will help you achieve a flawless paint job without any hassle. Don’t let the thought of a tiled fireplace hold you back from creating the cozy, modern ambiance you desire. Ready to take on the project? Let's dive into this simple and rewarding home improvement task.
If your tiled fireplace is feeling outdated or just isn’t the focal point you want in your living room, it might be time for a change. The great news is that painting a tiled fireplace is a surprisingly simple process that can make a dramatic difference in the aesthetic of your home. No need to hire expensive professionals, by following the right steps, you can give your fireplace a fresh look that aligns with your style. In this guide, we’ll break down everything you need to know, from selecting the right paint to prepping the surface for a smooth finish. By the end of this article, you’ll have the confidence and knowledge to tackle this project on your own, transforming your fireplace into a gorgeous centerpiece that complements the rest of your home décor. Whether you’re aiming for a chic, modern look or a more traditional feel, this guide has got you covered with all the tools and tips to make your tiled fireplace painting project a success.
Before you grab your paintbrush and start on your tiled fireplace makeover, it's crucial to do some prep work. Proper preparation will ensure a smoother finish and a more durable result. Start by cleaning the surface thoroughly. Grime, grease, and soot can interfere with the paint’s adhesion, so be sure to scrub the tiles well with a mixture of water and a mild detergent. You can use a stiff brush for better scrubbing, especially if your tiles have grooves.
Once the tiles are clean, it’s time to repair any imperfections. Cracked or chipped tiles should be patched with tile filler or caulk to create an even surface. Sanding the tiles is another essential step, roughen the surface slightly to help the paint adhere better. Many people overlook this, but without it, you may end up with uneven coverage that chips off after just a few months. If your tiles are particularly glossy, consider using a bonding primer that’s specifically designed for glossy surfaces. This step will make sure your paint sticks and lasts long-term.
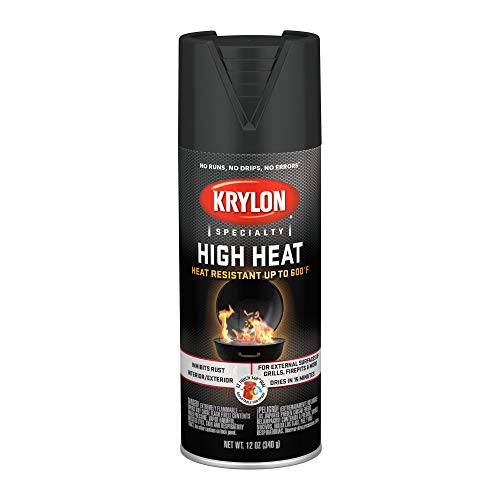
Not all paints are created equal, and when it comes to your tiled fireplace, choosing the right paint can make all the difference. You’ll want to go for a high-heat-resistant paint, particularly if your fireplace is regularly used. Heat-resistant paints are formulated to withstand the high temperatures that come from a working fireplace, ensuring that the color doesn’t fade or peel away.
Opting for an epoxy paint can be a great choice for tiled surfaces. This type of paint offers durability and resistance to heat, moisture, and even occasional splashes. Epoxy paint creates a strong bond with the surface and resists chipping and scratching over time. For a more matte or satin finish, consider acrylic latex paint, which is also durable and heat-resistant, but may require more frequent touch-ups compared to epoxy.
Color choice is another important factor. If you're aiming for a modern look, black or charcoal gray are popular choices that complement many contemporary living spaces. If you’re after a more rustic feel, earthy tones like taupe, warm beige, or terracotta work wonderfully with traditional fireplace designs. Keep in mind that lighter shades may require more coats for complete coverage, especially on darker tiles.

Painting a tiled fireplace requires more than just paint. The right tools and supplies are essential to achieve a professional finish. First, you’ll need a high-quality paintbrush or a foam roller. For a more detailed finish on grout lines or textured tiles, a smaller brush will work better. For larger, flatter areas, a roller will help cover the surface faster and with a smoother finish. Don't forget painter’s tape to protect any areas around the tiles you don’t want to paint, such as the mantle, walls, or surrounding decor.
A drop cloth is a must to protect the floor from paint splashes. Paint trays, sponges, and a bucket of warm water are also useful for cleaning your tools during the job. If you’re using epoxy paint, be sure to wear gloves and work in a well-ventilated area, as the fumes can be strong. A primer for bonding and a sealant to protect the paint after it’s dried will complete your toolbox.
By having all the proper tools on hand before you begin, you’ll make the entire painting process smoother and more efficient. Always use quality products, whether it’s the brush, the paint, or the primer, to ensure your fireplace looks great and lasts for years to come.
Once your tiled fireplace is prepped and your tools are ready, it's time to apply the paint. The process can be broken down into several key steps to ensure the best possible results. First, apply a thin coat of bonding primer to the surface, focusing on areas with heavy grout lines or glossy tiles. Let the primer dry completely, this step is crucial for good adhesion and a smooth finish.
After the primer has dried, apply your paint using even strokes, working in manageable sections. Start at the top of the fireplace and work your way down to avoid drips. It’s better to apply multiple thin layers of paint than one thick layer, as thick layers may result in an uneven finish. Allow each coat to dry thoroughly before applying the next, this ensures better coverage and a flawless finish. If you notice any areas where the paint has pooled or dripped, gently sand those areas before applying additional coats.
For textured tiles, a foam roller might be more efficient, as it will help cover the surface without getting caught in the grooves. Be sure to follow the paint manufacturer’s recommended drying time between coats to ensure proper curing.
After you’ve applied your last coat of paint and allowed it to dry, you’ll want to protect your work with a clear sealer. This step is crucial for ensuring the durability of your paint job. A matte or satin finish sealer will give your fireplace a smooth, professional look while protecting it from heat, moisture, and stains.
Apply the sealer evenly with a brush or roller, taking care to avoid applying too much in one spot. Let it dry completely, and consider adding a second layer for extra protection. This will ensure that your painted tiled fireplace looks fresh and beautiful for many years to come.
Once you've completed the painting of your tiled fireplace, it's essential to keep it looking great for years to come. Maintenance doesn't require much effort, but regular care is key to preserving the color and finish. Start by dusting the fireplace regularly with a soft cloth or microfiber duster to keep dirt from accumulating. Dirt and dust can cause your paint to look dull over time, so it’s important to stay on top of cleaning.

When cleaning the fireplace, use a gentle solution of warm water and mild soap. Avoid harsh chemicals or abrasive cleaners, as they can damage the paint. If there are any stubborn stains, you can use a non-abrasive cleaner or a mild scrub brush. For tougher spots, try applying a small amount of baking soda to the area, then gently scrubbing with a soft sponge.
Be sure to avoid using excessive moisture, as it can damage the painted surface. For the grout lines, if you find they’re starting to discolor or wear, consider using a grout sealer to protect them. This extra step will help maintain the fresh look of the grout and prevent staining over time.
Despite your best efforts, chips or peeling paint can sometimes occur over time, especially in high-traffic areas. Don’t worry, fixing minor imperfections is a relatively simple task. The key is to catch any issues early before they become larger problems.
To fix chipped paint on your tiled fireplace, gently sand the affected area to smooth out any rough edges. Then, apply a small amount of primer to the area, followed by your selected paint color. Once the paint is dry, apply a clear sealer over the patch to blend it in with the rest of the fireplace. If necessary, lightly sand the edges to ensure the patch blends seamlessly with the surrounding paint.
For peeling paint, it’s important to understand why it occurred in the first place. Most often, peeling happens due to improper surface preparation or moisture buildup. If you notice peeling, take a moment to inspect the area. If moisture is the culprit, ensure the area is dry before you repaint. For larger peeling areas, you may need to re-sand, prime, and re-paint the entire section to achieve a consistent finish.
While a painted tiled fireplace is beautiful on its own, you can elevate its look with a few decorative touches. Adding small accents like decorative tiles or metal inserts can give your fireplace a more personalized and unique feel. Consider adding a few mosaic tiles around the edges or as a border to create a stunning contrast with the painted surface.
You can also experiment with different finishes. For example, if you’ve chosen a matte paint for the tiles, consider adding a metallic accent to the grout lines to give the fireplace a subtle shine. Another option is to paint the mantle or other surrounding elements to match the color scheme of your fireplace, tying the look together cohesively.
Additionally, adding a tile stencil design can be a fun and creative way to bring personality to the space. These stencils can be used to create intricate patterns or geometric shapes on the tiles, enhancing the overall aesthetic of your painted fireplace. Remember, the goal is to make your tiled fireplace a statement piece in your home, so don’t be afraid to get creative with your decor.
While your painted tiled fireplace should last for many years with proper care, there may come a time when it needs a fresh coat of paint. Over time, exposure to heat, moisture, and regular use can cause the paint to fade, chip, or become worn. You’ll know it’s time to repaint if you notice uneven discoloration, cracked paint, or if the finish starts to lose its sheen.
Before you start the process of repainting, be sure to inspect the tiles and grout. If any tiles are cracked or damaged, it might be a good idea to replace them before you paint. Similarly, if the grout has become discolored or worn down, you may want to re-grout the area before starting the paint job again.
When you’re ready to repaint, follow the same preparation process you used for the initial paint job. Clean the surface thoroughly, sand any rough patches, and apply a new layer of bonding primer. Fresh coats of paint will make your tiled fireplace look like new again, breathing new life into your home’s focal point.


How to Start Monessen Fireplace: A Step-by-Step Guide

How to Whitewash Rock Fireplace: Simple Steps to Refresh Your Space

How to Make a Cardboard Fireplace: Easy & Creative Ideas

Unleash the Secrets of Cleaning a Gas Fireplace Burner

Unleashing the Charm: Restoring a Fireplace in Easy Steps

Unlock the Art of Crafting Your Own Gas Fire Pit

Ignite Warmth: Your Guide to Creating a Water Vapor Fireplace

Dynasty Electric Fireplace 2026 Top Picks For Cozy Living