
How to Remove a Fireplace Insert Without Damage

How to remove a fireplace insert sounds straightforward until the first stubborn screw refuses to move or the insert barely shifts after every visible fastener has been removed. Plenty of homeowners expect a quick afternoon project, then realize the unit weighs far more than expected and may still be connected to venting, gas lines, electrical wiring, or hidden brackets. That surprise can turn a simple plan into an exhausting job. A little preparation changes everything and helps avoid unnecessary frustration before the real work even begins.
Every fireplace setup tells a slightly different story, so taking a careful look before grabbing tools is worth every minute. Safety should stay at the center of every step because rushing often leads to scratched flooring, damaged masonry, bent vent pipes, or expensive repairs that could have been avoided. Knowing whether the insert burns wood, gas, or electricity shapes the removal process from the very beginning. Small details hidden around the surround or inside the firebox usually explain why an insert refuses to slide forward.
Weight catches many people off guard. Even compact inserts can weigh hundreds of pounds, making lifting alone risky for both the equipment and your back. Proper lifting techniques, furniture sliders, moving blankets, and a helping hand reduce unnecessary strain while protecting nearby surfaces. Taking the time to organize the workspace also creates enough room to maneuver without bumping into walls or the hearth.
Dust, soot, and years of accumulated debris often appear once the insert begins moving. That's perfectly normal, although it surprises plenty of people who expected a cleaner project. Keeping a vacuum designed for fine ash nearby and covering nearby furniture makes cleanup much easier afterward. Bit by bit, the entire process becomes more manageable instead of overwhelming.
Removing an insert isn't only about getting it out of the fireplace. It's also an opportunity to inspect the chimney cavity, surrounding masonry, insulation, venting components, and structural condition before installing something new or restoring the original fireplace. Careful planning pays off long after the insert has been removed because hidden issues become easier to address while everything is accessible. A steady pace almost always produces better results than trying to force heavy equipment out too quickly.

- BWP Score9.2
BWP Score is a ranking system developed by Bestwinterproducts.com. BWP score has no relationship or impact from any manufacturers or sales agent websites. Learn more
- BrandRUTLAND PRODUCTS

- BWP Score9.2
BWP Score is a ranking system developed by Bestwinterproducts.com. BWP score has no relationship or impact from any manufacturers or sales agent websites. Learn more
- BrandCreosote Sweeping Log

- BWP Score9.2
BWP Score is a ranking system developed by Bestwinterproducts.com. BWP score has no relationship or impact from any manufacturers or sales agent websites. Learn more
- BrandMidwest Hearth
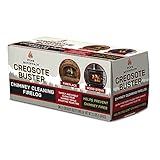
- BWP Score9.0
BWP Score is a ranking system developed by Bestwinterproducts.com. BWP score has no relationship or impact from any manufacturers or sales agent websites. Learn more
- BrandPine Mountain

- BWP Score9.0
BWP Score is a ranking system developed by Bestwinterproducts.com. BWP score has no relationship or impact from any manufacturers or sales agent websites. Learn more
- BrandCO-MATE

- BWP Score8.6
BWP Score is a ranking system developed by Bestwinterproducts.com. BWP score has no relationship or impact from any manufacturers or sales agent websites. Learn more
- BrandMEECO'S RED DEVIL

- BWP Score8.2
BWP Score is a ranking system developed by Bestwinterproducts.com. BWP score has no relationship or impact from any manufacturers or sales agent websites. Learn more
- BrandRUTLAND PRODUCTS

- BWP Score8.0
BWP Score is a ranking system developed by Bestwinterproducts.com. BWP score has no relationship or impact from any manufacturers or sales agent websites. Learn more
- BrandQuick 'n Brite
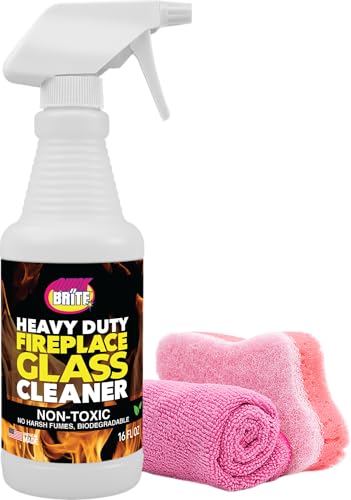
- BWP Score8.0
BWP Score is a ranking system developed by Bestwinterproducts.com. BWP score has no relationship or impact from any manufacturers or sales agent websites. Learn more
- BrandQuick 'n Brite

- BWP Score7.8
BWP Score is a ranking system developed by Bestwinterproducts.com. BWP score has no relationship or impact from any manufacturers or sales agent websites. Learn more
- BrandEROSMILE
Last update on 2026-07-30 / Affiliate links / Images, Product Titles, and Product Highlights from Amazon Product Advertising API
How To Remove A Fireplace Insert
Old fireplace inserts rarely slide out as easily as people expect. Hidden brackets, years of soot, heavy steel construction, and forgotten utility connections can quickly turn an exciting renovation into a stressful afternoon. That's exactly why how to remove a fireplace insert deserves a careful approach instead of brute force. A little planning protects your home, reduces unnecessary repairs, and makes the entire project feel much more manageable from the very first step.
Prepare The Fireplace Before Anything Moves
Every successful removal begins long before the insert actually moves. Preparation gives you a chance to spot obstacles that could easily be missed during a rushed project. Dust sheets, moving blankets, gloves, safety glasses, and proper lighting make the workspace safer while protecting nearby flooring and furniture. Spending fifteen extra minutes preparing often saves hours of frustration later.
Start by identifying exactly what type of insert sits inside the fireplace. A gas insert, wood-burning insert, and electric insert all connect differently, so assuming they're installed the same way creates unnecessary problems. Open the lower access panel if available and inspect every visible connection before reaching for a wrench. Taking photos from several angles also helps during reinstallation or replacement.
Clear the hearth completely before beginning. Decorative tools, fireplace screens, logs, ash buckets, and nearby furniture only create obstacles once the insert starts moving. A clean workspace also reduces the chance of tripping while handling several hundred pounds of steel. Even experienced installers avoid clutter because heavy lifting leaves little room for mistakes.
Keep realistic expectations about the weight involved. Many inserts weigh between 150 and well over 400 pounds depending on construction and fuel type. Never assume you can lift one alone, even if it appears compact from the front. Extra hands, furniture dollies, and lifting straps can make the difference between a smooth project and an unexpected injury.
Identify Every Connection Before Removal
The insert should never move until every connection has been verified. Electrical cords may hide behind trim panels, while gas lines often disappear beneath decorative surrounds. Disconnecting utilities safely prevents expensive damage and reduces unnecessary risks before the heavy work begins. Patience pays off during this stage.
Gas inserts deserve extra attention because the supply valve must be fully closed before disconnecting anything. If the smell of gas appears at any point, stop immediately and investigate before continuing. Safety always outweighs speed. There's absolutely no prize for finishing faster if something doesn't seem right.
Wood-burning inserts usually connect to a stainless chimney liner hidden above the firebox. That liner often includes brackets or locking screws that prevent the insert from sliding forward. Inspecting the flue connection first eliminates plenty of confusion once removal begins. Missing one hidden fastener can leave the insert feeling permanently stuck.
Electric fireplace inserts tend to look simpler, yet they can still surprise homeowners. Some models plug into nearby outlets while others connect directly to household wiring behind the unit. Turning off the proper breaker before disconnecting wiring keeps the project much safer. Double-checking electrical power with a tester is always worthwhile.
Gather The Right Tools Before Heavy Lifting
The right equipment removes guesswork from the project. Basic hand tools usually include socket sets, adjustable wrenches, screwdrivers, pry bars, flashlights, and utility knives. Protective equipment deserves equal attention because sharp sheet metal edges can easily cause cuts during removal. Good gloves improve grip while protecting your hands.
Furniture sliders often become the unsung hero of fireplace removal. Sliding hundreds of pounds across hardwood flooring becomes much easier without scratching finished surfaces. Thick plywood sheets also create temporary pathways that distribute weight more evenly. Small preparations like these reduce unnecessary stress once the insert begins moving.
Vacuums designed for ash or fine dust simplify cleanup considerably. Years of soot commonly collect behind inserts where regular household cleaning never reaches. Dust control keeps the rest of the room cleaner while improving visibility around mounting hardware. Nobody enjoys breathing airborne ash throughout the project.
Don't overlook simple measuring tools either. Measuring door openings, hallway widths, and staircases before moving the insert prevents frustrating surprises halfway through the job. Large inserts sometimes require removing doors or changing the removal angle. Planning the exit route first saves considerable effort.
Remove Trim Panels And Hidden Fasteners Carefully
Decorative surrounds often hide the hardware securing the insert to the fireplace. Metal trim pieces may snap into place while others rely on screws tucked into corners that aren't immediately obvious. Removing trim without bending it helps preserve parts that may be reused later. Gentle pressure almost always works better than forcing components apart.
Look carefully inside the firebox for anchor brackets attached to masonry or steel framing. Manufacturers frequently conceal these mounting points to improve appearance after installation. Missing just one bracket can make the insert seem permanently attached. Slow inspection usually solves the mystery before unnecessary force enters the picture.
Years of heat cycles sometimes leave screws seized in place. Penetrating oil and a little patience normally free stubborn fasteners without stripping the heads. Avoid oversized pry bars until every mounting point has been confirmed. Protecting the fireplace surround now prevents cosmetic repairs later.
If you're also planning a fresh electric upgrade afterward, explore best led fireplace insert options before shopping so measurements and installation requirements stay consistent with the opening left behind. Choosing dimensions early helps avoid ordering an insert that requires unnecessary structural changes.
Slide The Fireplace Insert Out Safely
Once every connection and fastener has been removed, the insert should begin moving gradually instead of suddenly. Gentle rocking often breaks years of accumulated dust and minor corrosion around the base. Controlled movement protects flooring while reducing stress on anyone helping with the lift. Slow progress is completely normal.
One person should guide each side whenever possible. Clear communication prevents awkward twisting that could damage both the insert and the fireplace opening. Heavy steel shifts quickly once momentum starts, making teamwork far safer than individual effort. Small coordinated movements work much better than one large pull.
Furniture dollies make transportation dramatically easier after the insert clears the hearth. Thick moving blankets protect finished surfaces while creating extra grip beneath the unit. Balanced lifting reduces strain on backs, shoulders, and knees throughout the process. Taking short pauses is far better than rushing through fatigue.
If replacing the insert with decorative alternatives instead of another heating appliance, compare best electric fireplace logs before finishing the renovation. That comparison may influence how much cleanup or modification is worth completing before the next installation begins.
Safely Removing A Fireplace Insert Step By Step
Reaching this stage means the insert is finally out of the fireplace, but the work isn't finished yet. A little extra attention now helps avoid expensive surprises before another appliance or decorative feature takes its place. Careful inspection, proper cleanup, and thoughtful planning keep the fireplace in good condition while making the next project much easier. Skipping these details often creates more work than the actual removal.
Inspect The Fireplace Opening Before Installing Anything Else
The empty fireplace reveals areas that haven't been visible for years. Loose mortar, cracked firebrick, rust stains, or damaged insulation become much easier to spot with the insert removed. Inspect every surface carefully instead of assuming everything remains in good condition. Small repairs now are usually simpler than fixing hidden damage after another insert goes back inside.
Look closely around the chimney opening where vent components previously connected. A detached bracket or worn seal may not have caused noticeable problems before, yet replacing worn parts now helps prevent future headaches. Structural stability matters just as much as appearance. Even minor issues deserve attention before covering them again.
Use a flashlight to inspect corners and the back wall of the firebox. Soot buildup often hides small cracks that remain invisible during normal fireplace use. A careful inspection provides peace of mind before spending money on replacement equipment. Rushing through this step rarely

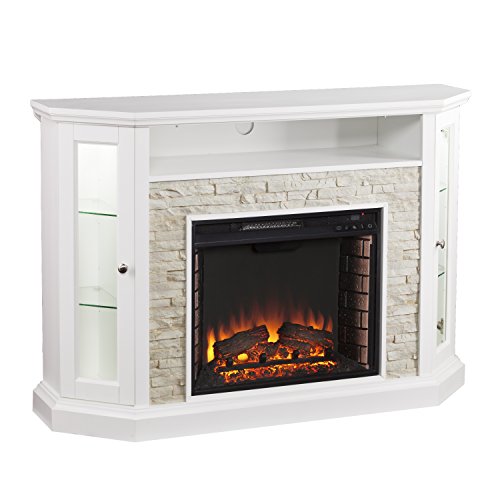
12 Best Corner Electric Fireplace 2026: My Ultimate Guide To Pick One
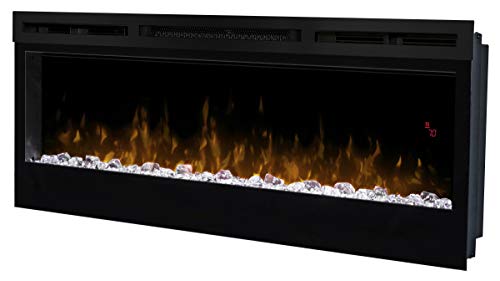
Dimplex Prism Wall Mount Fireplace: Sleek Heat With Modern Flame Style
Best Electric Fireplace Insert for Large Room Heating and Style

Best 40 Inch Electric Fireplace Insert 2026 - Cozy Ambiance with Modern Power
Top 12 Best Quality Electric Fireplace 2026 - Buying Guides

Best Wall Mount Electric Fireplace 2026 for Ultimate Comfort and Style

How to Start Monessen Fireplace: A Step-by-Step Guide

How to Whitewash Rock Fireplace: Simple Steps to Refresh Your Space






