
How to Replace the Anode Rod in a Rheem Water Heater

Shut off the power switch or gas valve and close the cold water valve right away. Cutting the heat and incoming water prevents accidental scalding while working near the tank top. Next, drain two gallons from the bottom spigot, unscrew the hex bolt on top using a 1-1/16-inch socket, and thread in a fresh rod sealed with plumber tape before refilling the tank completely.
A few home conditions change how this job goes. Low basement ceilings leave little clearance to pull out a straight four-foot rod, which means using a flexible folding rod instead. Mineral build-up can also cement the old bolt in place, and sulfur odors might push you toward an aluminum-zinc metal rather than standard magnesium. Here is how to loosen that stubborn fitting safely without twisting any pipes.
Gathering the Right Tools and Safety Gear
An anode rod (a sacrificial metal rod protecting the steel tank from rust) draws corrosive minerals away from the steel walls inside your water heater. Over time, this metal rod slowly dissolves so your tank does not rust through. Replacing this sacrificial part every few years extends the lifespan of your water heater and prevents costly tank leaks.
Gather these specific tools before touching any valves to ensure a smooth, safe replacement:
- A 1-1/16-inch deep socket to fit squarely over the hex head (the six-sided bolt top located on top of the tank).
- A 1/2-inch drive breaker bar (an extra-long wrench handle used for heavy leverage) measuring at least 18 inches.
- A standard garden hose to connect to the lower drain valve.
- A roll of white plumber tape (PTFE tape that seals threaded pipe joints) to create a watertight thread seal.
- A flathead screwdriver to pry off plastic access caps on the top casing.
- Heavy leather work gloves and protective eye goggles.
Using the exact socket size is critical. An adjustable wrench slips easily under heavy pressure, rounding off the bolt corners and creating a difficult repair. If your water heater sits in an unheated utility garage, you might already use the best electric heater for garage with thermostat to keep surrounding plumbing lines from freezing. Make sure the area around your heater is dry, level, and well-lit before starting.
Shutting Down Power and Relieving Tank Pressure
Never remove an anode rod while your water heater is hot and under pressure. Household water lines push 50 to 80 pounds of pressure per square inch into the vessel. Loosening the hex head on a pressurized tank causes scalding water to spray around the threads, creating a burn hazard and soaking electrical parts.
Turn off the energy source first. For an electric Rheem unit, switch off the dedicated double-pole breaker in your main panel. For a gas unit, turn the control knob on the lower gas valve to "VACATION" or "OFF". If an electric water heater stays powered while draining, the upper heating element will burn out in seconds once exposed to air.
Next, close the cold water supply valve on top of the tank by turning the handle clockwise or rotating the lever ninety degrees. Then walk to a nearby sink and open a hot water tap completely. Leave this faucet open while you work to relieve internal pressure and break the vacuum.
Finally, attach your garden hose to the bottom drain valve and run it to a drain or outside. Open the valve, let two to four gallons flow out, then close it tightly. Do not empty the entire tank. The remaining water weighs hundreds of pounds, anchoring the water heater to the floor so it does not spin when you apply torque.
Loosening a Seized Hex Head Without Twisting Plumbing
Factory machinery tightens water heater fittings with immense force, and heat cycles cause mineral deposits to lock the threads together. Loosening this connection is the most demanding part of the job. If you yank on a wrench without supporting the tank, the whole cylinder can spin on the floor. A twisting water heater can snap copper water lines or crack rigid gas pipes, creating serious leaks.
Locate the hex head on top of your Rheem unit. The bolt sits inside a circular opening on the top jacket, sometimes hidden under a decorative plastic cap. If present, pry the plastic plug off with a flathead screwdriver and push aside any loose foam insulation to expose the bolt head.
Press your 1-1/16-inch deep socket firmly over the hex head. Make sure the socket sits flat against the base of the bolt so it cannot tilt. Connect your breaker bar and position the handle horizontally. Brace yourself against the tank to counter the rotational force, or have a helper hold the tank steady.
Pull the breaker bar handle with sudden, sharp pulses rather than a slow, steady lean. These rapid bursts of force break the corroded thread bond without twisting the tank. If the bolt refuses to move, spray penetrating oil around the base of the bolt and wait twenty minutes. Tap the socket lightly with a rubber mallet to help the oil penetrate the threads. Never use a torch near the top of the tank, because internal foam insulation is flammable.
Removing the Rod Under Low Ceilings and Installing the Replacement
Once the seized threads break free, disconnect the breaker bar and use a standard ratchet wrench or your fingers to spin the bolt counterclockwise until it disengages completely. You may notice a tiny hiss of air or a few drops of water surface around the collar, which is normal.
Begin lifting the rod straight up out of the opening. In rooms with tall ceilings, the rod pulls out cleanly in one piece. In finished basements, crawlspaces, or utility closets with low ceilings, however, a straight 30-inch to 44-inch metal rod will bump into ceiling joists before the bottom clears the tank.
If the rod hits your ceiling, lift it as high as possible and clamp locking pliers around the rod right above the tank opening to keep it from sliding back down. Wearing leather work gloves, grab the top of the rod and bend the soft metal downward toward the floor. Release the clamp, pull up another foot, re-clamp, and bend another section. You can also cut exposed sections with a hacksaw until the rod is free.
Examine the old rod to see how much metal remains. A functioning rod looks chewed up and coated in white mineral crust. If the sacrificial metal has completely dissolved down to the thin steel wire core, the rod was past its lifespan and your tank was operating without protection.
Wipe loose sediment from the tank threads with a rag. Wrap the male threads of your new rod with four to six wraps of white plumber tape in a clockwise direction. Lower the rod into the tank opening. If working with low ceilings, a flexible segmented rod bends at each joint so you can feed it down easily. Thread the bolt by hand for two or three turns to prevent cross-threading before tightening it firmly with your ratchet.
Refill the system before restoring power. Keep your indoor hot water faucet open and slowly reopen the cold water supply valve. Water will rush in, pushing trapped air through the open faucet with loud sputtering sounds. Once a solid stream of water flows without air bursts, turn that indoor faucet off.
Check the base of the new hex bolt for moisture or slow weeping. If you see water, tighten the bolt another eighth of a turn. Once the fitting is dry and the tank is full, turn the circuit breaker back on or rotate your gas dial back to ON.
What to Look for in a Replacement Anode Rod
Choosing the correct replacement rod comes down to your ceiling clearance, water chemistry, and thread dimensions. Selecting the right design ensures an easy installation and long-term protection for your water heater tank.
Evaluate your water supply to choose between magnesium and aluminum-zinc alloys. Magnesium provides the strongest defense for steel tanks in normal city water. But if your home uses well water with high sulfur levels, magnesium reacts with bacteria to generate hydrogen sulfide gas, causing a rotten-egg odor in hot water. In that situation, an aluminum-zinc alloy rod is the right choice because zinc suppresses bacterial growth and stops odors while still protecting the tank.
Next, measure overhead clearance. If the distance from the top of the tank to the ceiling is less than the rod length, a rigid rod will not fit into the space. You must choose a flexible, segmented rod instead. Flexible rods use metal segments linked by internal stainless steel wire, feeding smoothly past ceiling obstructions. Water heaters in manufactured homes often face similar tight closet spaces, just as finding an appropriate heater for mobile home setups requires verifying compact clearances.
Finally, verify thread compatibility and socket size. Residential Rheem water heaters commonly take standard 3/4-inch pipe threads on the anode port and feature a standard 1-1/16-inch hex head. Confirming these dimensions on your unit before ordering ensures your tools fit and your installation goes smoothly without leaking.
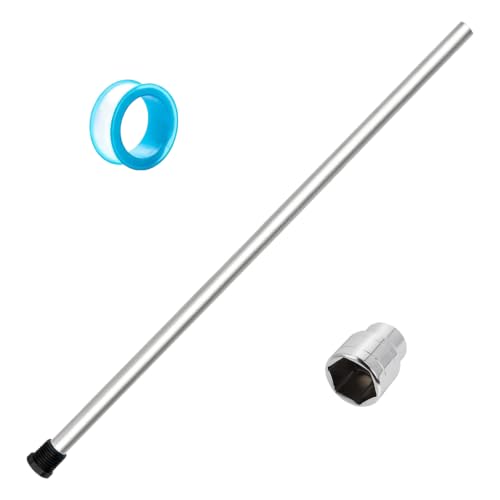
- BWP Score9.5
BWP Score is a ranking system developed by Bestwinterproducts.com. BWP score has no relationship or impact from any manufacturers or sales agent websites. Learn more
- BrandXuanze
Last update on 2026-10-12 / Affiliate links / Images, Product Titles, and Product Highlights from Amazon Product Advertising API
Frequently Asked Questions
Where is the anode rod located on a Rheem water heater?
On most residential Rheem models, the hex head sits on top of the tank, slightly off-center from the water pipes. You will see a six-sided bolt head resting in a slight recess on the outer jacket, sometimes hidden under a plastic plug. On select compact models, the rod is built into the hot water outlet pipe as an anode nipple, which you can confirm on your unit's connection diagram.
How often should you inspect or replace the anode rod in a Rheem heater?
Inspect your anode rod every three to four years under normal water conditions. If your home uses a water softener, check it every two years because softened water consumes sacrificial metal much faster. Replace the rod whenever more than six inches of the inner steel core wire is exposed or when thick crust coats the metal.
Can you use an impact wrench to loosen a stuck water heater anode rod?
You can use an impact wrench if a standard breaker bar fails to loosen the bolt, but you must be careful. The rapid hammering action of an impact wrench breaks seized threads effectively without spinning the water heater tank. However, excessive torque from an overly powerful tool can strip the welded bung on top of the tank or fracture the internal glass lining, so keep power settings low and stop immediately if the fitting binds.


Best Warm Winter Scarves 2026 For Cozy Comfort

Best Green Ski Goggles 2026 For Clear Vision On Slopes

12 Best Corner Electric Fireplace 2026: My Ultimate Guide To Pick One

Best Battery Powered Snow Blower 2026 For Effortless Snow Clearing

Best Ski Goggles Under 30 Inches For Crisp Vision And Comfort

Best Cooling Scarf 2026 For Instant Relief And Comfort

Fake Snow for Grass: Create a Realistic Winter Lawn Display

Dimplex Prism Wall Mount Fireplace: Sleek Heat With Modern Flame Style





