How to Replace a Hot Water Heater Drain Valve Safely

A dripping drain valve can look alarming, but it is a routine home repair that rarely requires buying a whole new tank. The safe fix is straightforward: shut off the heat and water supply, empty the tank past the opening, unscrew the old fitting, and thread in a solid new valve with fresh sealing tape.
A few details shape how the job goes. Cutting power works differently on an electric heater than on a gas burner, and the threaded neck of the new valve needs to match the thickness of your tank's outer insulation. Older plastic valves can also grow brittle over time, which means taking extra care so the fitting does not snap off inside the tank threads. Here is how to walk through each step cleanly and protect your floor from spills.
How do you shut down the water heater safely?
Before touching a wrench or a garden hose, turn off the heat source powering the tank. Water inside sits between 120 and 140 degrees Fahrenheit, which can cause severe scalds in seconds if it splashes. Draining a tank while the heat is running can also ruin the heating parts.
- Turn off electric power: Switch off the dedicated double-pole circuit breaker in your main electrical panel. Never rely on a wall toggle.
- Shut off the gas supply: Locate the thermostat gas control valve on the lower front panel. Rotate the temperature dial to "OFF" or the "PILOT" setting to keep the burner from firing.
- Close the cold water inlet: Turn the shutoff valve on the cold water pipe above the tank clockwise until it stops. This prevents fresh water from filling the tank while you drain it.
- Let the water cool: Run hot water from a bathtub faucet for five minutes, or let the tank rest so you do not risk burns from accidental spills.
How do you drain the water past the valve?
You do not need to empty all 50 gallons, but the water line must drop below the valve port. If water sits above the opening when you unscrew the fitting, water will flood your floor.
- Attach a garden hose: Screw a standard garden hose onto the valve spout. Tank drain spouts use 3/4-inch GHT (standard garden hose thread). Tighten it firmly so the internal rubber washer seals.
- Route the hose downward: Lead the other end of the hose to a floor drain, a sump pit, or outside. Keep the hose flat so gravity pulls the water out smoothly.
- Open a hot faucet upstairs: Open a hot water faucet on your top floor. This lets air enter the pipes and breaks the vacuum, allowing water to flow out freely below.
- Open the drain valve: Turn the valve handle counterclockwise. For older plastic valves with a slotted stem, use a flathead screwdriver to turn the stem counterclockwise.
- Clear sediment blockages: Water heaters gather sediment (loose mineral flakes and grit) at the bottom. If water only trickles, mineral grit is clogging the valve. Briefly open the cold water inlet valve above the tank for five seconds; that sudden water blast stirs up and breaks the sediment clog.
- Drain past the valve level: Let water run until the tank drains below the valve opening. Once the hose runs dry, close the old valve and disconnect the hose.
How do you remove a stuck or plastic valve?
Many factory drain valves are made of cheap plastic. Heat and minerals make plastic brittle over time. If you twist with sudden force, the handle can snap clean off, leaving the threaded neck jammed inside the tank wall.
Fit an adjustable wrench or pipe wrench over the flat sides of the valve base, right against the water heater jacket. Turn counterclockwise using slow, steady pressure. Hold the tank jacket steady with your free hand so you do not bend the outer metal skin.
If an older brass valve is frozen from mineral scale, tap your wrench handle lightly with a rubber mallet to break the bond. You can also spray penetrating oil around the outer threads where the valve meets the tank, giving it ten minutes to soak in.
If a brittle plastic valve does snap off flush with the tank, the tank is not ruined. Push an internal pipe extractor into the plastic neck and turn it counterclockwise to back the broken piece out. You can also use a mini-hacksaw blade to make two shallow cuts inside the plastic collar without nicking the steel tank threads, then pry the plastic pieces out with a small screwdriver.
What size and type of valve do you need?
Water heaters consist of a steel inner tank surrounded by thick foam insulation and an outer metal jacket. Choosing the wrong replacement part means the threads will not reach the inner tank.
- Check the shank length: The shank is the threaded pipe neck that reaches into the tank. Measure the distance from the outer jacket to the inner tank threads. Most tanks require a 2-inch or 3-inch shank to clear the insulation wall and leave space for your wrench.
- Match the inlet and outlet threads: The tank inlet is almost always 3/4-inch NPT (standard tapered pipe thread), which tightens as it screws in. The outlet is 3/4-inch GHT, matching standard garden hose threads.
- Choose full port solid brass: A full port valve has a wide, straight opening that lets gritty water pass easily without clogging. Solid brass withstands heat and will not crack under wrench pressure.
- Select a quarter-turn ball valve: A metal lever handle gives smooth control and shows instantly whether the valve is open or closed, unlike fragile plastic knobs.
How do you install and seal the new valve?
Installing the replacement valve is simple, but clean threads and proper tape wrapping are vital to prevent stubborn leaks under water pressure.
- Clean the tank port: Wipe the female threads inside the tank opening using a clean rag or small wire brush. Clear away old thread sealant, rust, or plastic debris.
- Wrap threads with tape: Wrap the male threads of the new valve with thread seal tape. Face the threaded shank toward you and wrap clockwise 3 to 5 times. Wrapping clockwise keeps the tape tight as you thread the valve into the tank.
- Start the valve by hand: Line the valve up straight to avoid cross-threading. Spin it clockwise by hand for at least two full turns. It must thread smoothly before you use a tool.
- Tighten with a wrench: Place an adjustable wrench on the flat pads of the brass valve body. Turn clockwise until the fitting feels snug and solid in the tank wall.
- Point the outlet downward: Stop when the hose spout faces directly down toward the floor. Do not turn the valve backward to straighten it, because loosening breaks the tape seal. If you miss the mark, turn it one full rotation forward until it points down.
How do you refill the tank and restore heat?
Never restore heat to an empty or partially full water heater. Heating elements or tank walls will suffer severe heat damage if power runs without water surrounding them.
- Close the new valve: Ensure the valve handle is fully closed. Screw on an end cap if your new valve includes one.
- Open an upstairs hot faucet: Keep an upstairs hot water faucet open so air escapes as water fills the tank.
- Turn the cold water supply on: Slowly open the cold water shutoff valve above the tank. You will hear water flowing in.
- Purge all air from the system: The open faucet will hiss and spit air. Let water run until it flows in a smooth, steady stream without sputtering, proving the tank is completely full. Shut the faucet off.
- Check for leaks: Wipe around the valve shank with a dry cloth. Look for any moisture. If you see water beads, tighten the valve an extra quarter turn.
- Restore power or gas: Turn the circuit breaker back on, or switch the gas control knob back to your desired temperature setting. On electric tanks, turning on power before the tank is completely full causes dry firing (burning out the heating element in seconds due to lack of surrounding water).
What should you look for in a replacement valve?
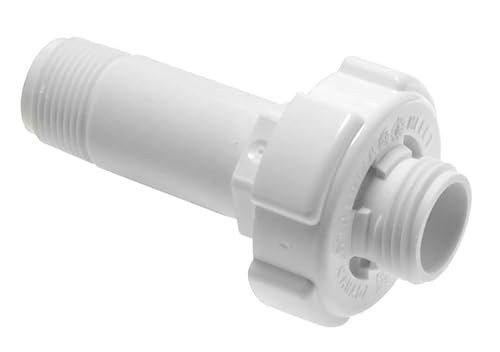
When selecting a replacement drain valve, skip cheap plastic parts and pick a solid brass ball valve. A brass design with a full port opening provides a clear flow path that lets gritty sediment flush out freely during routine maintenance without jamming.
Always verify your tank insulation thickness before buying so you choose the right shank length. A short neck will not reach the inner tank threads through thick foam insulation. If your water heater sits in an unheated utility space or garage, pairing it with a reliable garage heater keeps the surrounding plumbing safe from freezing temperatures during cold weather. Water heaters installed in tight alcoves also benefit from compact lever handles, much like planning a setup when shopping for a heater for a mobile home where clearance space is limited. Look for standard pipe threads on the inlet and standard garden hose threads on the spout to ensure smooth installation.

- BWP Score8.4
BWP Score is a ranking system developed by Bestwinterproducts.com. BWP score has no relationship or impact from any manufacturers or sales agent websites. Learn more
- BrandBoltigen
- BWP Score8.3
BWP Score is a ranking system developed by Bestwinterproducts.com. BWP score has no relationship or impact from any manufacturers or sales agent websites. Learn more
- BrandTrueLine

- BWP Score7.8
BWP Score is a ranking system developed by Bestwinterproducts.com. BWP score has no relationship or impact from any manufacturers or sales agent websites. Learn more
- BrandWHK
Last update on 2026-10-03 / Affiliate links / Images, Product Titles, and Product Highlights from Amazon Product Advertising API
FAQs
Do you have to drain all the water out first?
No, you do not need to empty the entire tank, but water must drop below the drain valve port. Draining the bottom third of the tank clears the water level and carries away loose mineral grit. If you remove the valve while water remains above that height, water will surge out across your floor.
Can you replace the valve without draining the tank?
Some people try using a shop vacuum on the top cold inlet to create suction and swap the valve without draining. This shortcut is dangerous because hot water can surge out if the vacuum seal slips, causing severe scalds and immediate floor flooding. Draining the water down past the valve takes only a few minutes and keeps you safe.
What if the old valve snaps off inside?
If the threaded neck of an old plastic valve shears off inside the tank port, you can remove it using an internal pipe extractor. Tap the extractor into the broken plastic sleeve and twist counterclockwise. You can also make two careful cuts inside the plastic ring with a mini-hacksaw blade and pry the pieces out with a screwdriver.
Why does water still drip from a new valve?
Drips usually stem from loose threads at the tank connection or a stray mineral flake trapped inside the valve seat. If water seeps from the threads around the tank jacket, tighten the valve another quarter turn. If water drips from the garden hose spout, open the valve briefly to flush out any sediment resting against the seal, then close it firmly.


Best Warm Winter Scarves 2026 For Cozy Comfort

Best Green Ski Goggles 2026 For Clear Vision On Slopes

12 Best Corner Electric Fireplace 2026: My Ultimate Guide To Pick One

Best Battery Powered Snow Blower 2026 For Effortless Snow Clearing

Best Ski Goggles Under 30 Inches For Crisp Vision And Comfort

Best Cooling Scarf 2026 For Instant Relief And Comfort

Fake Snow for Grass: Create a Realistic Winter Lawn Display
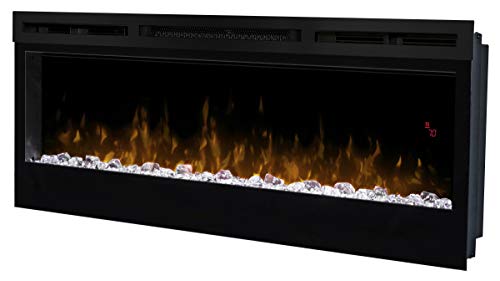
Dimplex Prism Wall Mount Fireplace: Sleek Heat With Modern Flame Style