
How to Update a Rock Fireplace With Fresh Style

How to update a rock fireplace often feels like a bigger challenge than expected because natural stone has a strong personality that can easily dominate an entire room. A fireplace that looked stylish years ago may now seem too dark, too rustic, or simply out of sync with newer furniture and décor. The good news is that replacing every stone isn't the only path forward. Small design decisions can dramatically shift the appearance while preserving the character that made the fireplace unique in the first place.
Fresh paint, a modern mantel, updated lighting, or carefully selected accessories can completely reshape the focal point without tearing apart the structure. Even subtle adjustments such as changing the surrounding wall color or adding textured décor help create a cleaner visual balance. Rock fireplace makeover ideas work best when every update complements the stone instead of fighting against it. That thoughtful approach creates a finished look that feels intentional rather than forced.
Color plays a surprisingly large role in the transformation. Warm gray, soft white, earthy beige, or muted charcoal can soften heavy stone while maintaining depth and texture. Decorative wood beams, floating shelves, and understated artwork also help shift attention toward a more current design without hiding the natural materials. Sometimes the fireplace doesn't need less stone. It simply needs stronger supporting elements around it.
Surface preparation deserves just as much attention as the decorative finish. Dust, soot, loose mortar, and years of residue can interfere with paint adhesion or sealers, leaving disappointing results. Cleaning thoroughly before making changes protects your effort and helps every material last longer. Spending extra time during preparation usually saves both money and frustration later.
Style should never outweigh practicality. Heat-resistant finishes, proper ventilation, and safe installation methods remain essential parts of every remodeling project. Decorative pieces should enhance the fireplace without interfering with airflow or creating fire hazards. Safe fireplace updates always deliver better long-term satisfaction than shortcuts that only look appealing at first glance.
Budget also influences the direction of the makeover, but it doesn't have to limit creativity. Some homeowners achieve dramatic improvements with nothing more than fresh paint, while others combine stone staining, mantel replacement, and built-in shelving for a larger renovation. Both approaches can produce impressive results because thoughtful planning matters far more than spending the highest amount. A balanced design almost always outlasts passing trends.
Texture remains one of the biggest advantages of natural stone. Instead of hiding every rough edge, many successful renovations embrace that texture while simplifying everything surrounding it. Smooth furniture, softer fabrics, and cleaner decorative lines allow the stone to become an attractive feature instead of visual clutter. That balance creates a room that feels comfortable, welcoming, and naturally updated.

- BWP Score7.7
BWP Score is a ranking system developed by Bestwinterproducts.com. BWP score has no relationship or impact from any manufacturers or sales agent websites. Learn more
- BrandNUPICK

- BWP Score7.3
BWP Score is a ranking system developed by Bestwinterproducts.com. BWP score has no relationship or impact from any manufacturers or sales agent websites. Learn more
- BrandNAKAAOSIK

- BWP Score8.8
BWP Score is a ranking system developed by Bestwinterproducts.com. BWP score has no relationship or impact from any manufacturers or sales agent websites. Learn more
- BrandGasSaf

- BWP Score9.3
BWP Score is a ranking system developed by Bestwinterproducts.com. BWP score has no relationship or impact from any manufacturers or sales agent websites. Learn more
- Brandonlyfire

- BWP Score8.3
BWP Score is a ranking system developed by Bestwinterproducts.com. BWP score has no relationship or impact from any manufacturers or sales agent websites. Learn more
- BrandNUPICK

- BWP Score8.4
BWP Score is a ranking system developed by Bestwinterproducts.com. BWP score has no relationship or impact from any manufacturers or sales agent websites. Learn more
- BrandCountry Living
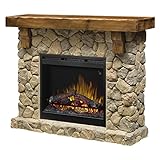
DIMPLEX SMP-904-ST Fieldstone Pine and Stone-look Electric Fireplace Mantel GDS26L5-904ST
View on Amazon- BWP Score8.7
BWP Score is a ranking system developed by Bestwinterproducts.com. BWP score has no relationship or impact from any manufacturers or sales agent websites. Learn more
- BrandDIMPLEX

- BWP Score8.8
BWP Score is a ranking system developed by Bestwinterproducts.com. BWP score has no relationship or impact from any manufacturers or sales agent websites. Learn more
- BrandBenrocks

- BWP Score9.7
BWP Score is a ranking system developed by Bestwinterproducts.com. BWP score has no relationship or impact from any manufacturers or sales agent websites. Learn more
- BrandBOSSIN

- BWP Score7.4
BWP Score is a ranking system developed by Bestwinterproducts.com. BWP score has no relationship or impact from any manufacturers or sales agent websites. Learn more
- BrandMidwest Hearth
Last update on 2026-07-26 / Affiliate links / Images, Product Titles, and Product Highlights from Amazon Product Advertising API
How To Update A Rock Fireplace Without Losing Character
A dated stone surround can make the whole room feel heavier, even after the furniture, flooring, and wall color have changed. The rough surface catches shadows, old mortar lines pull attention in every direction, and a bulky mantel may leave the television or artwork looking awkwardly squeezed into place. Learning how to update a rock fireplace starts with separating the features worth keeping from the details that make the structure feel tired. The goal isn't to erase every trace of stone, but to create a cleaner focal point that suits the room without turning the project into a demolition marathon.
Start With The Stone You Already Have
Put down the paintbrush for a moment and study the fireplace in daylight, lamplight, and with the fire running. Natural rock can shift from warm brown to cool gray as the light changes, so a color that seems overpowering at noon may look richer after sunset. Take note of the dominant stone color, the mortar shade, and any unusually dark or orange pieces that pull the eye. That simple review helps prevent a common mistake: changing the entire surface when one or two surrounding elements are causing most of the trouble.
Cleanliness also changes perception more than people expect. Soot, fireplace dust, and years of household grime settle into pits and crevices, muting the natural color and making the rock look dull. Use a stiff nylon brush, a vacuum with a brush attachment, and a cleaner approved for the stone type before judging the finish. Avoid flooding porous rock with water because trapped moisture can deepen stains, weaken old mortar, and delay any painting or sealing work.
Mortar deserves a close look because it acts like the background in a painting. Thick, dark, or uneven joints can make attractive stone appear clumsy, while a lighter and more consistent joint can calm the pattern without covering the rock itself. Small repairs may be manageable, but crumbling joints, wide cracks, or movement around the firebox call for professional attention. Sound masonry matters more than surface style, especially near areas exposed to repeated heating and cooling.
Photograph the fireplace straight on, then convert the image to grayscale on a phone or computer. Removing color makes the balance of light and dark much easier to judge, and suddenly the real problem may become obvious. A massive dark mantel, a black firebox opening, or a shadowy wall can be doing more visual damage than the stone. This quick exercise supports better design decisions before money gets spent on finishes that can't be easily reversed.
Set A Clear Direction Before Buying Materials
A successful update needs a defined mood, not a shopping cart full of unrelated ideas. Decide whether the room should feel warm and traditional, clean and modern, relaxed and rustic, or quietly transitional. Each direction handles rock differently: modern rooms usually simplify the palette, while rustic spaces can keep more texture and natural variation. A clear design direction keeps the mantel, hearth, wall paint, lighting, and accessories from competing with one another.
Collect a handful of room references, but don't copy a fireplace simply because it looks good in a photograph. A whitewashed stone wall in a bright room with tall windows may feel flat and chalky in a darker den. Likewise, a charcoal finish that looks dramatic online can swallow light in a narrow living room. Match ideas to your actual lighting conditions, ceiling height, flooring tone, and the size of the fireplace rather than chasing a single trendy image.
Set limits before work begins. Decide which parts are staying, which can change, and which are outside the budget or skill level. Keeping the firebox, stone, and hearth while replacing the mantel is a very different project from resurfacing the full surround. Clear boundaries protect the budget and reduce the temptation to make rushed choices halfway through a dusty weekend.
Build the plan from the largest visual element outward. Start with the rock finish, then select the mantel, wall color, hearth treatment, lighting, and decorative pieces. Reversing that order often produces mismatched undertones or proportions that feel off once everything is installed. A large-to-small planning method gives the fireplace a stronger sense of purpose and makes the room easier to decorate later.
Refresh The Rock Without Flattening Its Texture
Cleaning and sealing may be enough if the rock has attractive variation but looks dusty or dry. A breathable masonry sealer can help resist staining while preserving the surface, though some products deepen the stone color and create a slight wet look. Test any treatment in a hidden corner because porous rock can absorb finish unevenly. The right product should support the natural texture, not leave a glossy coating that looks like clear plastic.
Whitewashing offers a softer option for stone that feels too dark but still deserves to show through. A diluted masonry-safe coating settles differently across bumps and crevices, creating variation rather than a solid painted wall. Build the color gradually with light coats because removing excess from deep pores can be frustrating. A restrained whitewash keeps stone movement and depth visible while lowering the visual weight.
Limewash creates a chalkier, mineral appearance and can suit fireplaces with an old-world or relaxed farmhouse character. It behaves differently from standard paint and may change as it cures, so sample boards and hidden test areas are worth the effort. The finish can soften strong color contrasts, but it won't hide every stain, crack, or irregular joint. Its strength lies in creating a naturally aged finish, not a perfectly uniform surface.
Full paint coverage makes sense when the rock pattern feels chaotic, the colors clash badly with the room, or previous repairs have created obvious patches. Use products intended for masonry and confirm that every coating near the firebox is suitable for the expected heat exposure. Thick paint can clog small texture details, so careful brushing and controlled coats matter. The tradeoff is permanence: painted stone is difficult to restore to its original appearance once the pores have absorbed pigment.
Some fireplaces look better with selective treatment instead of an all-over finish. Lightening only the mortar can make individual rocks stand out, while darkening the mortar can visually connect a scattered pattern. A stone enhancer may enrich pale, washed-out pieces without changing the structure. Selective updates demand patience, but they often preserve more material character than covering every surface with one color.
Replace A Heavy Mantel With Better Proportions
A mantel can age a fireplace faster than the rock itself. Oversized ledges, glossy orange stain, carved brackets, or shallow decorative trim may clash with cleaner furniture and simpler wall details. Replacing that piece with a thicker wood beam, a slim painted shelf, or a carefully scaled stone mantel can reset the entire composition. The strongest improvement often comes from better proportions, not a more expensive material.
Measure the fireplace width, firebox opening, ceiling height, and nearby furniture before selecting a new mantel. A shelf that's too short can make the rock mass seem even wider, while one that's too deep may crowd the room and collect clutter. Mark the proposed dimensions with painter's tape and view them from several seats. That low-cost mockup reveals whether the mantel scale feels balanced before drilling into masonry.
Wood adds warmth, but its color needs to cooperate with the floor and stone. Repeating the exact floor stain isn't always necessary, yet the undertones should feel related rather than accidentally mismatched. Pale oak can soften gray rock, medium walnut can anchor light stone, and a painted mantel can quiet a busy mix of browns. Keep combustible materials and decorations at the clearances required for the fireplace type and local rules because heat safety cannot be guessed from appearance.
A mantel isn't mandatory. Removing a bulky shelf can create a cleaner wall, especially on fireplaces with strong horizontal stone courses or a tall chimney breast. Art, a sculptural light fixture, or a properly placed television may sit more naturally without another line cutting across the surface. Mantel-free designs work best when the upper portion has a clear purpose and doesn't become a blank stretch of unfinished visual space.
Electric inserts can change how the mantel and firebox relate to each other, especially if an unused wood-burning opening currently looks dark and empty. To add flame movement without storing logs or managing ash, consider the benefits of led fireplace inserts as a separate upgrade within the wider redesign. Measure the opening carefully and confirm ventilation, electrical access, and manufacturer clearance requirements before purchase. A well-fitted insert creates a more deliberate firebox instead of looking like a small appliance pushed into a large cavity.
Give The Firebox A Cleaner Visual Center
The firebox forms the darkest point of the fireplace, so small flaws there can dominate the whole wall. Rusted doors, cloudy glass, faded screens, and loose decorative trim make even freshly cleaned stone look unfinished. Remove damaged accessories and clean surfaces with products designed for soot and fireplace residue. A tidy opening gives the eye a clear visual anchor and makes surrounding updates feel more convincing.
Fireplace doors can add structure, but their frame style matters. Thin black frames tend to recede, while brass, bronze, or wide decorative surrounds become a stronger design feature. Match the metal to nearby hardware without forcing every fixture in the room to use the exact same finish. Repeating a metal once or twice creates visual continuity; repeating it everywhere can make the room look staged.
An unused firebox still needs a plan. Stacked wood can look appealing in a nonworking fireplace, but only if the opening is dry, clean, and never used for combustion. Candles and decorative objects should also stay away from active fireboxes, gas components, and areas that may retain heat. A safer route is a fitted screen, a purpose-built insert, or a simple dark interior that treats the opening as intentional negative space.
Existing masonry may limit the type of insert that fits without modification. A shallow opening, irregular rock edge, or raised hearth can complicate installation and leave awkward gaps around a rectangular appliance. Accurate measurements should include width, height, depth, taper, outlet location, and any protruding stone. Those details protect against fit problems that become expensive after a heavy unit has already arrived.
Decorative electric logs can suit a roomy firebox where a full framed insert would hide attractive masonry. To keep the original opening visible while adding a contained flame effect, review electric fireplace logs that match the available depth and outlet arrangement. The look is more open than a glass-front insert, though gaps, cords, and an unfinished back wall may remain visible. That tradeoff makes firebox preparation especially important.
Coordinate The Hearth With The New Look
The hearth often gets ignored until the stone surround has been painted, and then its mismatched color suddenly stands out. A red tile slab beneath cool gray rock, for example, can make the whole update feel halfway finished. Decide whether the hearth should blend quietly with the fireplace or provide a deliberate contrast. That choice affects the visual base of the entire structure.
Cleaning may rescue natural stone or brick hearths that look permanently stained. Soot tends to settle along grout lines and porous edges, so gentle repeated cleaning often works better than aggressive scrubbing. Avoid acidic products unless the material manufacturer confirms compatibility because acids can etch stone and discolor mortar. Preserving the surface protects both appearance and durability.
Tile can cover a damaged or stylistically awkward hearth, but the existing base must be stable, level, and suitable for the adhesive system. Large-format tile creates fewer grout lines and a calmer look, while small tile can follow irregular shapes more easily. Matte surfaces generally hide dust and footprints better than glossy finishes. Select materials rated for fireplace use and expected temperatures rather than relying on ordinary wall tile.
A raised hearth adds seating and architectural presence, yet it also occupies floor space and creates a hard edge in a busy walkway. Lowering or removing it may modernize the room, but structural changes can affect the firebox, flooring, and required clearances. That work isn't a casual cosmetic task. A professional assessment helps separate a simple finish update from a larger masonry alteration.
Color samples should be tested beside the hearth, not only against the upper stone. Flooring, rugs, and firebox metal all influence how a gray, beige, white, or black finish reads in the room. A sample that looks neutral alone can turn blue beside warm oak or yellow beside cool tile. Testing the complete palette prevents undertone clashes that are hard to ignore once the work is finished.
Use Lighting To Soften Shadows And Rough Edges
Rock creates deep shadows, and poor lighting can exaggerate every bump until the fireplace feels cave-like. A pair of sconces, ceiling spots, or concealed accent lights can spread illumination across the surface and reveal texture more evenly. Aim for broad, gentle coverage instead of narrow beams that create harsh bright patches. Good lighting turns rough stone texture into depth rather than visual noise.
Warm light usually flatters brown, tan, cream, and rust-colored stone, while neutral light can suit gray or whitewashed surfaces. Very cool bulbs may make warm mortar look dirty or greenish, especially at night. Compare bulbs in the actual room instead of relying on package descriptions alone. The right color temperature supports a cohesive material palette across the fireplace and surrounding walls.
Wall sconces need enough breathing room from the rock and mantel to look intentional. Uneven stone may also require custom mounting blocks or carefully cut backplates so fixtures sit flat. Exposed wiring, tilted fixtures, and wide gaps around electrical boxes can undermine an otherwise careful update. Plan electrical work early because lighting placement often affects artwork, television height, and mantel dimensions.
Dimmers offer useful control because the fireplace serves different jobs throughout the day. Brighter light supports cleaning and family activity, while lower output keeps the stone from overpowering the room during quiet evenings. Layered lighting also reduces dependence on one central ceiling fixture. That flexibility makes the fireplace feel like part of the room instead of a dark object waiting for a fire.
An unrelated electric appliance shouldn't be forced into the fireplace plan simply because it shares the word electric. To heat water for a sink, tub, workshop, or travel setup, evaluate electric immersion water heaters separately and follow their container, power, and safety requirements. These devices do not belong inside a firebox and shouldn't be treated as fireplace accessories. Keeping distinct products in their proper roles protects electrical safety and prevents a misleading design connection.
How To Update A Rock Fireplace With Finishing Details
A freshly cleaned surround and a better-scaled mantel can still feel unfinished if the surrounding wall, furniture, and décor pull in different directions. The last stretch of how to update a rock fireplace is less about covering stone and more about making every nearby element support it. Color balance, practical clearances, electrical access, and daily maintenance all shape whether the update feels comfortable or awkward. These finishing decisions can also prevent the familiar frustration of spending money on a makeover that photographs well but remains inconvenient to live with.
Finish The Rock Fireplace Update
The room around the fireplace should settle the stone rather than compete with every color inside it. Pull one quiet shade from the rock for nearby walls, such as a soft taupe, warm cream, muted gray, or dusty beige. This approach creates visual continuity without making the entire room look matched to death. A calm wall color also gives rough texture enough breathing room, which helps a large fireplace feel grounded instead of overpowering.
Paint samples need to stay on the wall for several days because natural stone reflects color in unpredictable ways. Morning sun may bring out orange or pink tones that disappear under warm lamps at night. Place large sample patches beside the mantel, hearth, and outer stone edge, then check them from the main seating area. This simple step protects against undertone conflicts that can make a supposedly neutral paint color look oddly blue, green, or yellow.
Trim color matters too, especially if the fireplace sits between windows, built-ins, or doors. Bright white trim can sharpen a dark stone wall, but it may look stark beside weathered rock and creamy mortar. Softer off-white or a slightly deeper wall-matched trim often creates a more relaxed transition. The right choice depends on whether the fireplace needs clean definition or a quieter connection to the architecture.
Wallpaper can work near a rock fireplace, though bold patterns should be handled with a light touch. A busy floral, sharp geometric print, and highly varied stone may create too many focal points in one view. Subtle grasscloth, linen-look paper, or a low-contrast print adds depth without challenging the masonry. Keep materials outside required heat clearances and rely on fireplace-safe placement rather than assuming decorative wall finishes can sit anywhere.
Arrange Furniture Around The New Focal Point
Furniture placement often reveals whether the fireplace update has actually solved the room's problems. A sofa aimed directly at the hearth may look logical, yet it can block walkways or leave chairs stranded along the walls. Start with normal movement through the room, then shape seating around conversation and fire viewing. A successful arrangement creates clear traffic paths without treating the fireplace like a stage that every seat must face.
Large stone fireplaces carry a lot of visual weight, so furniture needs enough scale to hold its own. Tiny side tables and delicate chairs may look lost beside a floor-to-ceiling rock wall. That doesn't mean every piece should be bulky, though. A substantial sofa, one grounded coffee table, and a few lighter supporting pieces usually create balanced proportions without making the room feel packed.
Rugs can connect the seating area to the fireplace, but their placement needs careful thought around sparks, embers, and heat. Follow the fireplace manufacturer's guidance and local safety requirements rather than sliding a textile close to the hearth for a prettier photo. Natural fibers may suit the stone visually, while low-pile rugs are often easier to clean around ash and dust. The best arrangement protects everyday comfort and safety at the same time.
Side chairs placed at a slight angle often soften the straight lines of a mantel and hearth. They also create a better conversation setup than a rigid row of furniture pointed at the firebox. Leave enough room to pull a chair back without bumping stone, a raised hearth, or a nearby table. Those few inches make the difference between a room that merely looks arranged and one that supports comfortable daily movement.
Handle A Television Without Creating An Awkward Wall
A television above the fireplace can solve a wall-space problem, but it can also create neck strain and make the mantel area feel crowded. Measure the expected screen height from the main seat before committing to brackets or electrical work. A raised hearth, tall firebox, and thick mantel can push the screen higher than expected. Comfortable viewing should guide the plan because screen height matters long after the renovation excitement wears off.
Heat is another concern that can't be judged by touching the wall once. Fireplace type, mantel depth, ventilation, burn duration, and manufacturer instructions all affect whether electronics can safely remain above the opening. A mantel may help redirect rising heat, but it isn't an automatic shield. Use the fireplace and television installation requirements to establish safe mounting clearances, and bring in a qualified installer when those directions conflict or remain unclear.
Cables can quickly undo a clean renovation. Surface-mounted cords across rough stone look improvised, while drilling channels into masonry can become permanent and messy. Plan outlets, conduit, media components, and future cable replacement before mounting the screen. Good preparation keeps wiring access practical instead of sealing essential connections behind stone or fixed trim.
A side wall may provide a better television location in rooms where the fireplace is unusually tall or frequently used. That layout lets the mantel support artwork, lighting, or a restrained decorative display without forcing two large focal points into the same vertical stack. Swiveling mounts can help in some spaces, though they still need solid anchoring and sensible sightlines. Separating the screen and fireplace often produces less visual tension and a more comfortable seating plan.
A budget-friendly electric unit may also suit a secondary room where the existing rock fireplace remains decorative rather than functional. To add controlled heat and flame effects without rebuilding the masonry, consider a electric fireplace under 200 that fits the available floor or wall space. Treat it as a separate appliance rather than wedging it into an opening without checking dimensions, ventilation, and power requirements. The lower purchase price can help, but proper placement and fit still decide whether the result feels intentional.
Decorate The Mantel Without Hiding The Stone
A rock fireplace already supplies pattern, shadow, and texture, so the mantel rarely needs a crowded lineup of objects. Start with one visual anchor, such as framed art, a mirror, or a sculptural piece, then add only what improves the balance. Leaving open space allows the eye to rest and keeps the stone visible. This restraint creates stronger visual focus than a shelf packed from edge to edge.
Scale should relate to the width of the mantel and the height of the chimney breast. One tiny frame floating above a wide beam can look accidental, while an oversized mirror may press against the ceiling or dominate the rock. Painter's tape and paper templates make it easy to test dimensions before hanging anything. A properly scaled display supports architectural balance rather than covering mistakes with more décor.
Asymmetry often suits irregular stone better than a perfectly mirrored arrangement. A larger object on one side can be balanced by two smaller items with similar visual weight on the other. Varying heights creates movement, but every piece doesn't need a different finish or color. Repeating one material, such as wood, matte black metal, or ceramic, provides quiet consistency across the display.
Seasonal decorating can become a nuisance if every update requires removing a dozen objects and cleaning soot from fragile pieces. Use a smaller group of sturdy items that can be swapped without rebuilding the whole mantel. Keep greenery, fabric, paper, candles, and dried materials away from active heat and flame according to required clearances. Practical restraint protects safe seasonal styling and makes routine cleaning far less tedious.
Textiles can soften a room filled with stone, but unrelated craft materials shouldn't be presented as fireplace equipment. For a separate dyeing project that adds custom color through scarves, table accents, or wall art, review silk scarves for dyeing outside the fireplace work area. Dyes, fabrics, and drying materials should stay away from sparks, open flames, hot surfaces, and soot. That clear separation supports creative décor planning without inventing a false connection between textile supplies and masonry renovation.
Choose Accessories That Solve Real Problems
Fireplace tools should earn their space because a large decorative set can clutter a newly simplified hearth. Wood-burning fireplaces may need a poker, shovel, brush, and sturdy stand, while an electric insert may need none of them. Match accessories to the actual fuel type and cleaning routine rather than copying a staged room. Useful pieces create practical hearth organization without adding visual noise.
Log holders need enough capacity for normal use but shouldn't spill into walkways or sit where heat can dry wood too aggressively. A low metal rack can feel lighter beside rough stone than a tall ornate basket. Keep firewood dry, inspect it for pests before bringing it indoors, and store only a modest amount near the fireplace. Sensible storage reduces mess, insects, and tripping hazards around an already hard-edged feature.
Screens and doors influence both safety and appearance. A simple black screen can disappear against a dark firebox, while decorative metalwork may become another competing pattern beside varied rock. Check that the screen covers the opening properly and remains stable during use. The best style is the one that delivers spark protection without making the fireplace look busier than it already is.
Ash buckets, kindling containers, and cleaning brushes should be easy to reach but don't need permanent display. A nearby cabinet, built-in drawer, or ventilated utility area can keep messy items out of sight. Never place warm ash in a combustible container, and follow safe disposal practices for the fireplace type. Hidden storage supports a cleaner finished room while keeping essential tools available.
Maintain The Updated Surface Without Damaging It
Fresh finishes won't stay fresh if cleaning methods are too harsh. Painted stone, limewash, sealed rock, mortar, tile, and natural hearth materials each react differently to moisture and chemicals. Keep a written note of every product used during the renovation so future cleaning doesn't become guesswork. That record protects finish compatibility and helps avoid discoloration, peeling, or etched surfaces.
Regular vacuuming with a soft brush attachment removes dust before it settles deep into texture. Work gently across mortar joints and avoid striking loose edges with rigid nozzles. A dry microfiber cloth can handle smooth mantel surfaces, while rock may need a soft nylon brush. Frequent light care is safer than occasional aggressive scrubbing and supports long-term surface durability.
Soot stains should be addressed early because porous materials can absorb them over time. Start with the mildest cleaner approved for the specific surface and test it in a discreet area. Mixing household chemicals is risky and can create harmful fumes, especially in a confined room. Careful spot treatment protects indoor air quality as well as the updated finish.
Annual inspection is wise for any fireplace that burns wood or gas. Chimney condition, venting, seals, firebox damage, gas components, and masonry cracks affect safety in ways décor can't fix. A cosmetic update should never hide movement, moisture intrusion, or deteriorating joints. Professional service provides functional peace of mind and helps preserve the work surrounding the firebox.
Avoid Renovation Choices That Age Too Quickly
Trend-heavy finishes can make a fireplace feel dated again before the paint has fully lost its new smell. Extremely stark white, heavy distressing, sharp black-and-white contrast, or decorative overlays may work in one room and feel forced in another. Let permanent choices respond to the house, stone, and natural light rather than a fast-moving style cycle. A restrained palette usually offers better design longevity.
Covering every irregularity isn't always an improvement. Natural stone contains chips, color shifts, uneven joints, and texture that manufactured surfaces often try to imitate. Correct damage and distracting repairs, but don't expect a rugged fireplace to become perfectly smooth without major reconstruction. Accepting some variation preserves authentic material character and prevents endless touch-ups.
Skipping sample work creates the most avoidable regrets. Paint, limewash, stain, grout, sealer, wood finish, and tile can all shift once placed beside the existing rock. Test them together under the room's real lighting instead of approving each sample separately in a store aisle. A coordinated sample board exposes color and texture conflicts before they become expensive permanent layers.
DIY work also needs a sensible stopping point. Cleaning, sample testing, painting approved surfaces, and swapping lightweight décor may be approachable, while structural masonry, gas lines, chimney repairs, and complex electrical changes require qualified help. Calling a professional isn't a failure or a loss of creativity. It protects structural integrity, fire safety, and code compliance where mistakes carry consequences beyond appearance.
Build A Practical Update Plan In The Right Order
Start with inspection and cleaning because every later decision depends on the true condition of the stone, mortar, hearth, and firebox. Photograph cracks, stains, loose joints, and awkward transitions before covering anything. Confirm which repairs are cosmetic and which require specialist attention. This first stage creates a reliable project baseline instead of building a design plan over hidden problems.
Next, settle the finish palette and test it in the room. Evaluate the rock treatment, mortar color, mantel material, hearth surface, wall paint, trim, and metal finishes together. Samples should remain in place through daylight and evening light, not just for a quick glance. This coordinated check keeps undertones and proportions from drifting apart as purchases begin.
Complete messy and permanent work before bringing in furniture or decorative items. Masonry repair, surface preparation, painting, tile work, electrical installation, and mantel mounting can create dust and require clear access. Protect floors and nearby surfaces according to the materials being used. A logical work sequence reduces rework and accidental damage during later stages.
Finish with lighting, furniture placement, artwork, fireplace tools, and a limited mantel display. Live with the simpler setup for a few days before filling every open spot. The room may need less decoration than expected once the cleaned stone, updated hearth, and better lighting begin working together. That pause helps preserve functional breathing room and keeps the rock fireplace from slipping back into visual clutter.

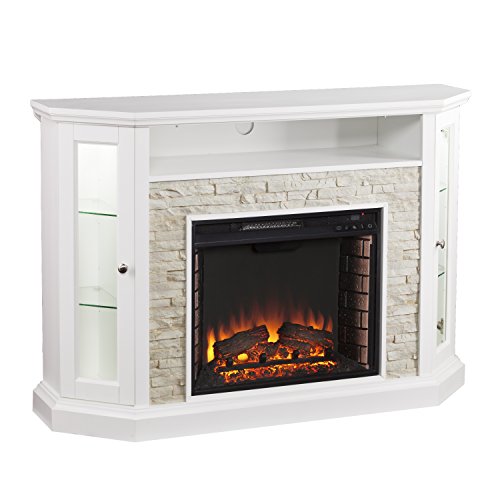
12 Best Corner Electric Fireplace 2026: My Ultimate Guide To Pick One
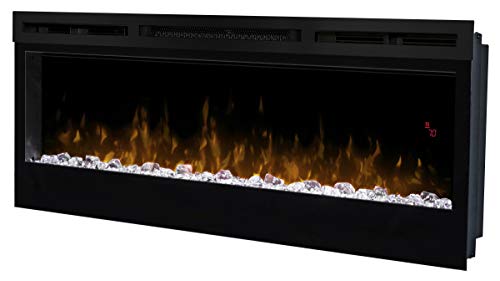
Dimplex Prism Wall Mount Fireplace: Sleek Heat With Modern Flame Style
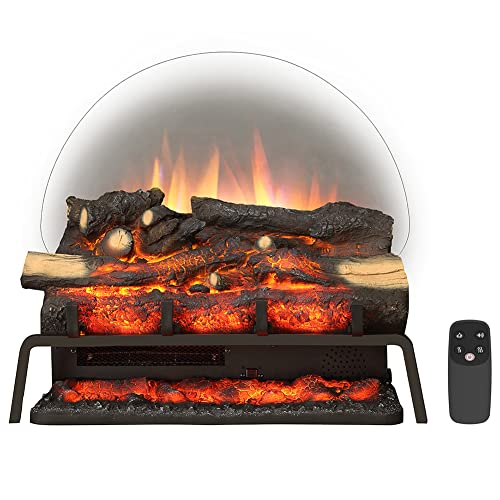
Best Electric Fireplace Insert for Large Room Heating and Style

Best 40 Inch Electric Fireplace Insert 2026 - Cozy Ambiance with Modern Power
Top 12 Best Quality Electric Fireplace 2026 - Buying Guides

Best Wall Mount Electric Fireplace 2026 for Ultimate Comfort and Style

How to Start Monessen Fireplace: A Step-by-Step Guide

How to Whitewash Rock Fireplace: Simple Steps to Refresh Your Space






