
How to Keep a Garage Warm in Winter

Keeping a freezing garage comfortable starts with sealing perimeter air drafts, not running a space heater. That step only works if you also insulate the garage door panels, which prevents cold outdoor air from instantly replacing any warmth you add. Without fixing those gaps first, running a heater simply wastes electricity while the floor and tools stay ice cold.
How you tackle the rest depends on your building layout and routine. An attached garage borrows warmth through shared house walls, while a detached building loses heat on every side. Bare wall studs and open ceiling rafters chill the room much faster than finished drywall, and a daily workshop demands steadier heat than an occasional parking spot. Here is how to stop the drafts and warm up your workspace safely.
Drafts around doors and floors freeze the room fastest
Cold air enters your garage through the perimeter gaps around the main door long before it seeps through the walls. A standard overhead garage door has dozens of feet of open seams where icy wind can whistle straight inside. If you run a heater without sealing these edges first, you will simply push warm air out while pulling freezing air in across the floor.
You can locate your biggest draft zones on any bright afternoon. Walk into the garage, close the overhead door, and turn off the interior lights. Look closely along the bottom, sides, and top header of the door frame. Any spot where you see bright daylight shining through is an open gap that acts like an open window in freezing weather.
Use this inspection checklist to seal the leaks around your garage perimeter:
- Check the bottom rubber draft seal: Look at the flexible rubber strip along the bottom of the garage door. Over time, road salt, dirt, and freezing temperatures cause this rubber to crack, flatten, or tear away from the metal track. If you see light beneath the door when it is fully latched, slip a new rubber draft seal into the bottom aluminum channel.
- Inspect the side and top jamb weatherstripping: Run your hand along the exterior frame while the door is closed. Modern weatherstripping consists of a vinyl trim board equipped with a flexible rubber flap that presses flat against the door exterior. If your current trim is stiff, rotted, or pulled away from the door face, replace it with fresh vinyl stop molding to close the gap.
- Examine the floor threshold: Concrete slabs often crack or settle unevenly, leaving low dips where a flat door bottom cannot touch the floor. A rubber threshold seal glued directly to the concrete with heavy-duty construction adhesive creates a raised barrier that blocks wind-driven snow and drafts.
- Check side entry doors and windows: Do not overlook your small side pass-through door or old single-pane garage windows. Add stick-on foam weatherstripping to the door frame and replace worn bottom door sweeps to keep drafts from sneaking into the room from the side yard.
- Seal wall and ceiling penetrations: Inspect exterior walls for unsealed holes where hose spigots, electrical conduit, or dryer vents enter the space. Fill gaps around pipes with expanding foam sealant to stop cold air from drafting through wall cavities.
Stopping active air leaks provides immediate relief. Once you plug these perimeter gaps, the ambient temperature inside your garage will stop dropping so sharply whenever winter wind picks up outside.
Insulate thin garage door panels to trap indoor heat
A standard single-layer steel or aluminum garage door conducts cold into your workspace just like a giant metal tray left in the snow. Even when your perimeter seals are airtight, freezing outdoor temperatures chill the thin metal face, turning the interior surface into an icy wall that drains all the warmth from the air. Adding insulation directly to the door sections creates a thermal buffer that slows down heat loss.
You can insulate an existing sectional garage door without replacing the hardware by using lightweight materials that will not overload your door springs. A reflective foil sheet that bounces heat back (a radiant barrier) or lightweight foam panels work best for this project. These sheets raise your heat-blocking score (often labeled as the R-value on insulation kits) while adding almost no extra weight to the door assembly.
Follow these numbered steps to insulate your sectional door panels safely:
- Measure your garage door panel cavities: Measure the width and height of each rectangular section on the inside of the door. Most standard single-car and two-car garage doors feature panels that are roughly 24 inches tall and either 48 or 60 inches wide, but you should verify your exact dimensions before cutting any material.
- Clean the metal door surfaces: Dust, oil residue, and dried cobwebs will prevent mounting tape from sticking. Wipe down the interior steel panels with rubbing alcohol or a mild household degreaser, then let the surface dry completely before applying any tape.
- Cut your insulation sheets to shape: Lay your reflective foil sheets or foam core panels on a flat workbench or clean floor. Use a straight edge and a utility razor knife to slice each panel to the exact measurements of your door recesses. If you are using panels designed to tuck behind the steel horizontal rails, cut them a quarter-inch longer so they bow outward slightly and snap snugly into place.
- Attach heavy-duty double-sided tape: Apply heavy-duty double-sided foam tape or adhesive squares directly to the cleaned metal surface of each panel. Position tape strips around the outer perimeter of each recess and add an extra cross pattern across the center for maximum holding strength.
- Press panels firmly into position: Peel away the tape backing and press the insulation sheet against the metal skin, starting from one corner and smoothing outward to eliminate trapped air pockets. Seal any perimeter seams between the panels and the door frame using foil tape to prevent drafts from getting behind the insulation layer.
If you rent your home or have a single-piece flip-up garage door that cannot hold rigid panels, consider hanging a heavy-duty magnetic thermal door curtain across the opening instead. These thick fabric curtains hang from hook-and-loop fasteners along the top door header and close securely in the center with magnets. They let you walk in and out easily while hanging an insulating blanket between your workspace and the cold door.
Use electric heaters instead of risky unvented fuel units
Choosing the right heat source is critical for staying warm without creating severe safety hazards. Many people try to blast a freezing garage with a portable propane or kerosene torpedo heater because these units kick out massive amounts of raw heat right away. However, burning fuel inside an enclosed garage creates dangerous problems that defeat your original goal.
An unvented heater is a fuel heater that exhausts fumes directly into the room rather than piping them outside through a chimney or wall flue. When you burn propane or kerosene indoors, the unit consumes your breathing oxygen and pumps carbon monoxide directly into the air you breathe. Carbon monoxide is an invisible, odorless gas that causes headaches, dizziness, and death. Furthermore, burning fuel releases large quantities of moisture; burning a single gallon of propane creates nearly a gallon of water vapor, which coats cold tools in condensation and triggers rapid metal rust.
Electric heaters are the safest choice for enclosed home garages because they provide clean, dry heat with zero combustion fumes and zero moisture output. Here is how common electric garage heating options compare:
- Quartz and infrared radiant heaters: These units emit directional heat waves that warm objects, workbenches, and your body directly, rather than heating the air between you and the unit. They are the most efficient option if you only stand in one spot to work on projects, because they provide instant warmth even if the surrounding air in the garage remains chilly.
- Fan-forced ceramic space heaters: Ceramic heaters blow heated air across the room to raise the ambient air temperature over time. They work well for small, well-sealed single-car garages, but they require a steady supply of power and take longer to take the chill off cold tools and surfaces.
- Oil-filled radiator heaters: These units circulate heated oil through sealed metal fins, providing silent, consistent background heat without blowing dust or sawdust around your shop. They do not get glowing hot on the outside, which makes them a safer choice around pets, but they warm up slowly.
Whenever you run an electric heater, you must follow strict electrical and fire safety rules. Maintain a minimum 3-foot clearance between the heating element and any flammable materials, including wood piles, paint cans, solvent rags, and cardboard boxes. Plug your heater directly into a wall outlet rather than an extension cord or a power strip, because high-wattage heating elements can melt light-duty cords and start hidden electrical fires. Managing individual room heating requires the same care as learning how to keep warm in winter in the house, where zoning heat safely protects your living space and prevents dangerous circuit overloads.
If your electric heater continuously trips the circuit breaker on your garage wall, stop using it immediately. Most standard garage outlets share a single 15-amp or 20-amp circuit with your overhead lights and garage door opener. If you want sustained heating in a larger two-car or three-car space, call a licensed electrician to install a dedicated 240-volt circuit and a hardwired ceiling-mounted garage heater.
Cold concrete floors pull heat directly from your body
Even if you seal every air leak and run an electric heater, your garage can still feel freezing if you stand directly on the bare concrete floor. Concrete acts like an open thermal drain. The slab sits directly against the frozen soil underneath your foundation, absorbing the ground's cold temperatures and conducting that chill straight through the soles of your shoes.
This heat transfer process pulls warmth out of your feet, which causes your blood vessels to constrict and leaves your entire body feeling uncomfortable. Standing on cold concrete for hours also leads to joint stiffness and muscle fatigue. If your toes start aching within minutes of stepping into your workshop, reviewing practical techniques on how to keep feet warm during winter can help you layer wool socks and insulated boots properly while you address the floor itself.
To block heat transfer from the slab, you need an insulating layer between your boots and the concrete. You do not need to install an expensive finished floor across the entire garage; you only need to cover the specific areas where you stand and work. Several simple floor coverings work well:
- Interlocking foam floor tiles: Dense foam exercise mats fit together like puzzle pieces and provide an excellent thermal barrier. They lift your feet off the icy concrete, cushion your knees, and wipe clean easily after messy projects.
- Heavy rubber stall mats: Thick rubber utility mats provide a durable, non-slip surface that blocks ground chill around workbenches and power tools. They handle heavy tool drops and oil spills without tearing.
- Modular plastic garage floor tiles: Snap-together rigid plastic tiles feature an open grid or hollow underside that creates an insulating pocket of dead air between the slab and the walking surface. This air gap stops cold from traveling upward into the room.
- Temporary plywood sheets or dense cardboard runners: If you are working on a short weekend project on a tight budget, simply laying down clean sheets of half-inch plywood or thick double-wall cardboard creates an immediate, low-cost thermal break under your work area.
Covering your primary standing zones makes a dramatic difference in how long you can comfortably work in the garage. Combining a floor barrier with warm footwear keeps your body temperature stable without forcing your room heater to run continuously.
Dry air prevents rust when warm air hits cold tools
One of the most frustrating surprises homeowners face when heating a garage in winter is finding surface rust on their tools, vehicle brakes, and table saws. Rust does not happen because the garage is cold; it happens because of rapid temperature swings and humidity. When you switch on a heater, the surrounding air warms up much faster than heavy cast iron and steel equipment.
Warm air naturally holds more water vapor than cold air. When that warm, humid air comes into contact with a freezing metal tool surface, the air immediately cools down to its dew point. The moisture suspended in the air condenses out and forms tiny droplets of liquid water across the bare metal. Within just a few hours, this condensation triggers surface oxidation, leaving behind orange rust stains on hand tools, drill presses, and engine blocks.
You can protect your equipment and control winter moisture with several practical habits:
- Avoid unvented fuel heaters completely: As mentioned earlier, burning portable fuel fills the enclosed garage air with gallons of water vapor. Sticking strictly to clean electric heat is the single most effective way to keep your garage air dry.
- Warm the room up gradually: Avoid turning a high-output blast heater on high immediately after walking into a freezing garage. Heating the room slowly gives heavy iron tools time to warm up alongside the surrounding air, which keeps condensation from forming on the steel surfaces.
- Coat bare metal surfaces with a protective barrier: Apply a thin coat of paste wax, mineral oil, or specialized corrosion-inhibiting spray to cast iron tool tables, hand saws, and wrench sets. This protective film prevents air and moisture from contacting the raw metal.
- Keep metal storage drawers closed: Store hand tools inside closed metal or plastic toolboxes until the garage air temperature stabilizes. The air inside a closed toolbox changes temperature much more slowly, shielding your tools from sudden condensation waves.
- Run a small dehumidifier or use moisture absorbers: If your garage stays damp from melting snow dripping off car tires, set up a small portable dehumidifier rated for cold temperatures. You can also place refillable moisture-absorbing tubs filled with calcium chloride beads near your primary tool storage racks.
Controlling moisture keeps your workspace comfortable and protects expensive tools from permanent corrosion. A dry garage always feels significantly warmer than a damp, clammy space at the exact same thermometer reading.
Select the right door insulation kit for your garage
When you are ready to stop heat loss through your garage door, choosing the right insulation materials will save you time and keep your overhead door operating smoothly. The ideal weatherization setup depends on whether your door is a standard single-car size or a wide double-car door, and whether you want rigid backing or flexible panels.
Insulation kits for garage doors generally come in two main styles: reflective foil bubble panels and foam-core panels. Reflective bubble panels feature double-sided aluminized film wrapped around a core of vacuum polyethylene air bubbles. These kits are exceptionally lightweight, easy to trim with household scissors, and excel at bouncing radiant heat back into the room. Because they add almost no weight to the door, you do not have to worry about throwing off the balance of your door springs or straining the electric garage door opener.
Foam-core panels are slightly thicker and offer a higher heat-blocking score against cold outdoor air. If you choose foam panels, make sure the kit includes high-density double-sided foam tape or adhesive squares that are specifically formulated to hold up in freezing winter temperatures. Standard household tape will turn brittle in the cold and drop the panels onto your car hood.
Before purchasing an insulation kit, measure the exact height and width of your door opening. Common residential single doors measure 8 feet wide by 7 or 8 feet high, while double garage doors typically span 16 or 18 feet wide by 7 or 8 feet high. Checking these measurements ensures your kit includes enough panels and tape to cover every recessed section without leaving bare gaps where cold can penetrate.

- BWP Score9.0
BWP Score is a ranking system developed by Bestwinterproducts.com. BWP score has no relationship or impact from any manufacturers or sales agent websites. Learn more
- BrandMYFAMIREA

- BWP Score9.0
BWP Score is a ranking system developed by Bestwinterproducts.com. BWP score has no relationship or impact from any manufacturers or sales agent websites. Learn more
- BrandTrade Winds

- BWP Score8.8
BWP Score is a ranking system developed by Bestwinterproducts.com. BWP score has no relationship or impact from any manufacturers or sales agent websites. Learn more
- BrandHomealexa
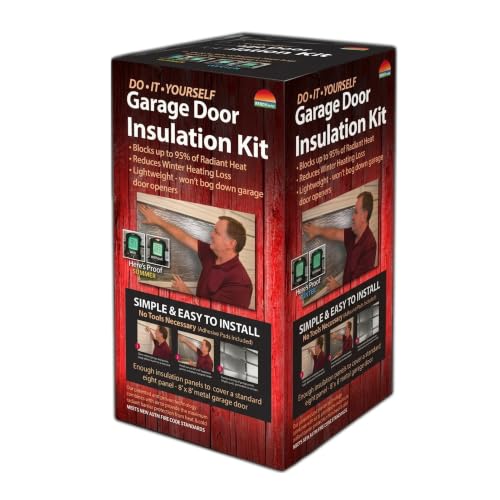
- BWP Score8.6
BWP Score is a ranking system developed by Bestwinterproducts.com. BWP score has no relationship or impact from any manufacturers or sales agent websites. Learn more
- BrandReach Barrier

- BWP Score8.6
BWP Score is a ranking system developed by Bestwinterproducts.com. BWP score has no relationship or impact from any manufacturers or sales agent websites. Learn more
- BrandUS Energy Products
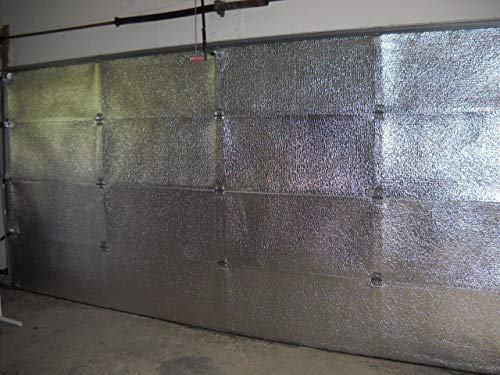
- BWP Score8.6
BWP Score is a ranking system developed by Bestwinterproducts.com. BWP score has no relationship or impact from any manufacturers or sales agent websites. Learn more
- BrandUS Energy Products
- BWP Score8.6
BWP Score is a ranking system developed by Bestwinterproducts.com. BWP score has no relationship or impact from any manufacturers or sales agent websites. Learn more
- BrandINSULATION MARKETPLACE

- BWP Score8.4
BWP Score is a ranking system developed by Bestwinterproducts.com. BWP score has no relationship or impact from any manufacturers or sales agent websites. Learn more
- BrandKEOHOLI

- BWP Score8.2
BWP Score is a ranking system developed by Bestwinterproducts.com. BWP score has no relationship or impact from any manufacturers or sales agent websites. Learn more
- BrandPICK FOR LIFE

- BWP Score8.2
BWP Score is a ranking system developed by Bestwinterproducts.com. BWP score has no relationship or impact from any manufacturers or sales agent websites. Learn more
- BrandHoqqf

- BWP Score-
BWP Score is a ranking system developed by Bestwinterproducts.com. BWP score has no relationship or impact from any manufacturers or sales agent websites. Learn more
- BrandTrade Winds
Last update on 2026-10-02 / Affiliate links / Images, Product Titles, and Product Highlights from Amazon Product Advertising API


Best Warm Winter Scarves 2026 For Cozy Comfort

Best Green Ski Goggles 2026 For Clear Vision On Slopes

12 Best Corner Electric Fireplace 2026: My Ultimate Guide To Pick One

Best Battery Powered Snow Blower 2026 For Effortless Snow Clearing

Best Ski Goggles Under 30 Inches For Crisp Vision And Comfort

Best Cooling Scarf 2026 For Instant Relief And Comfort

Fake Snow for Grass: Create a Realistic Winter Lawn Display

Dimplex Prism Wall Mount Fireplace: Sleek Heat With Modern Flame Style





