
How to Keep Your RV Warm in Winter

Stop drafts first, then add safe heat. Campers lose indoor warmth fast through thin window glass, unsealed slide-out gaps, and open ceiling vents. The best approach is to seal major heat leaks at roof openings and doors before cranking up the thermostat. Covering those drafty spots holds air inside so your heating system does not burn through fuel just fighting an endless chill.
The right heating setup depends on your campsite power and the weather outside. Travelers with campground electrical hookups can run portable electric heaters, while off-grid setups rely strictly on propane. Rig construction matters too, especially if single-pane windows or an exposed underbelly let ground frost freeze your living floor. A few straightforward fixes will keep living spaces warm, dry, and comfortable all winter.
The Short Version
- Plug ceiling openings first: Warm air naturally rises and slips out through thin plastic roof hatches. Insert a vent pillow (a thick foam cushion that plugs a ceiling vent opening) into every roof vent and skylight to seal in your rising warmth.
- Insulate cold glass and doorways: Single-pane camper windows bleed heat quickly into the winter air. Block drafts by cutting reflective bubble foil sheets to fit your windows, hanging magnetic thermal window covers, and adding a magnetic thermal door curtain over your front entrance.
- Block freezing wind under the floor: Cold air whipping beneath your camper turns the floorboards into ice and freezes plumbing lines. Install skirting (a barrier around the bottom of the trailer that blocks icy wind) using rigid foam boards or heavy vinyl to protect your holding tanks.
- Balance heat and fresh airflow: Run a safe electric space heater when hooked up to campsite power to save your propane tanks, but keep your furnace set to a baseline temperature to protect underbelly pipes. Crack a ceiling vent slightly to let humid air escape and stop winter mold.
Block Ceiling Vents and Skylights
Warm air rises directly to the highest point of your camper. In a travel trailer or motorhome, that high point is usually a thin plastic lid sitting inside a standard 14-inch by 14-inch roof vent opening. Most standard RV vent lids offer virtually zero insulation value. When outdoor temperatures drop below freezing, hot air from your living area escapes straight through the roof plastic, while icy air rolls down into your living space. Shower skylights present the same problem, acting like open thermal holes in your ceiling.
Stopping heat loss at the roof should be your very first task. Plastering layers of heat into the cabin does little good if that warmth flies right out the top of the rig. Use this checklist to seal your ceiling openings tightly against winter drafts:
- Check the exterior vent lids: Step outside or inspect from an interior ladder to confirm the crank lids sit completely flat. Clear away any fallen leaves, pine needles, or dirt from the rubber seal so the cover forms a tight mechanical closure.
- Press in insulated vent pillows: Push a 14-inch by 14-inch vent pillow directly into the square opening beneath each vent fan. These thick foam cushions fit snug against the vertical sidewalls of the vent casing. Select cushions that feature a reflective aluminum film on the top or bottom to bounce radiant heat back into the cabin.
- Cover clear shower skylights: Skylight domes let in helpful daylight, but they act like ice cubes overhead once the sun goes down. Attach an insulated skylight cover or a removable fabric shade with hook-and-loop fasteners over the dome opening to create a dead-air insulation layer.
- Close internal vent dampers: If your camper features power vent fans with manual airflow baffles, flip the flap shut before pushing your foam cushion into place. This stops wind gusts from rattling the internal fan blades.
- Inspect roof seals before freezing weather hits: Check the caulking around your vent flanges on the roof. If you notice cracking or peeling sealant, seal the gaps with RV-grade lap sealant before winter freezes make the material brittle.
Seal Windows, Doors, and Slide-Out Seams
Most recreation vehicles come equipped with lightweight, single-pane glass windows. Unlike modern home windows that use double panes separated by insulating gas, camper glass transfers freezing outdoor temperatures inside within seconds. When warm cabin air hits that freezing glass, it chills rapidly, creating a downward draft that makes the entire room feel drafty. Slide-outs make this issue worse because their extended walls sit outside the main insulated shell, joined only by flexible rubber wiper seals.
Stopping drafts around windows, exterior doors, and slide seams requires targeted physical barriers. Follow these steps to draft-proof your camper openings:
- Clean and inspect slide-out wiper seals: Extend your slide-outs completely. Wipe down the rubber wiper gaskets along the sides, top, and bottom to remove road grit. If you see daylight peeking through the corners where the slide mechanism meets the wall, slide a piece of foam pipe insulation or foam backer rod into the gap to block the breeze.
- Insulate window glass with reflective barrier sheets: Measure each window frame carefully. Cut rolls of double-sided reflective bubble insulation to match the exact dimensions of your window panes. Press the cut foil panels firmly into the window frames against the glass. The air bubbles inside the sheet slow thermal transfer, while the foil surface reflects interior heat back into your rooms.
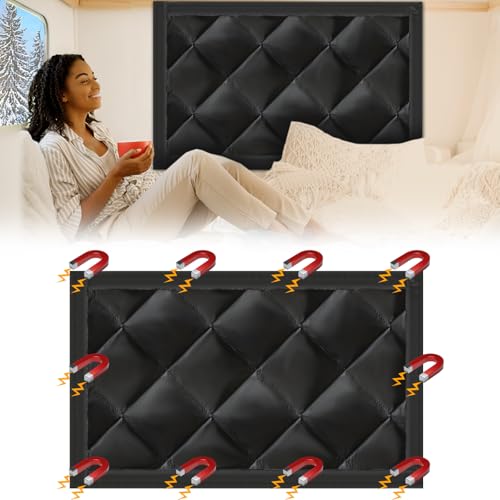
- Hang magnetic thermal window curtains: In your bedroom and sitting areas, mount magnetic window covers made from thick quilted cotton over the frames. Many camper window frames contain steel or accept stick-on magnetic strips. These quilted panels snap into place, sealing the edges against stubborn drafts and keeping your sleeping area warm.
- Add fresh foam weatherstripping to exterior doors: Camper doors flex during travel, which flattens the factory rubber seals. Press stick-on foam weatherstripping along the inner door jamb where the door closes. This extra foam compresses when you latch the door, stopping whistling wind around the lock and hinges.
- Install a magnetic thermal door curtain: Hang an insulated thermal door curtain across the main entryway. Camper doors are thin and hollow, losing heat quickly. A heavy insulated curtain hangs from top to bottom, creating an air pocket that keeps cold drafts from rushing into the living space every time someone steps near the door.
- Block the bottom door threshold: Set a weighted under-door draft stopper along the floor against your entry door. This blocks icy floor-level air from creeping under the door sweep and chilling your feet.
Skirt the Base and Guard the Underbelly
When freezing winter winds blow underneath a camper, they strip heat directly through the thin plywood floorboards. A constant freezing breeze under the trailer makes the floor feel like an ice rink. Frozen floors quickly chill your entire body. While knowing how to keep feet warm during winter with thick wool socks and insulated slippers makes indoor lounging comfortable, stopping the wind underneath the rig is the real solution to cold living spaces.
Freezing air beneath the floor also threatens your camper plumbing. Most travel trailers and fifth wheels carry their freshwater, gray water, and black water tanks below the subfloor. If freezing wind hits these tanks and external drain pipes, the standing water inside expands as it turns to ice. That expansion can crack your plastic plumbing valves, split PVC pipes, and leave you with severe water leaks once the weather warms up.
Skirting creates an insulated barrier around the base of your camper that extends from the bottom edge of the siding down to the dirt. You can build skirting out of rigid foam board insulation from the hardware store, heavy reinforced vinyl tarps, or specialized snap-on fabric skirting kits. The skirt blocks icy gusts from sweeping under the rig, creating a stable pocket of dead air. Because heat naturally escapes downward through the floorboards, that trapped pocket of air stays significantly warmer than the open air outside.
To set up skirting effectively, secure the bottom edge firmly against the ground. Wind gusts will catch loose skirting like a sail and rip it away. Place heavy gravel bags, cinder blocks, or dirt along the bottom flaps to keep the seal tight against the ground. If you are parked on soft dirt, drive wooden or metal stakes into the soil to hold rigid foam boards in position. Never use open-flame heaters, charcoal burners, or unvented propane heaters beneath a skirted camper. Doing so creates an extreme fire hazard and can fill your living area with deadly carbon monoxide fumes.
Along with skirting, protect your external water connection. Disconnect standard garden hoses before the first hard freeze hits, as trapped water will freeze and ruin your camper water intake valve. If you need a continuous water hookup at a campsite, use a heated drinking water hose equipped with built-in electric heat tape. Wrap foam pipe insulation around the campsite water hydrant and your camper connection elbow to prevent exposed brass fittings from freezing solid.
Choose and Run Safe Heat Sources
Heating an RV during the winter requires a smart approach to fuel management. Most campers come equipped with a built-in propane furnace that blows hot air through floor or cabinet vents. While these furnaces heat up a camper quickly, they consume propane at a rapid pace. During sustained sub-freezing weather, a furnace can easily empty a standard 20-pound or 30-pound propane cylinder every two to three days. Constantly hauling tanks to a refill station gets expensive and leaves you vulnerable if an empty tank catches you asleep at night.
Supplementing your built-in furnace with safe electric heat helps stretch your propane supply, but how you set it up depends on whether you have campground electrical hookups or are camping off the power grid:
- Using campsite shore power: When plugged into campground shore power (an electrical plug-in connection at a campground), your electrical usage is often included in the site fee. Running a portable electric ceramic space heater takes the heating load off your propane furnace. Keep in mind that a standard 1,500-watt electric space heater draws roughly 12.5 amps of electricity. If your camper has a 30-amp service connection, running two space heaters at the same time while someone brews coffee or runs a microwave will trip your main circuit breaker. Run space heaters on their low or medium settings to keep total electrical demand safe.
- Relying on off-grid battery power: If you are dry camping without electrical hookups, you cannot run electric space heaters on standard camper battery systems. Electric heating elements draw far too many amps and will drain house batteries in less than an hour. Off-grid campers must rely on their propane furnace or safe, indoor-rated portable radiant heaters. Keep spare full propane tanks on hand and monitor your 12-volt battery voltage closely, because the furnace blower fan requires steady battery power to push heat through the ducts.
- Protecting the underbelly with the furnace: Many modern four-season campers route heat ducts from the propane furnace directly into the enclosed underbelly to keep water lines and holding tanks from freezing. If you rely entirely on an electric space heater inside the cabin, the wall thermostat will never call for heat. The main furnace will remain off, leaving your underbelly plumbing completely cold. To prevent this, set your furnace thermostat to a baseline temperature of 55°F or 60°F so it fires up regularly, then use an electric space heater nearby for personal comfort.
Safety is critical whenever you run heating gear inside a small space. Always maintain a minimum 3-foot clearance between any portable space heater and flammable items like bed sheets, curtains, area rugs, and furniture. Plug portable electric heaters directly into a heavy-duty wall receptacle. Never plug a space heater into an extension cord or a power strip, which can overheat, melt, and ignite. Ensure your heater includes an automatic tip-over shutoff switch that cuts power instantly if a pet or person bumps it. Just as with learning how to keep warm in winter in the house, safe habits protect your space from fire while keeping your family comfortable.
Vent Moisture to Prevent Mold
It might seem strange to crack a window or open a roof vent when you are shivering in the cold, but controlling moisture is essential for winter RV living. A camper is a tiny, sealed box. Every time you breathe, cook food, boil water for coffee, or take a hot shower, you release moisture into the indoor air. Burning propane inside unvented portable heaters also releases substantial moisture directly into the room. In fact, burning one gallon of propane produces roughly one gallon of water vapor.
When this warm, humid indoor air meets cold exterior walls, metal window frames, or aluminum studs, it hits its dew point. The moisture immediately turns into condensation (water drops that form on cold walls and glass from breathing and cooking). If left alone, these water droplets trickle behind cushions, soak into wooden wall paneling, and collect underneath mattresses. Within a week or two, hidden moisture turns into toxic black mold, rots wall paneling, and causes musty odors that ruin your RV interior.
Manage indoor moisture and stop winter condensation using this practical checklist:
- Keep one roof vent cracked open: Leave a roof vent hatch open roughly a half inch at all times, especially in the bathroom and kitchen. Installing an exterior vent cover over the roof opening allows damp, warm air to float out continuously without letting rain or snow fall inside.
- Run the exhaust fan while cooking: Boiling pasta or frying food on your propane stove releases large amounts of steam. Always turn on your range hood exhaust fan, and open a kitchen window slightly to create an airflow path that pulls humid cooking steam outside immediately.
- Wipe down windows every morning: Keep a clean microfiber cloth or squeegee near your bed. Each morning, wipe away water drops that collect on your single-pane windows and aluminum trim before that moisture trickles down into your camper walls.
- Run a compact electric dehumidifier: If you are connected to shore power, place a small electric dehumidifier on your kitchen counter or dining table. An electric unit extracts moisture from the air constantly, dropping indoor humidity below 50 percent and making the room feel warmer.
- Improve airflow behind furniture: Leave your overhead cabinet doors and under-bed storage bays cracked open slightly during deep freezes. Pull your mattress an inch away from outside walls, and place an open-weave condensation mat beneath the mattress. This allows warm air to circulate freely beneath your bedding, preventing trapped moisture from molding your mattress.
What to Look for in Cold-Weather RV Gear
Selecting the right insulating accessories makes a dramatic difference in how warm your camper stays and how much fuel you burn. Before purchasing cold-weather supplies for your rig, take a few moments to inspect your layout and take accurate measurements. Getting items that fit your specific openings prevents air leaks and saves you the hassle of returning ill-fitting gear in the middle of winter.
When shopping for ceiling vent insulators, measure the inside width and depth of your vent openings. Most travel trailers and motorhomes feature standard 14-inch by 14-inch vents, but some custom skylights or European-style hatches have irregular shapes. Look for vent cushions made from dense sponge foam that expands firmly against vertical sidewalls. A cushion with a reflective aluminum film on one face is ideal because it bounces radiant room heat downward while preventing condensation from soaking into the foam core.
For window and door insulation, choose materials that are easy to cut and mount securely. Reflective bubble foil rolls should have smooth, durable foil surfaces that resist tearing when handled. Check that any magnetic window covers or insulated door curtains use strong embedded magnets or heavy-duty hook-and-loop fasteners. The adhesive backing on mounting strips must be rated for low temperatures, as ordinary glue becomes brittle and peels off camper walls when the thermometer dips below freezing. Finally, ensure any interior door curtain fits your door frame completely without snagging on the entry latch or blocking emergency exits.

- BWP Score9.8
BWP Score is a ranking system developed by Bestwinterproducts.com. BWP score has no relationship or impact from any manufacturers or sales agent websites. Learn more
- Brandlifeegrn

- BWP Score9.6
BWP Score is a ranking system developed by Bestwinterproducts.com. BWP score has no relationship or impact from any manufacturers or sales agent websites. Learn more
- BrandCamco

- BWP Score9.2
BWP Score is a ranking system developed by Bestwinterproducts.com. BWP score has no relationship or impact from any manufacturers or sales agent websites. Learn more
- BrandSIKADEER

- BWP Score9.2
BWP Score is a ranking system developed by Bestwinterproducts.com. BWP score has no relationship or impact from any manufacturers or sales agent websites. Learn more
- BrandLSGCQ

- BWP Score9.2
BWP Score is a ranking system developed by Bestwinterproducts.com. BWP score has no relationship or impact from any manufacturers or sales agent websites. Learn more
- BrandHOMNUTS
- BWP Score9.2
BWP Score is a ranking system developed by Bestwinterproducts.com. BWP score has no relationship or impact from any manufacturers or sales agent websites. Learn more
- BrandBeeveer

- BWP Score9.0
BWP Score is a ranking system developed by Bestwinterproducts.com. BWP score has no relationship or impact from any manufacturers or sales agent websites. Learn more
- BrandYoleShy

- BWP Score9.0
BWP Score is a ranking system developed by Bestwinterproducts.com. BWP score has no relationship or impact from any manufacturers or sales agent websites. Learn more
- BrandESUDNT

- BWP Score8.8
BWP Score is a ranking system developed by Bestwinterproducts.com. BWP score has no relationship or impact from any manufacturers or sales agent websites. Learn more
- BrandAGHITG

- BWP Score8.2
BWP Score is a ranking system developed by Bestwinterproducts.com. BWP score has no relationship or impact from any manufacturers or sales agent websites. Learn more
- Brandbestmoument
Last update on 2026-10-02 / Affiliate links / Images, Product Titles, and Product Highlights from Amazon Product Advertising API
FAQs
Why is my RV floor so much colder than the rest of the camper?
Your camper floor feels freezing because icy winter winds blow freely under the open chassis, stripping heat away from the thin subfloor. At the same time, warm air inside your cabin rises toward the ceiling, leaving cold, heavy air resting at floor level. Installing exterior skirting around the bottom of your trailer stops the wind, while laying thick wool area rugs inside keeps your feet insulated from the bare floorboards.
Can I leave an electric space heater running all night in my RV?
You can run an electric space heater overnight only if the unit includes modern safety features like tip-over shutoff switches and automatic overheat cutoffs. The heater must sit on a flat, hard surface at least 3 feet away from bedding, curtains, and furniture, plugged directly into a wall outlet rather than an extension cord. You should also ensure your built-in furnace cycles occasionally so your underbelly water tanks receive heat and do not freeze.
At what temperature do RV water pipes begin to freeze?
Camper plumbing lines can begin freezing when outdoor temperatures sit below 32°F for more than a few consecutive hours. Because RV water lines run along thin exterior walls and unheated storage compartments, they freeze much faster than home plumbing. If your camper lacks an enclosed, heated underbelly, disconnect your outside freshwater hose and open cabinet doors to let warm room air reach the plumbing under your sinks.
Do I really need to open a roof vent when it is freezing outside?
Yes, keeping a ceiling vent cracked open roughly a half inch is necessary to prevent severe condensation and mold growth inside your camper. Everyday activities like breathing, cooking, and showering release water vapor into the air that turns into water droplets when it hits cold camper walls. Opening a roof vent allows that humid air to escape outside, keeping your interior surfaces dry and your camper warmer overall.


Best Warm Winter Scarves 2026 For Cozy Comfort

Best Green Ski Goggles 2026 For Clear Vision On Slopes

12 Best Corner Electric Fireplace 2026: My Ultimate Guide To Pick One

Best Battery Powered Snow Blower 2026 For Effortless Snow Clearing

Best Ski Goggles Under 30 Inches For Crisp Vision And Comfort

Best Cooling Scarf 2026 For Instant Relief And Comfort

Fake Snow for Grass: Create a Realistic Winter Lawn Display

Dimplex Prism Wall Mount Fireplace: Sleek Heat With Modern Flame Style





